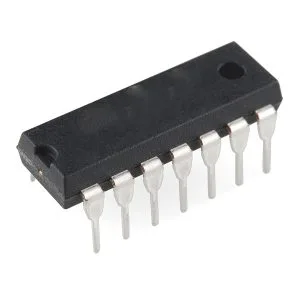
The 7404 IC is a 14-pin TTL NOT Gate with 6 inverters, used for signal inversion in digital circuits and logic systems.
7404 IC NOT Gate
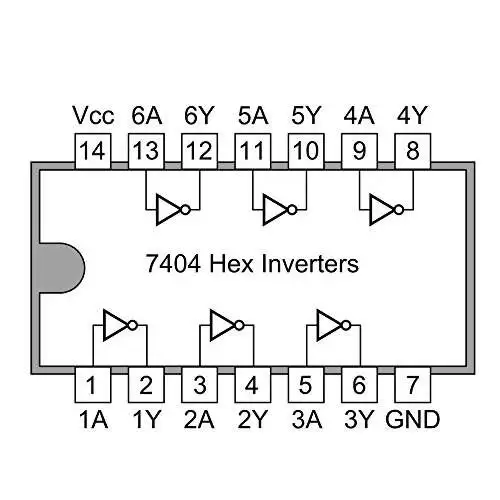
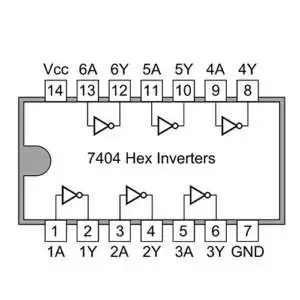
NOT gate is commonly used to INVERT a logical HIGH to logical LOW or logical LOW to logical HIGH. Each NOT gate has one input and one output. Commonly used NOT gate IC is 7404. Pinout diagram of 7404 is given below. Each 7404 has 6 NOT gates arranged as shown in the following figure. 14th pin is the Vcc and 7th pin is the Ground.
Recommended operating conditions of 7404
Recommended operating conditions of 7404 is given in the following table. Supply voltage should be less than 5.25V and greater than 4.75V. A voltage greater than 2V will be considered as HIGH level and voltage less than 0.8V will be considered as LOW level.
Truth table of NOT gate
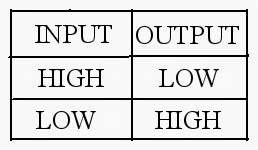
Truth table of NOT gate is given below. NOT gate will give a HIGH output, if the input is LOW. Similarly output will be HIGH, if the input is LOW.
Control 7404 using Switch
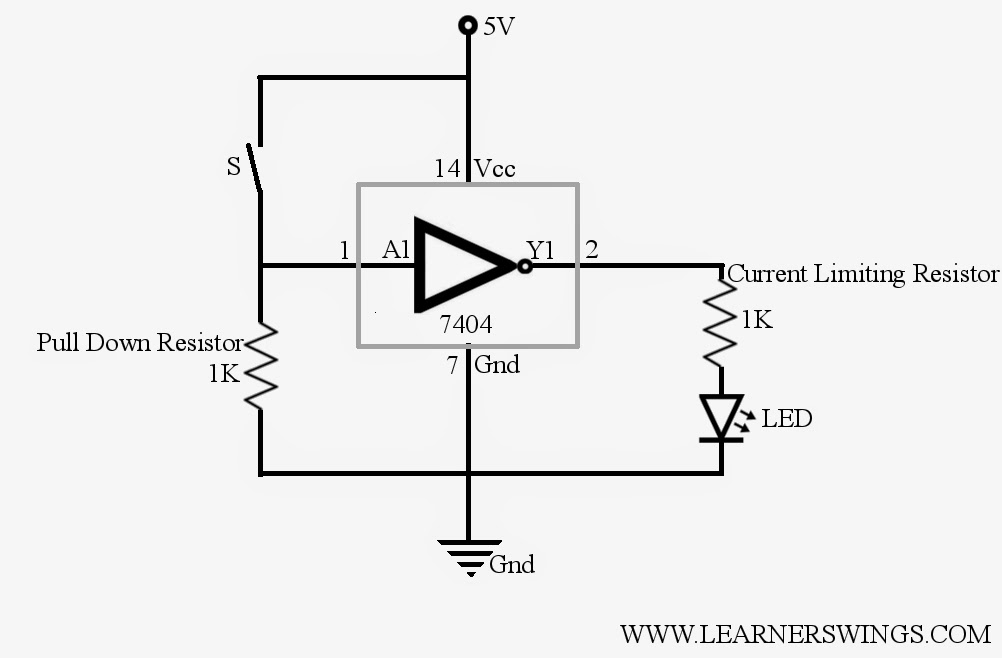
Circuit to control 7404 using switch is given below. 5V is supplied from an Arduino board or from 7805 Voltage regulator. Each 7404 has six NOT gates. Any NOT gate can be used in the circuit. First NOT gate is used in this circuit ( A1,Y1 ).
Explanation of the circuit
When switch is off, input pin of NOT gate will get connected to ground through the pull down resistor. Gate will consider it as logical LOW, So output will be HIGH and LED will turn ON. If the input pin is left unconnected ( not connected to pull down resistor and switch ), IC will assume itself that, voltage at the gate input is logical HIGH. So, turning off the switch without connecting pull down resistor will not give logical LOW at the input. That is, switch will have no effect in changing the voltage level at the gate input if pull down resistor is not connected. Similarly, when the switch turns on, voltage across the input pin will be 5V. Gate will consider it as logical HIGH. so the output will be logical LOW. This will turn off the LED. A current limiting resistor is provided in series with LED to protect LED from overcurrent. Truth table of this circuit is given below.
Alternate Method
NOT gate can be controlled by another circuit also. Circuit is done as shown in the following diagram. Here pull down resistor is replaced by a switch. Switch is used to control the connection of gate input to ground. When the switch turns on, gate input get connected to ground. Output is connected to an LED through a current limiting resistor for LED protection. Switch in the previous circuit is replaced by a pull up resistor. Pull up resistor pulls the input pins to HIGH, when switch is closed. If pull up resistor is not used, when switch turns on, power supply get shorted through the switch. This will result in large current and will damage the power supply.
Explanation of the Circuit
When the switch turns off, gate input pin get HIGH voltage from the voltage source through the pull up resistor. So output will be LOW and LED will turn off. But when the switch turns on, gate input get connected to ground and hence the gate input pin will be at logical LOW. So the output will be HIGH. This will turn on LED. Truth table of this circuit is given in the following table.


