


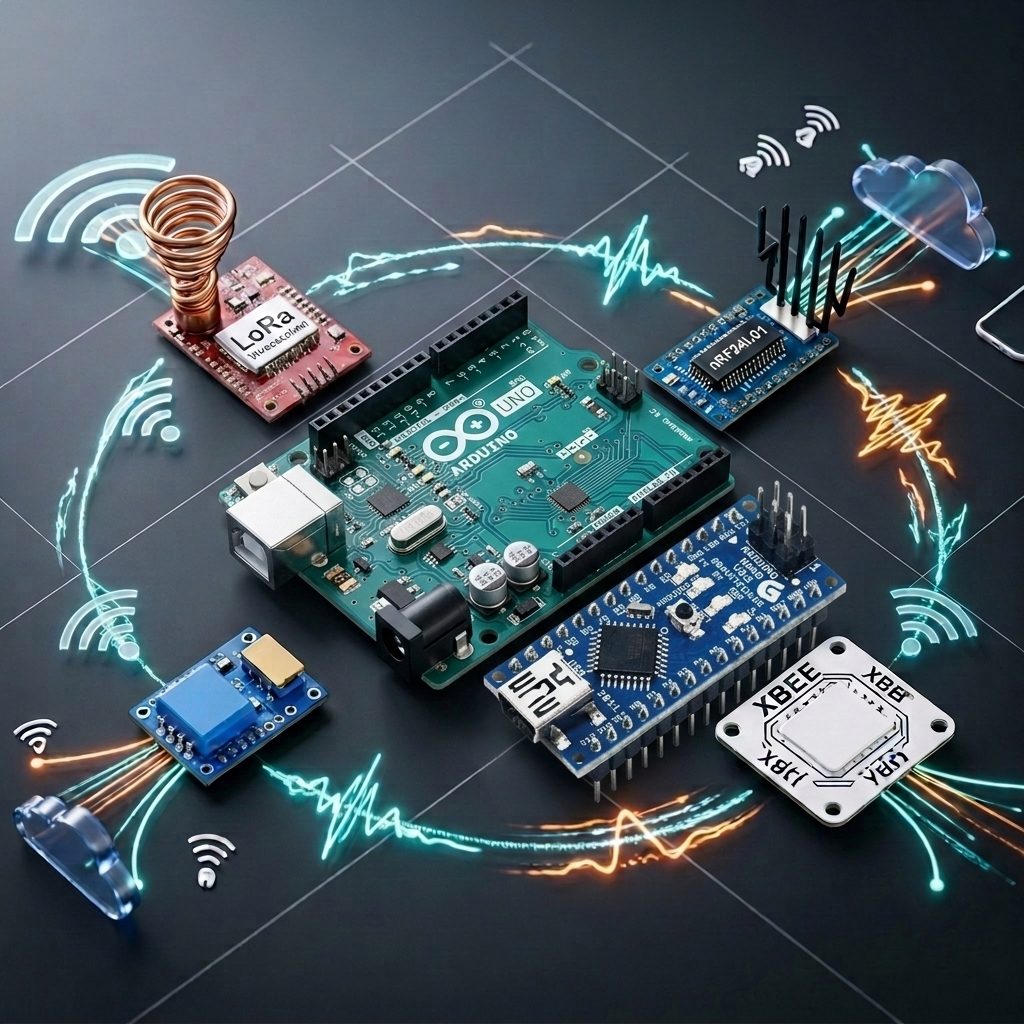
Arduino Wireless Communication
Contents List
Introduction
Arduino Wireless Communication allows an Arduino-based project to exchange data with another device without a physical communication cable. Wireless connectivity can be used to connect sensors, smartphones, computers, other microcontrollers, Internet services, and remote devices. Depending on the project requirements, Arduino platforms can use technologies such as Wi-Fi, Bluetooth Low Energy, LoRa, and cellular networks. Arduino’s official documentation provides dedicated learning resources for Bluetooth Low Energy and LoRa/LPWAN, while its hardware portfolio includes boards with integrated wireless connectivity.
For beginners, the important point is that there is no single wireless technology that is best for every Arduino project. A short-range smartphone controller may need Bluetooth, an Internet-connected sensor may use Wi-Fi, and a battery-powered sensor located far from a network may be better suited to LoRa or a cellular IoT technology. Understanding the differences between these technologies makes it easier to select the appropriate solution.
What Is Arduino Wireless Communication?
Arduino Wireless Communication is the transmission and reception of information between an Arduino project and another device using a wireless connection. Instead of transferring data through a physical cable, the system uses radio-frequency wireless technology to exchange information through the air.
A basic wireless communication system contains a transmitter, receiver, antenna, communication protocol, and the devices responsible for processing the transmitted information. In many modern Arduino boards, the wireless hardware is already integrated into the board. Other Arduino boards can be connected to an external wireless module.
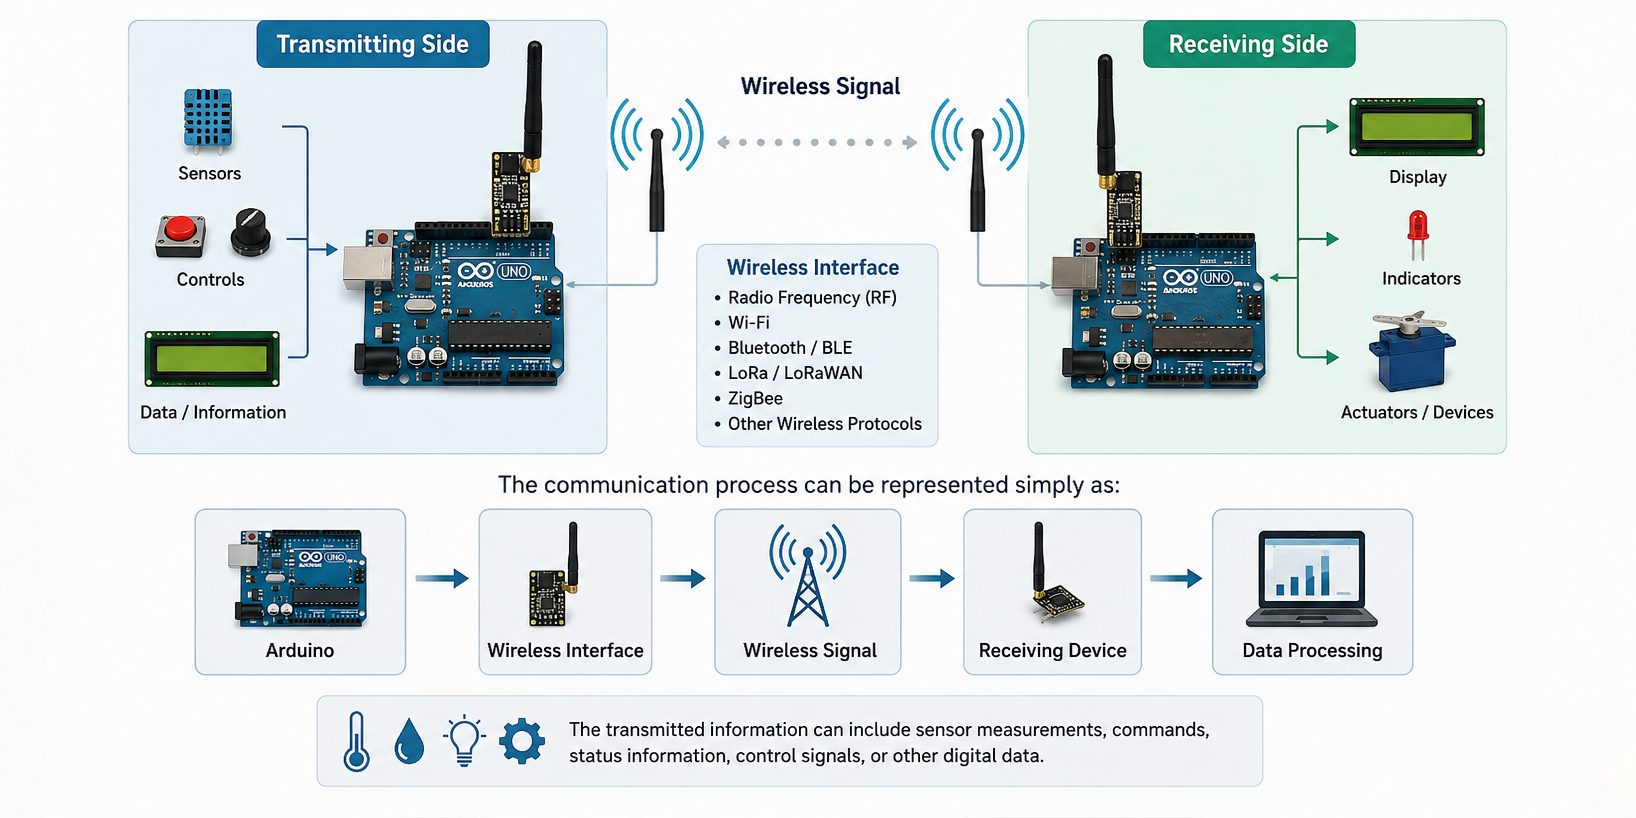
The communication process can be represented simply as:
Arduino → Wireless Interface → Wireless Signal → Receiving Device → Data Processing.
The transmitted information can include sensor measurements, commands, status information, control signals, or other digital data.
Why Use Wireless Communication with Arduino?
Wireless communication makes Arduino projects more flexible because devices do not need to remain physically connected.
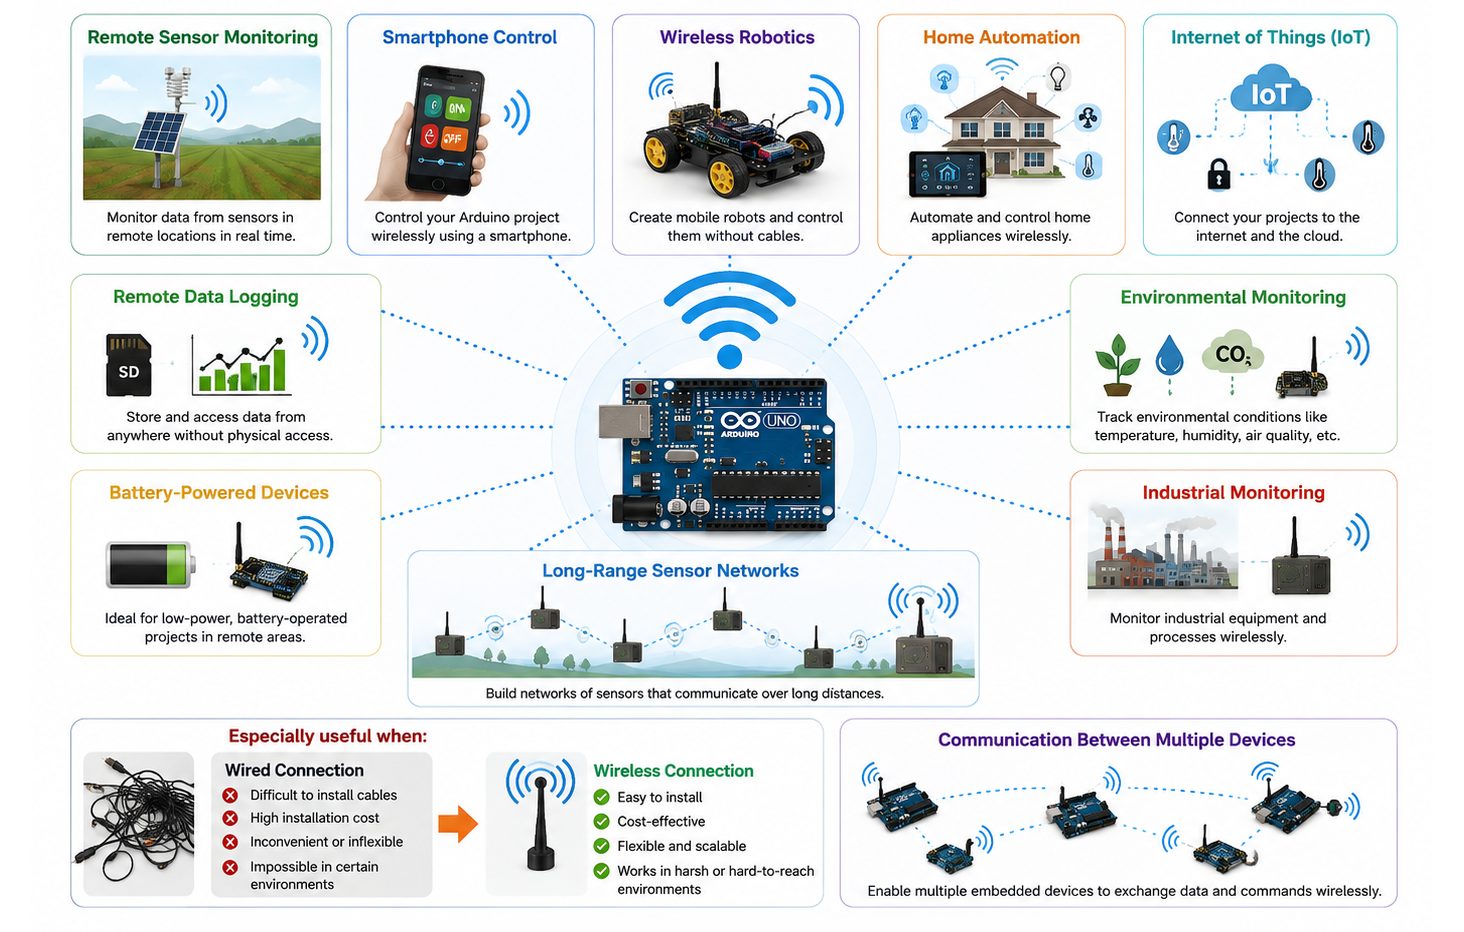
Common reasons for using wireless communication include:
- Remote sensor monitoring.
- Smartphone control.
- Wireless robotics.
- Home automation.
- Internet of Things applications.
- Remote data logging.
- Environmental monitoring.
- Industrial monitoring.
- Long-range sensor networks.
- Battery-powered devices.
- Communication between multiple embedded devices.
Wireless communication is especially useful when installing a physical cable would be difficult, expensive, inconvenient, or impossible.
How Does Arduino Wireless Communication Work?
A typical wireless Arduino system begins by collecting information from a sensor or receiving a command from another device. The Arduino processes this information and passes the data to the wireless communication interface.
The wireless interface then converts the digital information into a radio signal and transmits it through an antenna. The receiving device detects the signal, processes the wireless protocol, and makes the received information available to its application.
For example, a wireless temperature-monitoring system can work as follows:
Temperature Sensor → Arduino → Wireless Module → Wireless Network → Receiving Device → Temperature Display.
The receiving device could be another Arduino, smartphone, computer, cloud service, or IoT platform.
The exact process depends on the wireless technology being used.
Types of Arduino Wireless Communication
Arduino projects can use several wireless technologies. The appropriate choice depends mainly on communication range, data requirements, power consumption, network availability, and the type of device that must be connected.
Wi-Fi
Wi-Fi is one of the most useful choices when an Arduino project needs to communicate with a local wireless network or access Internet-based services.
A Wi-Fi-enabled Arduino can connect to a wireless router or access point and exchange data with computers, smartphones, servers, cloud platforms, or other network devices.
Wi-Fi is particularly suitable for:
- IoT devices.
- Web-based control.
- Cloud-connected sensors.
- Home automation.
- Remote monitoring.
- Network-based data logging.
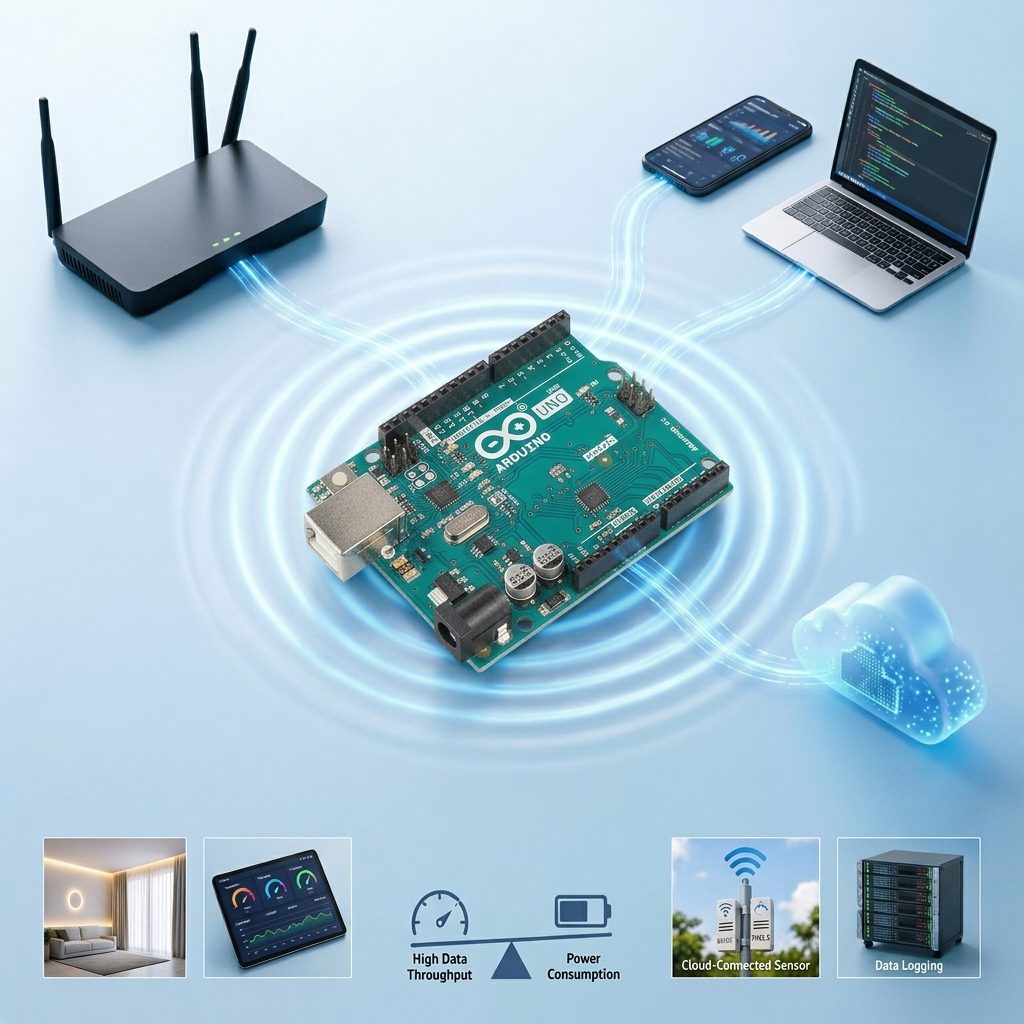
The Arduino UNO R4 WiFi is a current example of an Arduino board with integrated wireless connectivity. It uses a Renesas RA4M1 microcontroller together with an ESP32-S3 for Wi-Fi and Bluetooth connectivity, and it is compatible with Arduino Cloud.
Wi-Fi generally provides much higher data throughput than technologies designed for low-power, long-range sensor communication. However, its power requirements can make it less suitable for some battery-powered applications.
Bluetooth and Bluetooth Low Energy
Bluetooth is designed primarily for short-range wireless communication between nearby devices. It is particularly useful when an Arduino project needs to communicate with a smartphone, tablet, computer, or another Bluetooth-enabled device.
Bluetooth Low Energy, commonly abbreviated as BLE, is designed for applications where low power consumption is important.
Arduino provides dedicated BLE learning resources, and boards such as the Nano 33 BLE Rev2 include Bluetooth Low Energy hardware and can use the ArduinoBLE library.

Typical applications include:
- Smartphone-controlled projects.
- Wearable devices.
- Wireless sensors.
- Human-machine interfaces.
- Remote controls.
- Short-range data exchange.
Bluetooth is generally more appropriate for local device-to-device communication than for directly providing Internet connectivity.
LoRa
LoRa is designed for long-range wireless communication with low power consumption. It is particularly useful for applications where small amounts of data must be transmitted over a large distance.
Arduino’s MKR WAN 1310 provides LoRa connectivity and can communicate with LoRa-based networks, gateways, public networks such as The Things Network, or another compatible board using direct connectivity.
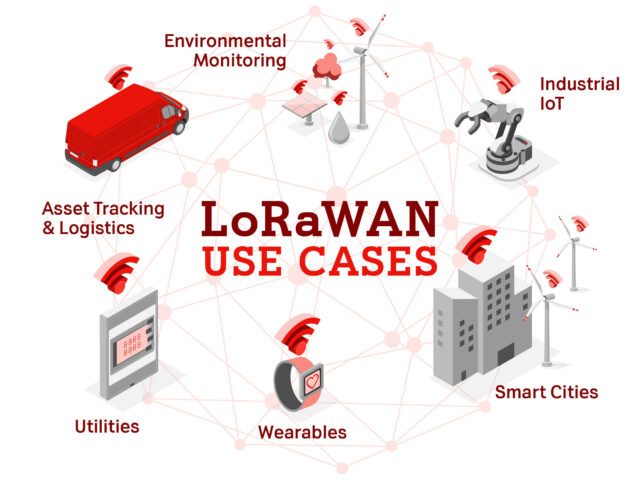
LoRa is suitable for applications such as:
- Agricultural monitoring.
- Environmental sensors.
- Remote monitoring.
- Smart-city sensors.
- Long-range telemetry.
- Low-power IoT devices.
Arduino’s own LoRa farming example demonstrates the use of LoRa for collecting sensor information over a large area where Wi-Fi coverage may not be available.
One important distinction is that LoRa and LoRaWAN are not exactly the same thing. LoRa refers to the underlying long-range radio technology, while LoRaWAN defines a network protocol and architecture used to connect LoRa devices to networks and gateways.
Cellular Communication
Cellular communication allows an Arduino project to communicate through mobile networks instead of relying on a local Wi-Fi network.
This approach is useful when a device must operate in a remote location where Wi-Fi is unavailable but cellular network coverage exists.
Arduino’s MKR NB 1500, for example, supports NB-IoT and LTE-M networks and is intended for low-power IoT applications in remote areas. It can also communicate through cellular networks and send or receive SMS.
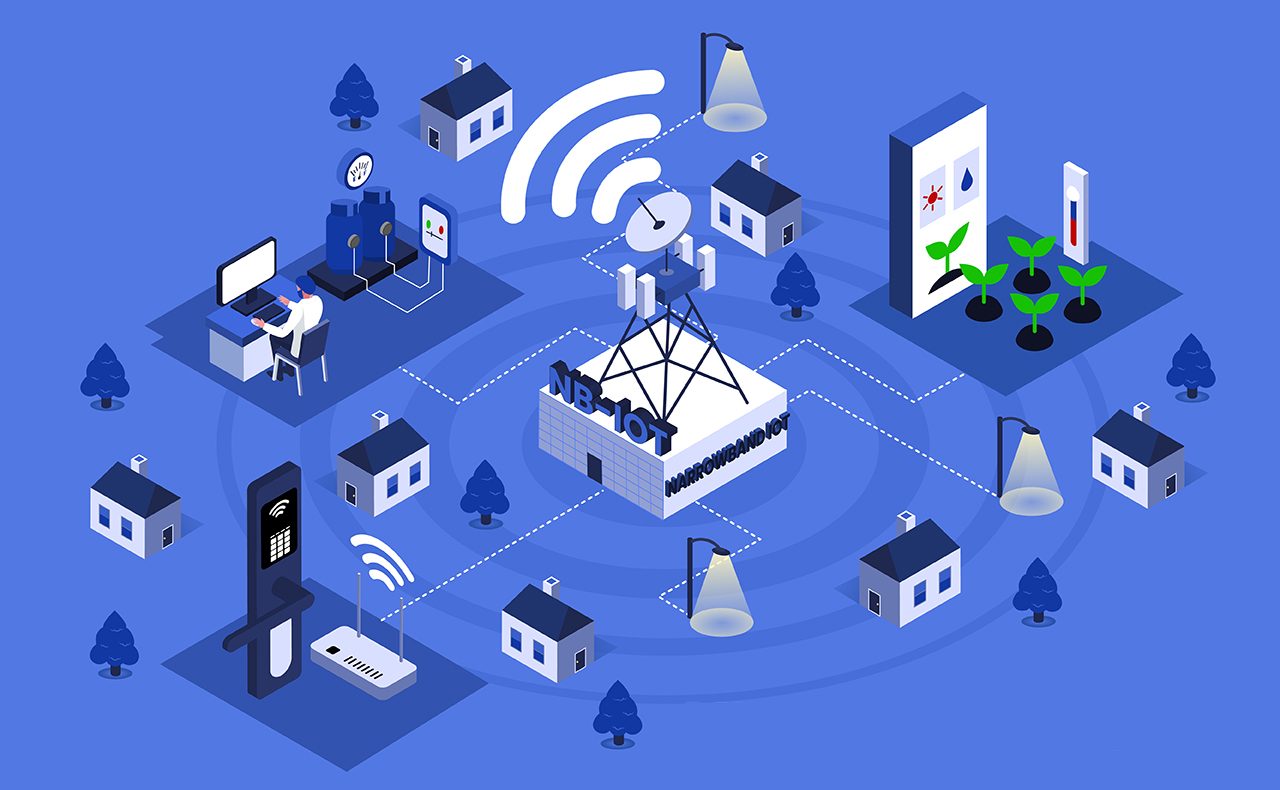
Typical applications include:
- Remote monitoring.
- Asset tracking.
- Agriculture.
- Utility monitoring.
- Industrial IoT.
- Remote environmental sensors.
Cellular solutions generally require appropriate network coverage and service arrangements, so they should be selected according to the project’s location and deployment requirements.
Zigbee and Other Wireless Technologies
Zigbee and other wireless technologies provide additional communication options for Arduino projects. They are useful when applications require low power consumption, mesh networking, or simple short-range wireless communication.
Zigbee is a low-power wireless technology that supports mesh networks, allowing multiple devices to communicate and extend network coverage by relaying data between devices.
Common Zigbee applications include:
- Smart home systems.
- Home automation.
- Wireless sensor networks.
- Smart lighting.
- Industrial monitoring.
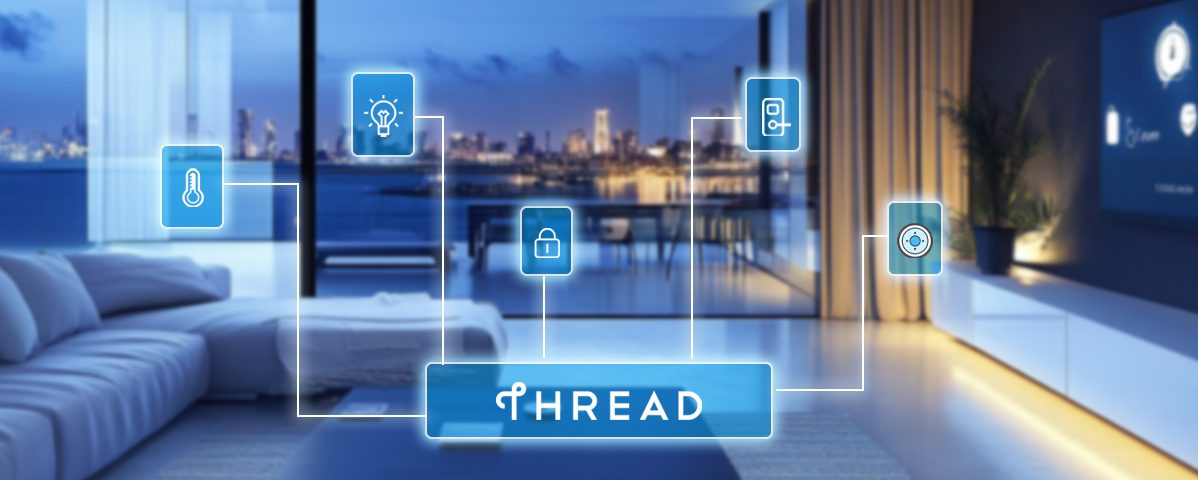
Other technologies include Thread, which supports low-power mesh networking, RF modules for simple wireless communication, and Infrared (IR) for short-range, line-of-sight control applications.
The best technology depends on the required range, power consumption, number of devices, and application requirements.
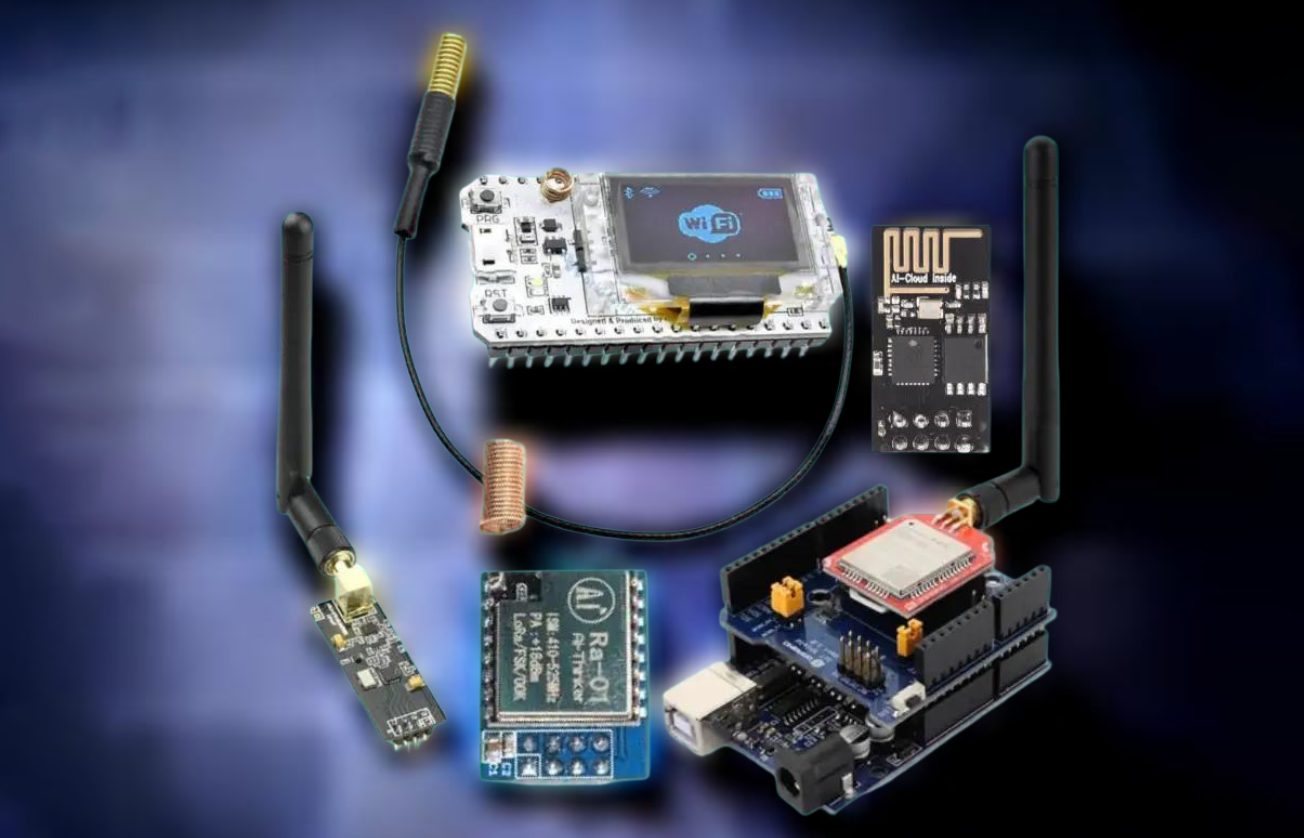
Arduino Wireless Communication Modules and Boards
There are two common ways to add wireless communication to an Arduino project.
The first is to use an Arduino board that already includes wireless connectivity. This simplifies the hardware design because the radio hardware and supporting components are integrated into the board.
The second approach is to connect an external wireless module to an Arduino board. This provides greater flexibility because the wireless technology can be selected independently of the main microcontroller board.
Examples of Arduino wireless hardware include:
| Wireless Technology | Example Arduino Hardware | Typical Application |
|---|---|---|
| Wi-Fi | UNO R4 WiFi | IoT and Internet connectivity |
| Bluetooth LE | Nano 33 BLE Rev2 | Smartphone and short-range communication |
| LoRa | MKR WAN 1310 | Long-range, low-power communication |
| Cellular | MKR NB 1500 | Remote IoT connectivity |
These examples are based on Arduino’s current hardware documentation.
Wireless Communication vs Wired Communication
| Parameter | Wireless Communication | Wired Communication |
|---|---|---|
| Connection Method | Transfers data without physical cables using radio signals. | Transfers data through physical cables or wires. |
| Mobility | Provides high mobility and flexibility. | Limited by the length and location of cables. |
| Installation | Usually easier where running cables is difficult. | Requires physical cable installation. |
| Communication Range | Can range from short distances to very long distances depending on the technology. | Limited by cable type and communication standard. |
| Data Rate | Varies depending on the wireless technology. | Often provides stable and high data rates. |
| Power Consumption | Can be higher because of wireless transmission, although low-power technologies are available. | Usually does not require radio transmission power. |
| Interference | Can be affected by radio interference and physical obstacles. | Generally less affected by radio interference. |
| Reliability | May be affected by signal strength and environmental conditions. | Generally provides a stable and reliable connection. |
| Security | Requires appropriate encryption and authentication to protect wireless data. | Physical access to the cable is usually required to intercept communication. |
| Typical Examples | Wi-Fi, Bluetooth, LoRa, Zigbee, Cellular. | UART, I2C, SPI, USB, Ethernet. |
| Best For | Mobile, remote, and difficult-to-wire applications. | Fixed installations requiring stable and direct communication. |
The choice should therefore be based on the application rather than simply on whether wireless communication is available.
Important Wireless Communication Parameters
Before selecting a wireless communication technology for an Arduino project, it is important to understand several key parameters. These factors affect communication performance, reliability, power consumption, and the overall suitability of a wireless system for a particular application.
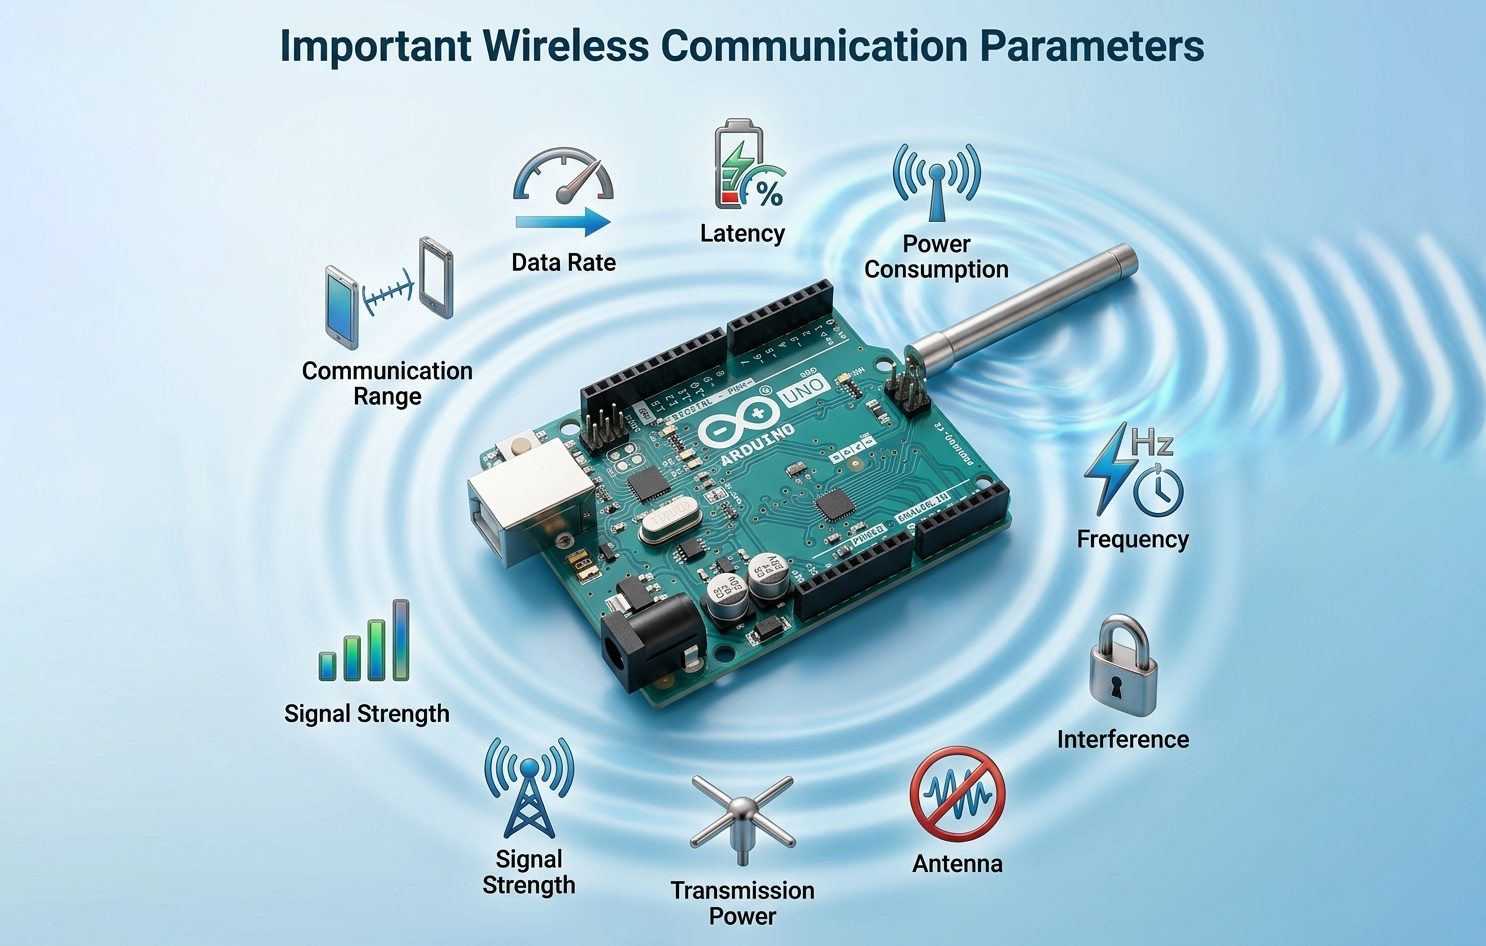
Communication Range
Communication range is the maximum distance over which two devices can reliably exchange data. The actual range depends on factors such as transmission power, antenna quality, frequency, obstacles, and environmental conditions.
Data Rate
Data rate describes how much data can be transmitted within a specific period of time. Applications that transmit sensor readings may require only a low data rate, while applications involving large amounts of information require faster communication.
Power Consumption
Power consumption is especially important for battery-powered Arduino projects. Some wireless technologies consume significant power during transmission, while others are designed for low-power operation and can support long battery life.
Frequency
Wireless devices communicate using specific radio-frequency bands. The operating frequency can affect communication range, signal penetration, antenna design, and susceptibility to interference.
Latency
Latency is the time required for data to travel from the transmitting device to the receiving device. Low latency is important for applications such as robotics, remote control, and real-time monitoring.
Signal Strength
Signal strength affects the reliability of wireless communication. Weak signals can cause communication errors, reduced range, slower performance, or lost data.
Transmission Power
Transmission power determines the strength of the signal sent by a wireless device. Higher transmission power can potentially improve communication range but usually increases power consumption.
Antenna
The antenna is an essential part of many wireless systems. Its design, position, and quality can significantly affect communication range and signal reliability.
Interference
Wireless signals can be affected by other electronic devices, radio signals, walls, metal objects, and environmental conditions. Reducing interference helps improve communication reliability.
Security
Wireless communication should use appropriate security methods to protect transmitted data. Depending on the technology, security may include authentication, encryption, passwords, and secure communication protocols.
Wireless Communication Protocols
A wireless technology and a communication protocol are related but are not necessarily the same thing.
The wireless technology determines how information is transmitted over the radio link, while a protocol defines how devices organize, address, transmit, receive, and interpret information.
Arduino’s official learning resources distinguish several communication technologies and protocols, including BLE, LoRa/LPWAN, UART, SPI, I2C, CAN, and Modbus.
For example, an Arduino project may use:
Wi-Fi → Network communication → Application protocol → Cloud service.
The wireless connection is therefore only one part of the complete communication system.
Wireless Communication and Arduino Libraries
Arduino libraries simplify the process of communicating with wireless hardware.
A library can provide functions for:
- Initializing the wireless interface.
- Connecting to a network.
- Discovering devices.
- Sending data.
- Receiving data.
- Managing connections.
- Processing communication events.
Arduino’s Language Reference includes communication functions and dedicated Wi-Fi classes such as WiFi, WiFiClient, WiFiServer, and WiFiUDP.
The correct library depends on the Arduino board, wireless module, and communication technology being used.
How to Send and Receive Wireless Data with Arduino
The general process can be divided into two sides.
Transmitter:
Read data → Process data → Prepare message → Transmit message.
Receiver:
Receive message → Validate data → Process message → Perform an action.
For example, an Arduino temperature sensor can read the temperature, convert the measurement into a suitable data format, and transmit it wirelessly.
The receiving Arduino can then decode the message and display the temperature or use it to control another device.
This basic architecture is common to many wireless applications even though the actual communication protocol may differ.
Example of an Arduino Wireless Application
Consider a wireless environmental monitoring system.
The system can contain:
- Arduino board.
- Temperature and humidity sensor.
- Wireless communication interface.
- Battery or power supply.
- Receiving device or network.
- Software for displaying or storing the data.
The Arduino periodically reads the sensor. It processes the measurements and transmits the information wirelessly.
The receiving side can then display the data, store it, or forward it to an IoT platform.
For a short-range project, Bluetooth may be appropriate. For a Wi-Fi-covered location, Wi-Fi may provide convenient Internet connectivity. For a remote low-power sensor, LoRa or cellular IoT may be more suitable.
Wi-Fi vs Bluetooth vs LoRa vs Cellular
The following comparison provides a general guide rather than fixed performance values, because actual performance depends on the specific hardware, environment, configuration, and network.
| Parameter | Wi-Fi | Bluetooth/BLE | LoRa | Cellular IoT |
|---|---|---|---|---|
| Typical Range | Short to medium | Short | Long | Wide-area |
| Data Rate | High | Low to medium | Low | Varies |
| Power Demand | Generally higher | Low, especially BLE | Low | Depends on technology and network |
| Internet Access | Through network | Usually indirect | Through gateway/network | Through cellular network |
| Smartphone Connection | Excellent | Excellent | Not normally direct | Not normally direct |
| Remote Sensors | Good with network coverage | Limited | Excellent | Excellent |
| Main Strength | Network and Internet access | Local device connectivity | Long range and low power | Wide-area connectivity |
This table should be used as a selection guide, not as a substitute for the technical specifications of a particular module.
How to Choose the Right Wireless Technology
- The best wireless technology depends on the requirements of the project.
- Choose Wi-Fi when the project needs network or Internet connectivity and suitable Wi-Fi coverage is available.
- Choose Bluetooth/BLE when the project needs short-range communication with a smartphone, computer, or nearby device, particularly when low power is important.
- Choose LoRa when the project must transmit relatively small amounts of data over long distances while keeping power consumption low.
- Choose cellular IoT when the device needs wide-area connectivity without depending on a local Wi-Fi network.
For more specialized applications, other wireless technologies may also be appropriate.
The selection process should consider:
- Required communication range.
- Amount of data.
- Required response time.
- Battery life.
- Network availability.
- Hardware cost.
- Antenna requirements.
- Security requirements.
- Environmental conditions.
- Regulatory requirements.
Wireless Communication Range and Signal Quality
Wireless communication can be affected significantly by the physical environment.
Walls, metal structures, electronic equipment, other radio transmitters, and the position of the antenna can all affect communication quality.
For better results:
- Keep the antenna away from large metal objects.
- Follow the module manufacturer’s antenna requirements.
- Use an appropriate power supply.
- Avoid unnecessary obstacles between communicating devices.
- Test the system in the actual installation environment.
- Do not assume laboratory range specifications will be achieved in every installation.
For professional applications, wireless performance should be tested under the expected operating conditions.
Wireless Communication Security
Security becomes increasingly important when an Arduino project communicates over a network or Internet connection.
A wireless system may transmit sensor information, commands, authentication information, or other sensitive data. Security should therefore be considered during the design stage.
Important practices include:
- Use appropriate authentication.
- Protect network credentials.
- Avoid publishing passwords in source code.
- Use encryption when appropriate.
- Keep firmware and libraries updated when supported.
- Restrict access to network-connected devices.
- Avoid exposing unnecessary services.
- Use secure communication methods for sensitive information.
Arduino hardware also includes examples of security-oriented components. For example, the MKR WAN 1310 includes an ECC508 cryptographic chip, while the UNO WiFi Rev2 includes an ATECC608 security chip.
Common Problems and Troubleshooting
Wireless projects can fail for many reasons, and the problem is not always the Arduino code.
Common causes include:
- Incorrect wiring.
- Incorrect pins.
- Insufficient power.
- Incorrect wireless configuration.
- Incorrect network credentials.
- Weak signal.
- Antenna problems.
- Interference.
- Incorrect library.
- Incompatible hardware.
- Incorrect communication settings.
- Software configuration errors.
A systematic troubleshooting process should begin by checking the power supply and hardware connections, followed by the communication configuration and software.
Common Mistakes to Avoid
Beginners often select wireless hardware based only on advertised range or popularity. A better approach is to start with the project requirements.
Avoid:
- Choosing a wireless module before defining the required range.
- Ignoring power consumption.
- Using an inadequate power supply.
- Assuming every Arduino board has built-in wireless connectivity.
- Confusing wireless technology with communication protocol.
- Ignoring antenna requirements.
- Assuming maximum range is guaranteed.
- Using unsecured network credentials.
- Selecting LoRa when high data throughput is required.
- Selecting Wi-Fi when extremely low power consumption is the primary requirement.
Applications of Arduino Wireless Communication
Wireless communication greatly expands the types of projects that can be built with Arduino.
Common applications include:
- Smart home systems.
- IoT devices.
- Wireless temperature monitoring.
- Environmental monitoring.
- Agricultural monitoring.
- Remote control systems.
- Robotics.
- Wearable electronics.
- Industrial monitoring.
- Asset tracking.
- Energy monitoring.
- Smart-city applications.
- Remote data acquisition.
- Wireless sensor networks.
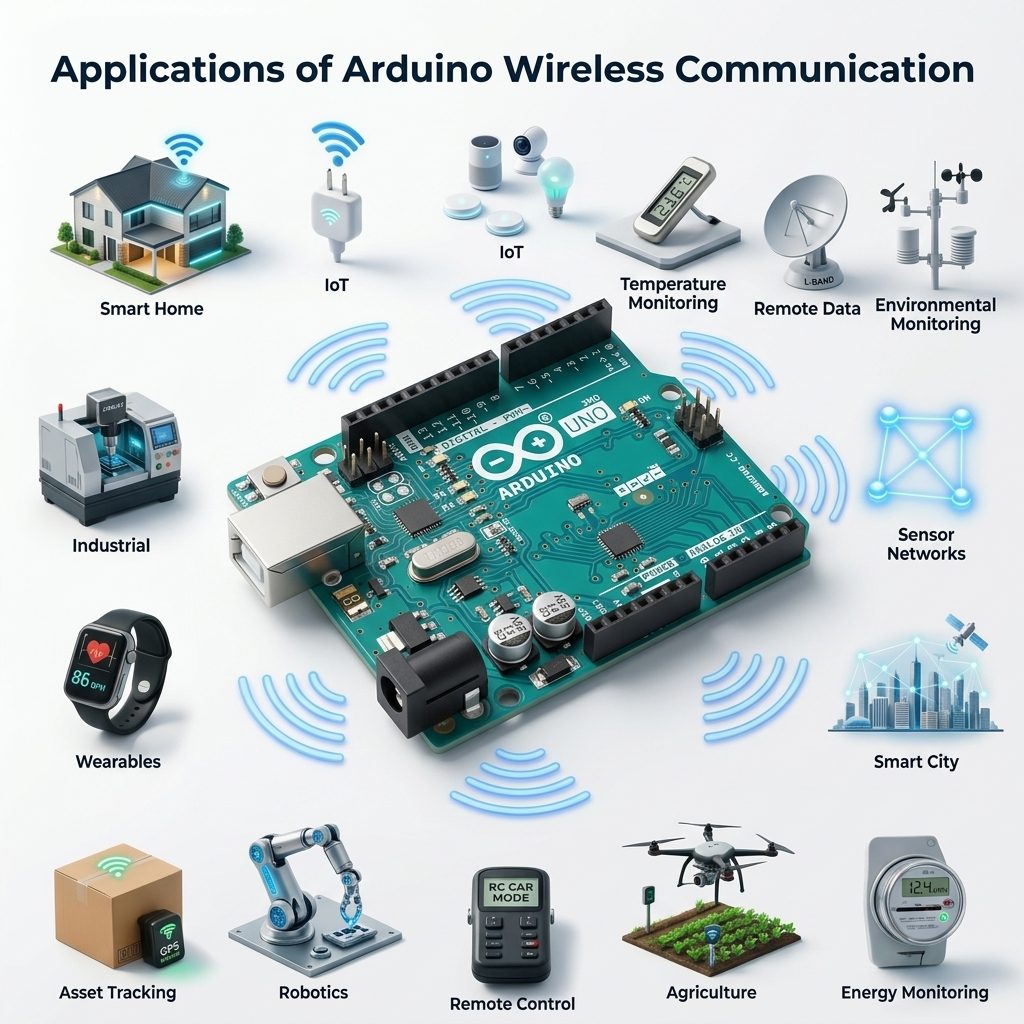
Arduino’s own hardware and project documentation demonstrates applications ranging from Bluetooth-connected devices to LoRa-based agricultural monitoring and cellular IoT.
Frequently Asked Questions
Does every Arduino board support wireless communication?
No. Many traditional Arduino boards do not include a built-in wireless interface. Wireless communication can be provided either by choosing a board with integrated wireless connectivity or by adding an external wireless module.
Which Arduino wireless technology is best for beginners?
There is no universal best choice. Wi-Fi is convenient for Internet-connected projects, while Bluetooth/BLE is often convenient for short-range communication with smartphones and other nearby devices.
Can Arduino connect to a smartphone wirelessly?
Yes. Arduino boards with Bluetooth or BLE can communicate with compatible smartphones. Wi-Fi-enabled Arduino boards can also communicate through a network.
Can Arduino communicate with another Arduino wirelessly?
Yes. Depending on the required range and application, Arduino boards can communicate using technologies such as Bluetooth, LoRa, Wi-Fi, and external radio modules.
Is LoRa better than Wi-Fi?
Neither technology is universally better. LoRa is designed for long-range, low-power communication with relatively small amounts of data, while Wi-Fi is better suited to higher-throughput network and Internet applications.
Does wireless communication require an Internet connection?
No. Some wireless systems can communicate directly between devices without Internet access. Internet connectivity is required only when the application needs access to Internet-based services.
What affects Arduino wireless range?
Range is affected by transmit power, receiver sensitivity, antenna characteristics, frequency, obstacles, interference, environmental conditions, and the specific wireless technology.
Is wireless communication secure?
It can be secure when appropriate authentication, encryption, access control, and secure configuration are used. Security should be considered as part of the system design rather than added only after the project is completed.
Conclusion
Arduino Wireless Communication provides a practical way to connect embedded projects without physical communication cables. It enables Arduino devices to communicate with smartphones, computers, other microcontrollers, local networks, cloud platforms, and remote systems.
The most important lesson is that wireless technology should be selected according to the requirements of the project. Wi-Fi is a strong choice for network and Internet-connected applications, Bluetooth and BLE are useful for short-range device communication, LoRa is well suited to long-range low-power sensing, and cellular technologies can provide wide-area connectivity where local networks are unavailable. Arduino’s current documentation provides hardware and learning resources covering these different approaches.
By considering range, data rate, power consumption, latency, network availability, security, cost, and environmental conditions, beginners and experienced engineers can select a wireless communication solution that matches the actual needs of their Arduino project.
الاتصال اللاسلكي باستخدام Arduino
قائمة المحتويات
- مقدمة.
- ما هو الاتصال اللاسلكي باستخدام Arduino؟
- لماذا نستخدم الاتصال اللاسلكي مع Arduino؟
- كيف يعمل الاتصال اللاسلكي باستخدام Arduino؟
- أنواع الاتصال اللاسلكي باستخدام Arduino.
- وحدات ولوحات الاتصال اللاسلكي الخاصة بـ Arduino.
- مقارنة الاتصال اللاسلكي بالاتصال السلكي.
- أهم معايير الاتصال اللاسلكي.
- بروتوكولات الاتصال اللاسلكي.
- مكتبات الاتصال اللاسلكي في Arduino.
- كيفية إرسال واستقبال البيانات لاسلكيًا باستخدام Arduino.
- مثال على تطبيق لاسلكي باستخدام Arduino.
- مقارنة Wi-Fi وBluetooth وLoRa والاتصال الخلوي.
- كيفية اختيار تقنية الاتصال اللاسلكي المناسبة لـ Arduino.
- مدى الاتصال اللاسلكي وجودة الإشارة.
- أمان الاتصال اللاسلكي.
- المشكلات الشائعة واستكشاف الأخطاء وإصلاحها.
- أخطاء شائعة يجب تجنبها.
- تطبيقات الاتصال اللاسلكي باستخدام Arduino.
- الأسئلة الشائعة.
- الخلاصة.
• مدة القراءة حوالي: 20 دقيقة.
مقدمة.
• يتيح الاتصال اللاسلكي باستخدام Arduino للمشروعات الإلكترونية تبادل البيانات مع الأجهزة الأخرى دون الحاجة إلى كابل اتصال فعلي. ويمكن استخدام الاتصال اللاسلكي لربط المستشعرات والهواتف الذكية وأجهزة الكمبيوتر ووحدات التحكم الدقيقة الأخرى وخدمات الإنترنت والأجهزة الموجودة في أماكن بعيدة. ويعتمد اختيار التقنية المناسبة على متطلبات المشروع، حيث يمكن استخدام تقنيات مثل Wi-Fi وBluetooth Low Energy وLoRa وشبكات الاتصال الخلوية.
• بالنسبة للمبتدئين، من المهم معرفة أنه لا توجد تقنية لاسلكية واحدة تناسب جميع مشروعات Arduino. فإذا كان المشروع يعتمد على التحكم في جهاز قريب باستخدام الهاتف الذكي، فقد يكون Bluetooth هو الخيار الأنسب. أما المستشعر المتصل بالإنترنت فقد يكون Wi-Fi أكثر ملاءمة، بينما قد يكون LoRa أو أحد حلول إنترنت الأشياء الخلوية أفضل للمستشعرات التي تعمل بالبطارية وتقع على مسافات بعيدة. وفهم الفروق بين هذه التقنيات يساعد على اختيار الحل المناسب لكل مشروع.
ما هو الاتصال اللاسلكي باستخدام Arduino؟
• الاتصال اللاسلكي باستخدام Arduino هو عملية إرسال واستقبال المعلومات بين مشروع يعتمد على Arduino وجهاز آخر من خلال اتصال لاسلكي. وبدلًا من نقل البيانات عبر كابل مادي، يتم استخدام إشارات لاسلكية تعمل بترددات الراديو لنقل المعلومات عبر الهواء.
• يتكون نظام الاتصال اللاسلكي الأساسي من جهاز إرسال وجهاز استقبال وهوائي وبروتوكول اتصال، بالإضافة إلى الأجهزة المسؤولة عن معالجة البيانات المرسلة والمستقبلة. وتحتوي بعض لوحات Arduino الحديثة على وحدة الاتصال اللاسلكي مدمجة، بينما يمكن تزويد لوحات أخرى بوحدة لاسلكية خارجية.
• يمكن تبسيط عملية الاتصال بالشكل التالي:
Arduino ← واجهة الاتصال اللاسلكي ← الإشارة اللاسلكية ← الجهاز المستقبل ← معالجة البيانات.
• يمكن أن تتضمن البيانات المرسلة قياسات المستشعرات أو الأوامر أو معلومات الحالة أو إشارات التحكم أو أي بيانات رقمية أخرى.
لماذا نستخدم الاتصال اللاسلكي مع Arduino؟
• يمنح الاتصال اللاسلكي مشروعات Arduino قدرًا أكبر من المرونة، لأن الأجهزة لا تحتاج إلى البقاء متصلة ببعضها بواسطة الأسلاك.
• من أهم أسباب استخدام الاتصال اللاسلكي:
- • مراقبة المستشعرات عن بُعد.
- • التحكم باستخدام الهاتف الذكي.
- • تطبيقات الروبوتات اللاسلكية.
- • أنظمة المنزل الذكي.
- • تطبيقات إنترنت الأشياء.
- • تسجيل البيانات عن بُعد.
- • مراقبة الظروف البيئية.
- • المراقبة الصناعية.
- • شبكات المستشعرات بعيدة المدى.
- • الأجهزة التي تعمل بالبطاريات.
- • الاتصال بين عدة أجهزة مدمجة.
• يكون الاتصال اللاسلكي مفيدًا بشكل خاص عندما يكون تركيب كابل فعلي صعبًا أو مكلفًا أو غير عملي أو غير ممكن.
كيف يعمل الاتصال اللاسلكي باستخدام Arduino؟
• يبدأ نظام Arduino اللاسلكي عادةً بجمع البيانات من مستشعر أو استقبال أمر من جهاز آخر. بعد ذلك يعالج Arduino هذه المعلومات ويرسل البيانات إلى واجهة الاتصال اللاسلكي.
• تقوم واجهة الاتصال اللاسلكي بتحويل البيانات الرقمية إلى إشارة راديوية وإرسالها عبر الهوائي. ثم يلتقط الجهاز المستقبل الإشارة ويعالج بروتوكول الاتصال اللاسلكي، وبعد ذلك تصبح البيانات المستقبلة متاحة للتطبيق أو النظام المسؤول عن استخدامها.
• على سبيل المثال، يمكن أن يعمل نظام مراقبة درجة الحرارة لاسلكيًا كما يلي:
مستشعر الحرارة ← Arduino ← الوحدة اللاسلكية ← الشبكة اللاسلكية ← الجهاز المستقبل ← عرض درجة الحرارة.
• يمكن أن يكون الجهاز المستقبل Arduino آخر أو هاتفًا ذكيًا أو جهاز كمبيوتر أو خدمة سحابية أو منصة لإنترنت الأشياء.
• تختلف خطوات الاتصال الفعلية حسب التقنية اللاسلكية المستخدمة.
أنواع الاتصال اللاسلكي باستخدام Arduino
• يمكن لمشروعات Arduino استخدام العديد من تقنيات الاتصال اللاسلكي، ويعتمد اختيار التقنية المناسبة بشكل أساسي على مدى الاتصال، وحجم البيانات، واستهلاك الطاقة، وتوفر الشبكة، ونوع الأجهزة المطلوب ربطها.
Wi-Fi
• يعد Wi-Fi من أكثر الخيارات فائدة عندما يحتاج مشروع Arduino إلى الاتصال بشبكة لاسلكية محلية أو الوصول إلى خدمات تعتمد على الإنترنت.
• يمكن لـ Arduino المزود بتقنية Wi-Fi الاتصال بجهاز توجيه لاسلكي أو نقطة وصول، ثم تبادل البيانات مع أجهزة الكمبيوتر والهواتف الذكية والخوادم والمنصات السحابية وغيرها من الأجهزة المتصلة بالشبكة.
• يناسب Wi-Fi بشكل خاص:
- • أجهزة إنترنت الأشياء.
- • التحكم عبر الويب.
- • المستشعرات المتصلة بالخدمات السحابية.
- • أنظمة المنزل الذكي.
- • المراقبة عن بُعد.
- • تسجيل البيانات عبر الشبكة.
• يعد Arduino UNO R4 WiFi مثالًا على لوحة Arduino التي تتضمن الاتصال اللاسلكي، حيث تجمع بين المتحكم الدقيق Renesas RA4M1 ووحدة ESP32-S3 لتوفير Wi-Fi وBluetooth، كما تدعم العمل مع Arduino Cloud.
• يوفر Wi-Fi عادةً معدل نقل بيانات أعلى بكثير من التقنيات المصممة للاتصال بعيد المدى منخفض استهلاك الطاقة، إلا أن استهلاكه للطاقة قد يجعله أقل ملاءمة لبعض التطبيقات التي تعمل بالبطاريات.
Bluetooth وBluetooth Low Energy (BLE)
• صُممت تقنية Bluetooth أساسًا للاتصال اللاسلكي قصير المدى بين الأجهزة القريبة. وهي مناسبة عندما يحتاج مشروع Arduino إلى التواصل مع هاتف ذكي أو جهاز لوحي أو جهاز كمبيوتر أو جهاز آخر يدعم Bluetooth.
• أما Bluetooth Low Energy، والمعروفة اختصارًا باسم BLE، فهي مصممة خصيصًا للتطبيقات التي يكون فيها تقليل استهلاك الطاقة عاملًا مهمًا.
• توفر Arduino موارد تعليمية مخصصة لتقنية BLE، كما تحتوي لوحات مثل Nano 33 BLE Rev2 على دعم مدمج للاتصال منخفض الطاقة ويمكن استخدامها مع مكتبة ArduinoBLE.
• تشمل التطبيقات الشائعة:
- • المشروعات التي يتم التحكم فيها بواسطة الهاتف الذكي.
- • الأجهزة القابلة للارتداء.
- • المستشعرات اللاسلكية.
- • واجهات الإنسان والآلة.
- • أجهزة التحكم عن بُعد.
- • تبادل البيانات لمسافات قصيرة.
• يكون Bluetooth أكثر ملاءمة عادةً للاتصال المباشر بين الأجهزة القريبة مقارنةً باستخدامه كوسيلة مباشرة للوصول إلى الإنترنت.
nRF24L01
• يعد nRF24L01 وحدة اتصال لاسلكي شائعة في مشروعات Arduino، وتعمل باستخدام نطاق تردد 2.4 GHz. وهي مناسبة بشكل خاص للاتصال المباشر بين وحدات متعددة عندما تكون هناك حاجة إلى نقل بيانات بسيط وسريع نسبيًا دون الاعتماد على شبكة Wi-Fi أو الإنترنت.
• يمكن استخدام وحدات nRF24L01 لإنشاء اتصال بين Arduino ووحدات تحكم دقيقة أخرى، كما يمكن استخدامها في تطبيقات التحكم عن بُعد والروبوتات وشبكات المستشعرات.
• تتميز هذه الوحدات بانخفاض تكلفتها وسهولة دمجها مع المشروعات، إلا أن مدى الاتصال الفعلي يعتمد على نوع الوحدة والهوائي والبيئة المحيطة وقدرة الإرسال.
LoRa وLoRaWAN
• صُممت LoRa للاتصالات اللاسلكية بعيدة المدى مع استهلاك منخفض للطاقة، ولذلك فهي مناسبة للتطبيقات التي تحتاج إلى إرسال كميات صغيرة نسبيًا من البيانات لمسافات كبيرة.
• توفر لوحة Arduino MKR WAN 1310 إمكانية الاتصال عبر LoRa، ويمكن استخدامها مع شبكات LoRa والبوابات والشبكات العامة مثل The Things Network، أو مع لوحة أخرى متوافقة في بعض تطبيقات الاتصال المباشر.
• تناسب LoRa تطبيقات مثل:
- • مراقبة الأنشطة الزراعية.
- • المستشعرات البيئية.
- • المراقبة عن بُعد.
- • مستشعرات المدن الذكية.
- • القياسات والإشارات بعيدة المدى.
- • أجهزة إنترنت الأشياء منخفضة استهلاك الطاقة.
• توضح أمثلة Arduino الخاصة بالزراعة باستخدام LoRa كيفية جمع بيانات المستشعرات عبر مساحات واسعة في الأماكن التي قد لا تتوفر فيها تغطية Wi-Fi.
• من المهم التمييز بين LoRa وLoRaWAN؛ فـ LoRa تشير إلى تقنية الاتصال اللاسلكي بعيدة المدى نفسها، بينما LoRaWAN تحدد بروتوكول الاتصال وبنية الشبكة المستخدمة لربط أجهزة LoRa بالبوابات والشبكات.
الاتصال الخلوي
• يسمح الاتصال الخلوي لمشروع Arduino باستخدام شبكات الهاتف المحمول بدلًا من الاعتماد على شبكة Wi-Fi محلية.
• يكون هذا الحل مفيدًا عندما يعمل الجهاز في موقع بعيد لا تتوفر فيه شبكة Wi-Fi، ولكن توجد تغطية مناسبة لشبكة الهاتف المحمول.
• تعد لوحة Arduino MKR NB 1500 مثالًا على حلول الاتصال الخلوي، حيث تدعم تقنيات NB-IoT وLTE-M وتستهدف تطبيقات إنترنت الأشياء منخفضة استهلاك الطاقة، كما يمكنها استخدام الشبكات الخلوية لإرسال واستقبال الرسائل النصية.
• تشمل التطبيقات الشائعة:
- • المراقبة عن بُعد.
- • تتبع الأصول.
- • التطبيقات الزراعية.
- • مراقبة المرافق والخدمات.
- • تطبيقات إنترنت الأشياء الصناعية.
- • المستشعرات البيئية البعيدة.
• تتطلب حلول الاتصال الخلوي توفر تغطية مناسبة وخدمة اتصالات ملائمة، لذلك يجب اختيارها وفق موقع المشروع ومتطلبات تشغيله.
Zigbee وتقنيات الاتصال اللاسلكي الأخرى
• توفر Zigbee وغيرها من التقنيات اللاسلكية خيارات إضافية لمشروعات Arduino، خصوصًا عندما يتطلب التطبيق استهلاكًا منخفضًا للطاقة أو شبكة مترابطة Mesh أو اتصالًا لاسلكيًا بسيطًا لمسافات قصيرة.
• تعتمد Zigbee على استهلاك منخفض للطاقة وتدعم الشبكات المترابطة Mesh، مما يسمح لعدة أجهزة بالتواصل مع بعضها والمساعدة في توسيع نطاق الشبكة من خلال تمرير البيانات بين الأجهزة.
• من تطبيقات Zigbee الشائعة:
- • أنظمة المنزل الذكي.
- • أتمتة المنازل.
- • شبكات المستشعرات اللاسلكية.
- • الإضاءة الذكية.
- • المراقبة الصناعية.
• تشمل التقنيات الأخرى Thread التي تدعم الشبكات المترابطة منخفضة الطاقة، ووحدات RF للاتصال اللاسلكي البسيط، والأشعة تحت الحمراء IR لتطبيقات التحكم قصيرة المدى التي تتطلب خط رؤية مباشر.
• يعتمد اختيار التقنية الأفضل على مدى الاتصال المطلوب، واستهلاك الطاقة، وعدد الأجهزة، وطبيعة التطبيق.
وحدات ولوحات الاتصال اللاسلكي الخاصة بـ Arduino
• توجد طريقتان شائعتان لإضافة الاتصال اللاسلكي إلى مشروع Arduino.
• الطريقة الأولى هي استخدام لوحة Arduino تحتوي بالفعل على اتصال لاسلكي مدمج، مما يبسط تصميم الدائرة لأن وحدة الراديو والمكونات الداعمة لها تكون مدمجة في اللوحة.
• أما الطريقة الثانية فتتمثل في توصيل وحدة لاسلكية خارجية بلوحة Arduino. وتوفر هذه الطريقة مرونة أكبر، لأن تقنية الاتصال اللاسلكي يمكن اختيارها بشكل مستقل عن لوحة المتحكم الرئيسية.
• من أمثلة أجهزة Arduino اللاسلكية:
| تقنية الاتصال اللاسلكي | مثال على أجهزة Arduino | التطبيق النموذجي |
|---|---|---|
| Wi-Fi | UNO R4 WiFi | إنترنت الأشياء والاتصال بالإنترنت. |
| Bluetooth LE | Nano 33 BLE Rev2 | الاتصال بالهواتف والأجهزة القريبة. |
| LoRa | MKR WAN 1310 | الاتصال بعيد المدى منخفض الطاقة. |
| الاتصال الخلوي | MKR NB 1500 | الاتصال بإنترنت الأشياء عن بُعد. |
• تمثل هذه الأمثلة فئات من لوحات Arduino التي توفر تقنيات اتصال لاسلكي مختلفة.
مقارنة الاتصال اللاسلكي بالاتصال السلكي
| المعيار | الاتصال اللاسلكي | الاتصال السلكي |
|---|---|---|
| طريقة الاتصال | نقل البيانات دون كابلات باستخدام الإشارات اللاسلكية. | نقل البيانات عبر الكابلات أو الأسلاك. |
| الحركة والمرونة | يوفر مرونة وحركة أكبر. | تتحدد الحركة بطول الكابل وموقعه. |
| التركيب | أسهل عادةً في الأماكن التي يصعب فيها تمديد الكابلات. | يتطلب تركيب كابلات فعلية. |
| مدى الاتصال | من مسافات قصيرة إلى مسافات بعيدة جدًا حسب التقنية. | يعتمد على نوع الكابل ومعيار الاتصال. |
| معدل نقل البيانات | يختلف حسب تقنية الاتصال المستخدمة. | يوفر غالبًا معدل نقل مستقرًا وعاليًا. |
| استهلاك الطاقة | قد يكون أعلى بسبب الإرسال اللاسلكي، مع توفر تقنيات منخفضة الطاقة. | لا يحتاج عادةً إلى طاقة لإرسال إشارات لاسلكية. |
| التداخل | قد يتأثر بالتداخل الراديوي والعوائق المادية. | أقل تأثرًا عادةً بالتداخل الراديوي. |
| الموثوقية | قد تتأثر بقوة الإشارة والظروف المحيطة. | يوفر عادةً اتصالًا مستقرًا وموثوقًا. |
| الأمان | يتطلب التشفير والمصادقة المناسبة لحماية البيانات. | يتطلب اعتراض الاتصال عادةً الوصول الفعلي إلى الكابل. |
| أمثلة | Wi-Fi وBluetooth وLoRa وZigbee والاتصال الخلوي. | UART وI2C وSPI وUSB وEthernet. |
| الأفضل لـ | التطبيقات المتنقلة والبعيدة وصعبة التوصيل بالأسلاك. | الأنظمة الثابتة التي تحتاج إلى اتصال مباشر ومستقر. |
• لذلك ينبغي اختيار طريقة الاتصال وفقًا لمتطلبات التطبيق، وليس لمجرد توفر الاتصال اللاسلكي.
أهم معايير الاتصال اللاسلكي
• قبل اختيار تقنية الاتصال اللاسلكي لمشروع Arduino، من الضروري فهم مجموعة من المعايير الأساسية التي تؤثر في أداء الاتصال وموثوقيته واستهلاك الطاقة ومدى ملاءمة النظام للتطبيق المطلوب.
مدى الاتصال
• يشير مدى الاتصال إلى أقصى مسافة يمكن خلالها لجهازين تبادل البيانات بصورة موثوقة. ويتأثر المدى الفعلي بعوامل مثل قدرة الإرسال وجودة الهوائي والتردد والعوائق والظروف البيئية.
معدل نقل البيانات
• يعبّر معدل نقل البيانات عن كمية المعلومات التي يمكن إرسالها خلال فترة زمنية محددة. وقد تحتاج تطبيقات المستشعرات إلى معدل منخفض لنقل القراءات، بينما تحتاج التطبيقات التي تتعامل مع كميات كبيرة من البيانات إلى سرعة أعلى.
استهلاك الطاقة
• يعد استهلاك الطاقة عاملًا مهمًا جدًا في المشروعات التي تعمل بالبطاريات. فبعض تقنيات الاتصال اللاسلكي تستهلك طاقة ملحوظة أثناء الإرسال، بينما صُممت تقنيات أخرى للعمل باستهلاك منخفض وإطالة عمر البطارية.
زمن الاستجابة
• يشير زمن الاستجابة إلى الوقت الذي تستغرقه البيانات للانتقال من الجهاز المرسل إلى الجهاز المستقبل. ويكتسب انخفاض زمن الاستجابة أهمية خاصة في تطبيقات الروبوتات والتحكم عن بُعد والمراقبة الفورية.
التردد
• تستخدم الأجهزة اللاسلكية نطاقات محددة من ترددات الراديو. ويمكن أن يؤثر تردد التشغيل في مدى الاتصال وقدرة الإشارة على اختراق العوائق وتصميم الهوائي ومستوى التأثر بالتداخل.
قوة الإشارة
• تؤثر قوة الإشارة بشكل مباشر في موثوقية الاتصال اللاسلكي. وقد تؤدي الإشارة الضعيفة إلى أخطاء في الاتصال أو انخفاض المدى أو تراجع الأداء أو فقدان بعض البيانات.
قدرة الإرسال
• تحدد قدرة الإرسال قوة الإشارة التي يرسلها الجهاز اللاسلكي. وقد تساعد زيادة قدرة الإرسال على تحسين مدى الاتصال، لكنها تؤدي عادةً إلى زيادة استهلاك الطاقة.
الهوائي
• يعد الهوائي جزءًا أساسيًا من العديد من أنظمة الاتصال اللاسلكي. ويمكن لتصميمه وموقعه وجودته أن تؤثر بشكل كبير في مدى الاتصال واستقرار الإشارة.
التداخل
• يمكن أن تتأثر الإشارات اللاسلكية بالأجهزة الإلكترونية الأخرى والإشارات الراديوية والجدران والأجسام المعدنية والظروف البيئية. ويساعد تقليل مصادر التداخل على تحسين موثوقية الاتصال.
الأمان
• يجب استخدام وسائل الأمان المناسبة لحماية البيانات المرسلة لاسلكيًا. وقد تشمل هذه الوسائل المصادقة والتشفير وكلمات المرور وبروتوكولات الاتصال الآمنة، وذلك حسب التقنية المستخدمة.
بروتوكولات الاتصال اللاسلكي
• ترتبط تقنية الاتصال اللاسلكي ببروتوكول الاتصال، لكنهما ليسا الشيء نفسه بالضرورة.
• تحدد التقنية اللاسلكية كيفية انتقال المعلومات عبر الوصلة الراديوية، بينما يحدد البروتوكول الطريقة التي تنظم بها الأجهزة البيانات وتتعامل مع العناوين والإرسال والاستقبال وتفسير المعلومات.
• تشمل تقنيات وبروتوكولات الاتصال التي يمكن استخدامها في مشروعات Arduino كلًا من BLE وLoRa/LPWAN وUART وSPI وI2C وCAN وModbus، مع اختلاف وظيفة كل منها حسب بنية المشروع.
• على سبيل المثال، قد يستخدم مشروع Arduino البنية التالية:
Wi-Fi ← اتصال شبكي ← بروتوكول التطبيق ← خدمة سحابية.
• لذلك فإن الاتصال اللاسلكي يمثل جزءًا واحدًا فقط من منظومة الاتصال الكاملة.
مكتبات الاتصال اللاسلكي في Arduino
• تساعد مكتبات Arduino على تبسيط عملية التعامل مع وحدات الاتصال اللاسلكي، إذ توفر وظائف جاهزة تقلل الحاجة إلى برمجة جميع تفاصيل الاتصال من البداية.
• يمكن أن توفر المكتبة وظائف خاصة بـ:
- • تهيئة واجهة الاتصال اللاسلكي.
- • الاتصال بالشبكة.
- • اكتشاف الأجهزة.
- • إرسال البيانات.
- • استقبال البيانات.
- • إدارة الاتصالات.
- • معالجة أحداث الاتصال.
• تتضمن بيئة Arduino ومراجعها البرمجية وظائف ومكتبات خاصة بشبكات Wi-Fi، مثل WiFi وWiFiClient وWiFiServer وWiFiUDP.
• تعتمد المكتبة المناسبة على لوحة Arduino ووحدة الاتصال اللاسلكي والتقنية المستخدمة في المشروع.
كيفية إرسال واستقبال البيانات لاسلكيًا باستخدام Arduino
• يمكن تقسيم عملية الاتصال الأساسية إلى جانبين: المرسل والمستقبل.
المرسل:
قراءة البيانات ← معالجة البيانات ← تجهيز الرسالة ← إرسال الرسالة.
المستقبل:
استقبال الرسالة ← التحقق من البيانات ← معالجة الرسالة ← تنفيذ الإجراء.
• على سبيل المثال، يمكن لمستشعر حرارة متصل بـ Arduino قياس درجة الحرارة وتحويل القراءة إلى تنسيق مناسب ثم إرسالها لاسلكيًا.
• يستطيع Arduino المستقبل بعد ذلك فك ترميز الرسالة وعرض درجة الحرارة أو استخدامها للتحكم في جهاز آخر.
• تعد هذه البنية الأساسية شائعة في العديد من تطبيقات الاتصال اللاسلكي، حتى مع اختلاف البروتوكول المستخدم من مشروع إلى آخر.
مثال على تطبيق لاسلكي باستخدام Arduino
• لنفترض وجود نظام لاسلكي لمراقبة الظروف البيئية.
• يمكن أن يتكون النظام من:
- • لوحة Arduino.
- • مستشعر لدرجة الحرارة والرطوبة.
- • واجهة اتصال لاسلكي.
- • بطارية أو مصدر طاقة.
- • جهاز استقبال أو شبكة اتصال.
- • برنامج لعرض البيانات أو تخزينها.
• يقوم Arduino بقراءة بيانات المستشعر بشكل دوري، ثم يعالج القياسات ويرسل المعلومات لاسلكيًا.
• يستطيع الطرف المستقبل عرض البيانات أو تخزينها أو إرسالها إلى منصة لإنترنت الأشياء.
• إذا كان المشروع قصير المدى، فقد يكون Bluetooth مناسبًا. وإذا كان الموقع مغطى بشبكة Wi-Fi، فقد يوفر Wi-Fi اتصالًا مريحًا بالإنترنت. أما المستشعر البعيد الذي يعمل بطاقة منخفضة، فقد يكون LoRa أو الاتصال الخلوي لإنترنت الأشياء أكثر ملاءمة.
مقارنة Wi-Fi وBluetooth وLoRa والاتصال الخلوي
• يقدم الجدول التالي مقارنة عامة تساعد على اختيار التقنية المناسبة، وليس قيمًا ثابتة للأداء، لأن الأداء الفعلي يعتمد على نوع الأجهزة والبيئة والإعدادات والشبكة المستخدمة.
| المعيار | Wi-Fi | Bluetooth/BLE | LoRa | الاتصال الخلوي لإنترنت الأشياء |
|---|---|---|---|---|
| المدى المعتاد | قصير إلى متوسط. | قصير. | بعيد. | واسع النطاق. |
| معدل البيانات | مرتفع. | منخفض إلى متوسط. | منخفض. | يختلف حسب التقنية. |
| استهلاك الطاقة | أعلى عادةً. | منخفض، وخاصة BLE. | منخفض. | يعتمد على التقنية والشبكة. |
| الوصول إلى الإنترنت | من خلال الشبكة. | عادةً بشكل غير مباشر. | من خلال بوابة أو شبكة. | من خلال شبكة الهاتف المحمول. |
| الاتصال بالهاتف الذكي | ممتاز. | ممتاز. | ليس مباشرًا عادةً. | ليس مباشرًا عادةً. |
| المستشعرات البعيدة | جيد مع توفر الشبكة. | محدود. | ممتاز. | ممتاز. |
| الميزة الأساسية | الشبكات والوصول إلى الإنترنت. | الاتصال المحلي بين الأجهزة. | المدى الطويل والاستهلاك المنخفض. | الاتصال واسع النطاق. |
• ينبغي استخدام هذا الجدول كدليل مبدئي للاختيار، وليس بديلًا عن مراجعة المواصفات الفنية لوحدة الاتصال المحددة.
كيفية اختيار تقنية الاتصال اللاسلكي المناسبة لـ Arduino
- • تعتمد أفضل تقنية لاسلكية على متطلبات المشروع.
- • اختر Wi-Fi عندما يحتاج المشروع إلى الاتصال بالشبكة أو الإنترنت مع توفر تغطية Wi-Fi مناسبة.
- • اختر Bluetooth/BLE عندما يحتاج المشروع إلى اتصال قصير المدى مع هاتف ذكي أو جهاز كمبيوتر أو جهاز قريب، وخاصة عندما يكون استهلاك الطاقة عاملًا مهمًا.
- • اختر LoRa عندما يحتاج المشروع إلى إرسال كميات صغيرة نسبيًا من البيانات لمسافات طويلة مع الحفاظ على استهلاك منخفض للطاقة.
- • اختر الاتصال الخلوي لإنترنت الأشياء عندما يحتاج الجهاز إلى اتصال واسع النطاق دون الاعتماد على شبكة Wi-Fi محلية.
• في التطبيقات المتخصصة، قد تكون هناك تقنيات لاسلكية أخرى أكثر ملاءمة.
• ينبغي أن تراعي عملية الاختيار العوامل التالية:
- • مدى الاتصال المطلوب.
- • كمية البيانات.
- • زمن الاستجابة المطلوب.
- • عمر البطارية.
- • توفر الشبكة.
- • تكلفة الأجهزة.
- • متطلبات الهوائي.
- • متطلبات الأمان.
- • الظروف البيئية.
- • المتطلبات التنظيمية.
مدى الاتصال اللاسلكي وجودة الإشارة
• يمكن أن تتأثر جودة الاتصال اللاسلكي بشكل كبير بالبيئة المحيطة.
• تؤثر الجدران والهياكل المعدنية والأجهزة الإلكترونية وأجهزة الإرسال اللاسلكية الأخرى وموقع الهوائي في جودة الاتصال ومداه.
• للحصول على أداء أفضل:
- • أبعد الهوائي عن الأجسام المعدنية الكبيرة.
- • اتبع متطلبات تركيب الهوائي التي تحددها الشركة المصنعة للوحدة.
- • استخدم مصدر طاقة مناسبًا ومستقرًا.
- • قلل العوائق غير الضرورية بين الأجهزة المتصلة.
- • اختبر النظام في بيئة التركيب الفعلية.
- • لا تفترض أن مدى الاتصال المعلن في الاختبارات المعملية سيتحقق في جميع ظروف التشغيل.
• في التطبيقات الاحترافية، يجب اختبار أداء الاتصال اللاسلكي في الظروف الفعلية التي سيعمل فيها النظام.
أمان الاتصال اللاسلكي
• تزداد أهمية الأمان عندما يتصل مشروع Arduino بشبكة أو بالإنترنت.
• قد ينقل النظام اللاسلكي بيانات المستشعرات أو أوامر التحكم أو معلومات المصادقة أو بيانات أخرى حساسة، ولذلك يجب أخذ الأمان في الاعتبار منذ مرحلة تصميم المشروع.
• من أهم ممارسات الأمان:
- • استخدام آلية مصادقة مناسبة.
- • حماية بيانات الدخول إلى الشبكة.
- • تجنب وضع كلمات المرور مباشرةً داخل الشيفرة البرمجية المنشورة.
- • استخدام التشفير عندما يكون مناسبًا.
- • تحديث البرامج الثابتة والمكتبات عند توفر التحديثات.
- • تقييد الوصول إلى الأجهزة المتصلة بالشبكة.
- • تجنب تشغيل الخدمات غير الضرورية أو إتاحتها عبر الشبكة.
- • استخدام وسائل اتصال آمنة عند نقل المعلومات الحساسة.
• تتضمن بعض لوحات Arduino أيضًا مكونات مخصصة لتعزيز الأمان، مثل شريحة ECC508 في MKR WAN 1310 وشريحة ATECC608 في UNO WiFi Rev2.
المشكلات الشائعة واستكشاف الأخطاء وإصلاحها
• قد تتوقف المشروعات اللاسلكية عن العمل لأسباب متعددة، ولا يكون سبب المشكلة دائمًا هو الشيفرة البرمجية الخاصة بـ Arduino.
• من الأسباب الشائعة:
- • توصيل الأسلاك بطريقة غير صحيحة.
- • استخدام أطراف توصيل غير صحيحة.
- • عدم كفاية مصدر الطاقة.
- • إعدادات لاسلكية غير صحيحة.
- • إدخال بيانات شبكة غير صحيحة.
- • ضعف الإشارة.
- • مشكلات في الهوائي.
- • وجود تداخل لاسلكي.
- • استخدام مكتبة غير مناسبة.
- • عدم توافق الأجهزة.
- • إعدادات اتصال غير صحيحة.
- • أخطاء في إعدادات البرنامج.
• يجب أن يبدأ استكشاف الأخطاء بطريقة منظمة بفحص مصدر الطاقة والتوصيلات، ثم التحقق من إعدادات الاتصال اللاسلكي، وبعد ذلك مراجعة المكتبات والشيفرة البرمجية.
أخطاء شائعة يجب تجنبها
• يختار المبتدئون أحيانًا وحدة الاتصال اللاسلكي بناءً على مدى الاتصال المعلن أو شهرة الوحدة فقط. والأفضل هو البدء بتحديد متطلبات المشروع ثم اختيار التقنية التي تحقق هذه المتطلبات.
• تجنب الأخطاء التالية:
- • اختيار الوحدة اللاسلكية قبل تحديد مدى الاتصال المطلوب.
- • تجاهل استهلاك الطاقة.
- • استخدام مصدر طاقة غير مناسب.
- • افتراض أن جميع لوحات Arduino تحتوي على اتصال لاسلكي مدمج.
- • الخلط بين تقنية الاتصال اللاسلكي وبروتوكول الاتصال.
- • تجاهل متطلبات الهوائي.
- • افتراض أن أقصى مدى معلن مضمون في جميع الظروف.
- • تخزين بيانات الشبكة بطريقة غير آمنة.
- • اختيار LoRa عندما يتطلب المشروع معدل نقل بيانات مرتفعًا.
- • اختيار Wi-Fi عندما يكون انخفاض استهلاك الطاقة هو المتطلب الأساسي.
تطبيقات الاتصال اللاسلكي باستخدام Arduino
• يوسع الاتصال اللاسلكي بشكل كبير أنواع المشروعات التي يمكن تنفيذها باستخدام Arduino.
• تشمل التطبيقات الشائعة:
- • أنظمة المنزل الذكي.
- • أجهزة إنترنت الأشياء.
- • مراقبة درجة الحرارة لاسلكيًا.
- • مراقبة الظروف البيئية.
- • المراقبة الزراعية.
- • أنظمة التحكم عن بُعد.
- • الروبوتات.
- • الإلكترونيات القابلة للارتداء.
- • المراقبة الصناعية.
- • تتبع الأصول.
- • مراقبة استهلاك الطاقة.
- • تطبيقات المدن الذكية.
- • جمع البيانات عن بُعد.
- • شبكات المستشعرات اللاسلكية.
• توضح لوحات Arduino ومشروعاتها إمكانية استخدام الاتصال اللاسلكي في تطبيقات متعددة، بدءًا من الأجهزة المتصلة عبر Bluetooth ووصولًا إلى أنظمة المراقبة الزراعية باستخدام LoRa وتطبيقات إنترنت الأشياء المعتمدة على الشبكات الخلوية.
الأسئلة الشائعة
هل تدعم جميع لوحات Arduino الاتصال اللاسلكي؟
• لا. لا تحتوي العديد من لوحات Arduino التقليدية على واجهة اتصال لاسلكي مدمجة. ويمكن إضافة الاتصال اللاسلكي إما باستخدام لوحة تحتوي على هذه الخاصية من الأساس أو بإضافة وحدة لاسلكية خارجية.
ما أفضل تقنية لاسلكية للمبتدئين مع Arduino؟
• لا توجد تقنية واحدة هي الأفضل لجميع المشروعات. يكون Wi-Fi مناسبًا للمشروعات المتصلة بالإنترنت، بينما يكون Bluetooth/BLE خيارًا عمليًا للاتصال قصير المدى بالهواتف الذكية والأجهزة القريبة.
هل يمكن لـ Arduino الاتصال بالهاتف الذكي لاسلكيًا؟
• نعم. يمكن للوحات Arduino التي تدعم Bluetooth أو BLE الاتصال بالهواتف الذكية المتوافقة. كما يمكن للوحات التي تدعم Wi-Fi التواصل مع الهاتف من خلال الشبكة.
هل يمكن لـ Arduino التواصل مع Arduino آخر لاسلكيًا؟
• نعم. وفقًا لمدى الاتصال المطلوب وطبيعة التطبيق، يمكن استخدام Bluetooth أو LoRa أو Wi-Fi أو وحدات الراديو الخارجية لإنشاء اتصال بين لوحات Arduino.
هل LoRa أفضل من Wi-Fi؟
• لا يمكن اعتبار إحدى التقنيتين أفضل من الأخرى في جميع الحالات. صُممت LoRa للاتصال بعيد المدى منخفض استهلاك الطاقة ونقل كميات صغيرة نسبيًا من البيانات، بينما يناسب Wi-Fi التطبيقات التي تحتاج إلى معدل نقل أعلى واتصال بالشبكة والإنترنت.
هل يحتاج الاتصال اللاسلكي إلى اتصال بالإنترنت؟
• لا. تستطيع بعض الأنظمة اللاسلكية تبادل البيانات مباشرةً بين الأجهزة دون الحاجة إلى الإنترنت. ويصبح اتصال الإنترنت ضروريًا فقط عندما يحتاج المشروع إلى الوصول إلى خدمات أو موارد موجودة على الإنترنت.
ما العوامل التي تؤثر في مدى الاتصال اللاسلكي لـ Arduino؟
• يتأثر المدى بقدرة الإرسال وحساسية المستقبل وخصائص الهوائي والتردد والعوائق والتداخل والظروف البيئية وتقنية الاتصال اللاسلكي المستخدمة.
هل الاتصال اللاسلكي آمن؟
• يمكن أن يكون الاتصال اللاسلكي آمنًا عند استخدام المصادقة والتشفير والتحكم في الوصول والإعدادات الآمنة المناسبة. وينبغي أن يكون الأمان جزءًا من تصميم النظام منذ البداية، وليس خطوة تضاف بعد اكتمال المشروع.
الخلاصة
• يوفر الاتصال اللاسلكي باستخدام Arduino وسيلة عملية لربط المشروعات الإلكترونية المدمجة دون الحاجة إلى كابلات اتصال فعلية. ويسمح ذلك لأجهزة Arduino بالتواصل مع الهواتف الذكية وأجهزة الكمبيوتر ووحدات التحكم الدقيقة الأخرى والشبكات المحلية والمنصات السحابية والأنظمة البعيدة.
• أهم ما يجب تذكره هو أن اختيار التقنية اللاسلكية يجب أن يعتمد على متطلبات المشروع. فـ Wi-Fi مناسب بدرجة كبيرة للتطبيقات التي تحتاج إلى الاتصال بالشبكة أو الإنترنت، بينما يناسب Bluetooth وBLE الاتصال قصير المدى بين الأجهزة، وتتميز LoRa بالاتصال بعيد المدى مع استهلاك منخفض للطاقة، في حين توفر تقنيات الاتصال الخلوي إمكانية الاتصال واسع النطاق في الأماكن التي لا تتوفر فيها الشبكات المحلية.
• ومن خلال دراسة مدى الاتصال ومعدل نقل البيانات واستهلاك الطاقة وزمن الاستجابة وتوفر الشبكة والأمان والتكلفة والظروف البيئية، يمكن للمبتدئين والمهندسين ذوي الخبرة اختيار تقنية الاتصال اللاسلكي التي تتوافق فعليًا مع احتياجات مشروع Arduino.


Leave a comment
You must be logged in to post a comment.