


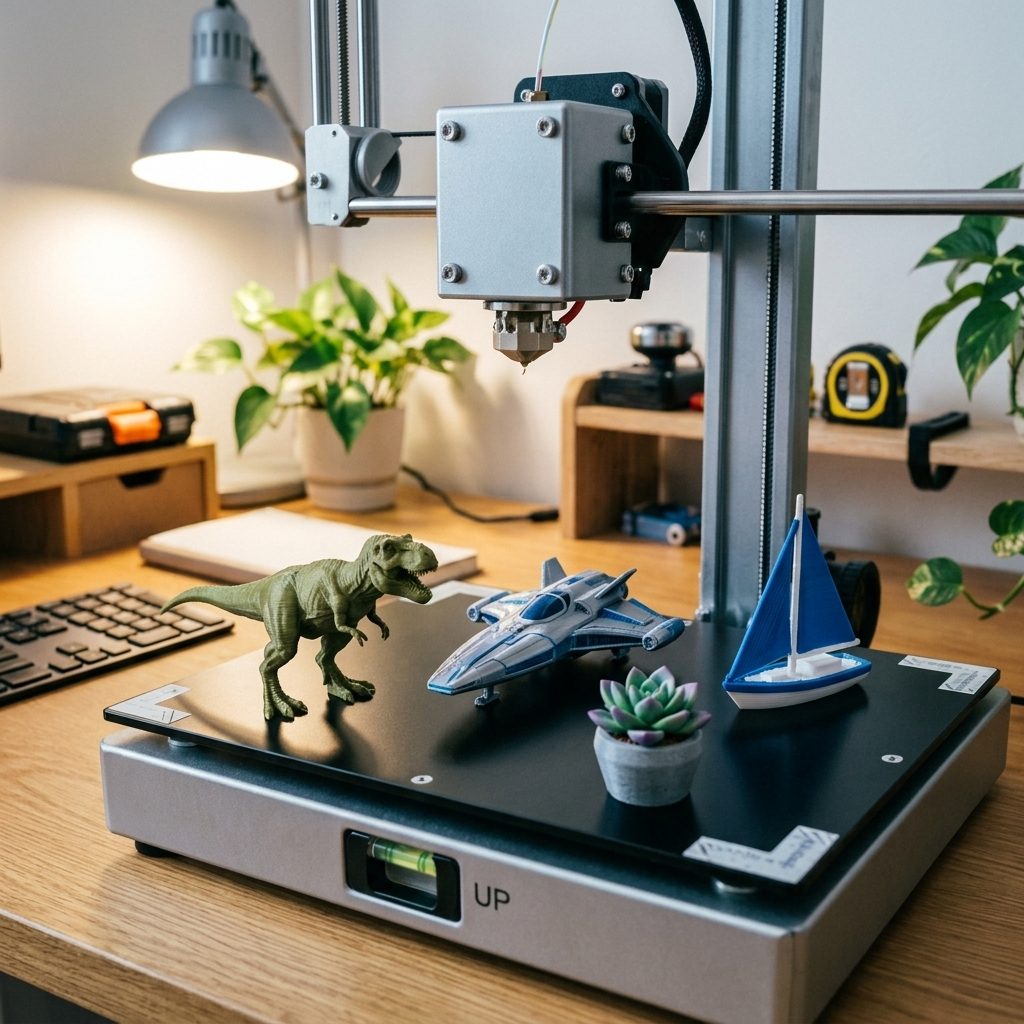
3D Printers for Beginners
Contents List
- Introduction.
- What Is a 3D Printer?
- How Does a 3D Printer Work?
- 3D Printing Technologies
- FDM vs. Resin: Which Is Better for Beginners?
- Main Parts of a 3D Printer.
- 3D Printing Materials.
- Important 3D Printer Specifications.
- How to Choose a 3D Printer for Beginners?
- Essential 3D Printing Software.
- How to Set Up a 3D Printer?
- How to Make Your First 3D Print?
- Basic 3D Printing Settings.
- 3D Printer Calibration.
- Common 3D Printing Problems and Solutions.
- 3D Printer Maintenance.
- 3D Printing Safety.
- Where to Find 3D Models?
- Beginner-Friendly 3D Printing Projects.
- How Much Does 3D Printing Cost?
- Frequently Asked Questions.
- Conclusion.
Reading Time is 20 minute
Introduction
3D printers have changed the way people create physical objects, making it possible to turn a digital design into a real item layer by layer. Unlike traditional printers that put ink on paper, 3D printers use materials such as plastic filament or liquid resin to build three-dimensional objects.
Today, 3D printers are used for a wide range of purposes, including prototyping, education, product development, home projects, replacement parts, and creative hobbies. As 3D printing technology has become more accessible, beginners can now find printers designed to be easier to set up and operate.
However, choosing and using a 3D printer for the first time can be confusing. Different printer types, materials, specifications, software, and settings all affect the printing process and final results.
This guide to 3D printers for beginners explains the essential concepts you need to get started. It covers how 3D printers work, the main types and components, printing materials, how to choose and set up your first printer, basic settings, calibration, maintenance, safety, and common printing problems.

What Is a 3D Printer?
A 3D printer is a machine that creates a three-dimensional physical object from a digital design. It does this by adding material layer by layer until the complete object is formed.
The process starts with a digital 3D model. You can create the model using 3D design or CAD software, or download an existing model from an online 3D model library.

Before printing, the model is processed using slicer software. The slicer divides the model into many thin layers and creates instructions that tell the printer how to produce each layer.
Unlike a traditional printer, which prints on a flat surface, a 3D printer creates objects with length, width, and height. Depending on the printer technology, it may use plastic filament, liquid resin, or other specialized materials.
3D printers can create many different objects, including prototypes, toys, decorations, tools, organizers, replacement parts, and custom components.
How Does a 3D Printer Work?
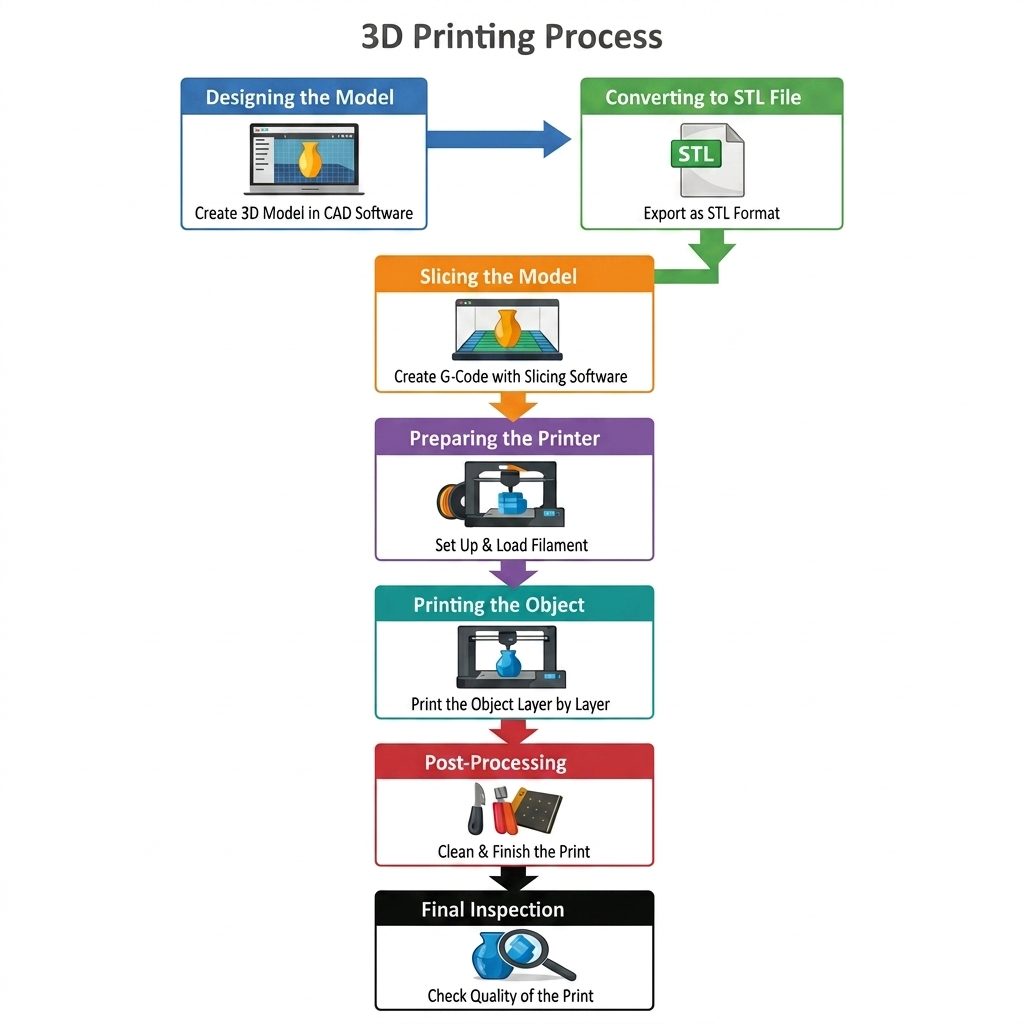
Although different 3D printers use different technologies, the basic process is similar: a digital model is converted into instructions, and the printer builds the object layer by layer.
The process usually follows these steps:
- Create or download a 3D model: Start with a digital model of the object you want to print.
- Prepare the model: Open the model in slicer software and select the appropriate printer and material.
- Slice the model: The software divides the model into thin layers and generates printer instructions.
- Prepare the printer: Load the required filament or resin and make sure the printer is ready.
- Start printing: The printer follows the instructions and creates each layer.
- Build the object: Thousands of layers can eventually form the complete three-dimensional object.
- Finish the print: Remove the object from the printer and perform any required cleaning or post-processing.
For example:
- An FDM printer heats plastic filament until it becomes soft enough to flow through a nozzle.
- The nozzle moves across the print area and deposits the material in precise patterns. Once one layer is completed, the printer moves to the next layer.
- Resin printers work differently. They use light to cure liquid resin into solid material, building the object one layer at a time.
- The quality of the final print depends on several factors, including the printer, material, model design, temperature, layer height, print speed, and other printing settings.
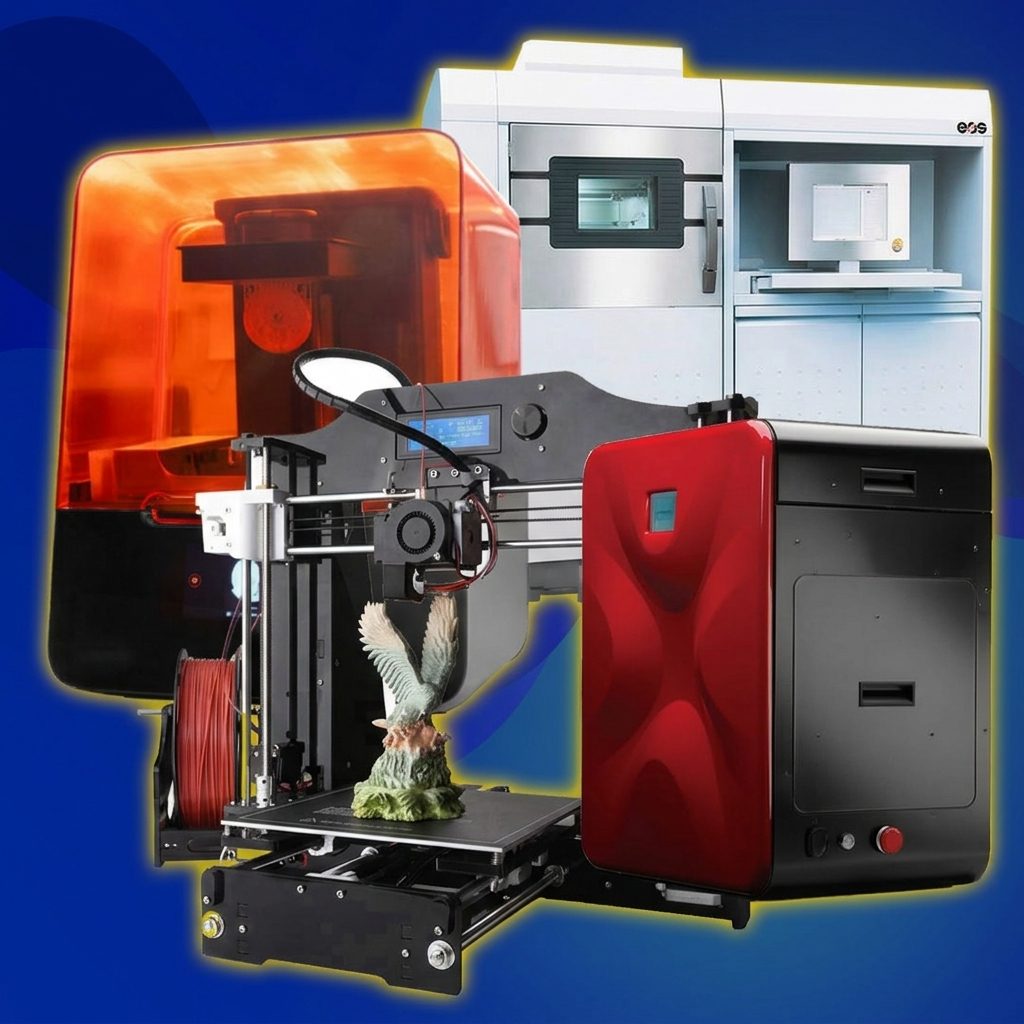
3D Printing Technologies
| No. | Technology / Method | Main Category | Explanation |
|---|---|---|---|
| 1 | Fused Deposition Modeling (FDM) / Fused Filament Fabrication (FFF) | Material Extrusion | FDM/FFF is the most familiar 3D printing technology for beginners. A thermoplastic filament is fed into a heated nozzle, where it melts and is deposited layer by layer. Common materials include PLA, PETG, ABS, and TPU. The technology is popular because printers and materials are relatively affordable and easy to use. It is widely used for hobbies, education, prototyping, and functional parts. Its main limitations are visible layer lines and moderate surface quality compared with resin printing. |
| 2 | Stereolithography (SLA) | Vat Photopolymerization | SLA uses a vat filled with liquid photopolymer resin. A UV laser selectively cures the resin layer by layer to create a solid object. SLA can produce highly detailed parts with smooth surfaces. It is commonly used for miniatures, prototypes, dental models, and jewelry applications. After printing, the object normally requires washing and UV post-curing. Resin handling also requires more care than filament-based printing. |
| 3 | Digital Light Processing (DLP) | Vat Photopolymerization | DLP also uses liquid photopolymer resin, but it cures resin using projected light rather than a moving laser. A complete layer can be exposed at once, allowing relatively fast printing. DLP can produce highly detailed objects with good surface quality. It is widely used for dental models, jewelry, prototypes, and small detailed components. Like SLA, the printed parts usually require washing and post-curing. |
| 4 | Selective Laser Sintering (SLS) | Powder Bed Fusion | SLS uses a laser to selectively fuse powdered material layer by layer. Polymer powders, especially nylon, are commonly used. The surrounding unfused powder helps support the printed object, reducing the need for separate support structures. SLS is suitable for strong and complex functional parts. It is widely used for professional prototyping and industrial production. The equipment is generally more expensive than desktop FDM printers. |
| 5 | Multi Jet Fusion (MJF) | Powder-Based Additive Manufacturing | MJF uses layers of polymer powder combined with specially deposited agents and energy to form solid parts. It can efficiently produce detailed and strong functional components. The technology is particularly useful for producing multiple parts in one manufacturing cycle. MJF is commonly used for prototypes and production components. It is mainly found in professional and industrial environments rather than beginner desktop workshops. |
| 6 | Material Jetting / Inkjet 3D Printing | Material Jetting | Material Jetting works similarly to an inkjet printer, but it deposits tiny droplets of build material instead of ink. The deposited material is usually cured immediately using UV light. This technology can produce highly detailed objects with smooth surfaces. Some systems can also print multiple materials in the same object. It is commonly used for prototypes, medical models, and detailed product models. PolyJet is a well-known example of this technology. |
| 7 | Selective Laser Melting (SLM) | Powder Bed Fusion | SLM is mainly used for manufacturing complex metal parts. A thin layer of metal powder is spread across the build area, and a powerful laser selectively melts the required regions. The process repeats layer by layer until the part is complete. SLM can produce strong and highly complex components. It is widely used in aerospace, medical, automotive, and advanced engineering applications. The equipment requires specialized facilities and is significantly more expensive than consumer 3D printers. |
| 8 | Direct Metal Laser Sintering (DMLS) | Powder Bed Fusion | DMLS is a metal powder-based technology that uses a laser to selectively fuse metal particles. It enables the production of complex metal geometries that may be difficult to manufacture using conventional machining. The technology is useful for aerospace, medical, and engineering components. Complex internal structures and lightweight designs can also be produced. Post-processing, including support removal and finishing, is often required. DMLS is closely related to other metal Powder Bed Fusion technologies. |
| 9 | Binder Jetting | Binder Jetting | Binder Jetting creates objects by selectively depositing a liquid binding agent onto layers of powder. The powder may consist of metal, sand, ceramic, or other materials. The printed part usually requires additional processing after printing. Metal parts commonly undergo sintering to achieve their final strength and density. Binder Jetting can be useful for producing complex parts efficiently. It is primarily used in industrial manufacturing applications. |
| 10 | Electron Beam Melting (EBM) | Powder Bed Fusion | EBM uses an electron beam instead of a laser to selectively melt metal powder. The printing process takes place in a vacuum environment. The technology is particularly suitable for high-performance metal components. Titanium and other advanced metals are important application areas. EBM is used in industries such as aerospace and medical manufacturing. The equipment is highly specialized and expensive. |
| 11 | Directed Energy Deposition (DED) | Directed Energy Deposition | DED deposits material while simultaneously applying focused thermal energy. The material may be supplied as metal powder or metal wire. A laser, electron beam, or other energy source melts the material during deposition. DED is particularly useful for repairing damaged metal components. It can also manufacture relatively large industrial parts. The technology is mainly used in aerospace, heavy industry, and advanced manufacturing. |
| 12 | Laminated Object Manufacturing (LOM) | Sheet Lamination | LOM creates objects by bonding thin sheets of material together. Each layer is cut into the required shape before the next layer is added. Depending on the system, paper, plastic, or other sheet materials can be used. The object is gradually formed through the stacking of many layers. LOM differs significantly from extrusion, resin, and powder-based technologies. It is mainly used in specialized applications rather than general consumer printing. |
| 13 | Selective Deposition Lamination (SDL) | Sheet Lamination | SDL is a sheet-based additive manufacturing method that selectively bonds successive layers of material. The layers are shaped to gradually create the final three-dimensional object. Some SDL systems use paper-based materials and can produce full-color models. The technology is less widespread than FDM, SLA, and SLS. It is mainly associated with specialized printing applications. SDL belongs to the broader Sheet Lamination family. |
| 14 | Ultrasonic Additive Manufacturing (UAM) | Sheet Lamination | UAM is a specialized additive manufacturing technology that joins thin layers of metal using ultrasonic energy. Unlike many metal printing technologies, it does not primarily depend on completely melting the material. Additional machining can be combined with the additive manufacturing process. UAM is useful for specialized metal structures and complex engineering applications. It is mainly used in advanced industrial environments. |
| 15 | Continuous Liquid Interface Production (CLIP) | Vat Photopolymerization | CLIP is an advanced resin-based 3D printing technology. It uses controlled light and oxygen to continuously form objects from liquid photopolymer resin. The process can reduce the traditional stop-and-start nature of layer-by-layer printing. This allows high-speed production in suitable applications. CLIP can produce detailed parts with smooth surfaces. It is primarily used in professional and industrial applications. |
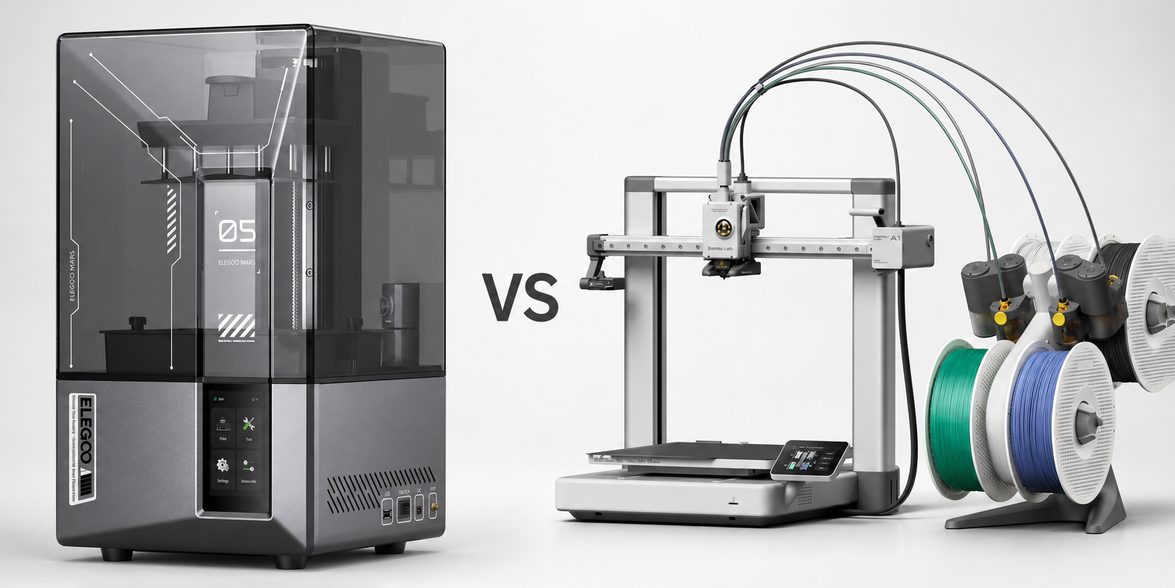
FDM vs. Resin: Which Is Better for Beginners?
- There is no single best choice for everyone. FDM is often a good starting point for beginners who want to make household objects, functional parts, tools, or larger models.
- Resin printing may be a better choice for someone who prioritizes fine detail and smooth surfaces, such as when making small miniatures or highly detailed models.
- The best choice depends on what you want to print, your budget, the materials you want to use, and how much setup and post-processing you are comfortable with.
Main Parts of a 3D Printer
- Understanding the main parts of a 3D printer makes it easier to use, maintain, and troubleshoot the machine.
- Although designs vary between models, most 3D printers have several basic components.
Print Bed
- The print bed, also called the build plate, is the surface where the object is printed. The first layer must stick properly to the bed for the print to remain stable.
- Some printers have a heated bed. Heating the surface can improve adhesion and reduce problems such as warping with certain materials.
Nozzle
- The nozzle is the small opening through which melted filament is deposited on an FDM printer. Nozzle size affects printing speed, detail, and the amount of material deposited.
- A common nozzle size is around 0.4 mm, which provides a good balance between detail and printing speed.
Extruder
- The extruder controls the movement of filament into the hotend. It uses gears or other mechanisms to push the filament forward or retract it when necessary.
- Some printers use a direct-drive extruder, while others use a Bowden system, where the extruder is positioned away from the hotend.
Hotend
- The hotend is the part that heats the filament to the required temperature so it can flow through the nozzle.
- It usually contains a heater, temperature sensor, and other components that control the temperature.
Motion System
- The motion system moves the print head, print bed, or both along the printer’s axes. Motors, belts, rails, lead screws.
- Other mechanical components work together to position the nozzle accurately.
Cooling Fans
- Fans help control temperature during printing.
- One fan may cool the hotend, while another can cool the freshly deposited plastic.
- Proper cooling can improve print quality and help maintain the correct operating temperature.
Frame
- The frame provides the printer with its structure and keeps the moving components aligned.
- A stable frame can help reduce unwanted movement and improve print consistency.
Control System
- The electronics and control board manage the printer’s motors, heaters, sensors, fans, and other functions.
- Users interact with the printer through a screen, buttons, touchscreen, or sometimes a computer or mobile application.
3D Printing Materials
3D printers use different materials depending on the printing technology.
Choosing the right material is important because it affects the object’s strength, flexibility, appearance, durability, and printing requirements.
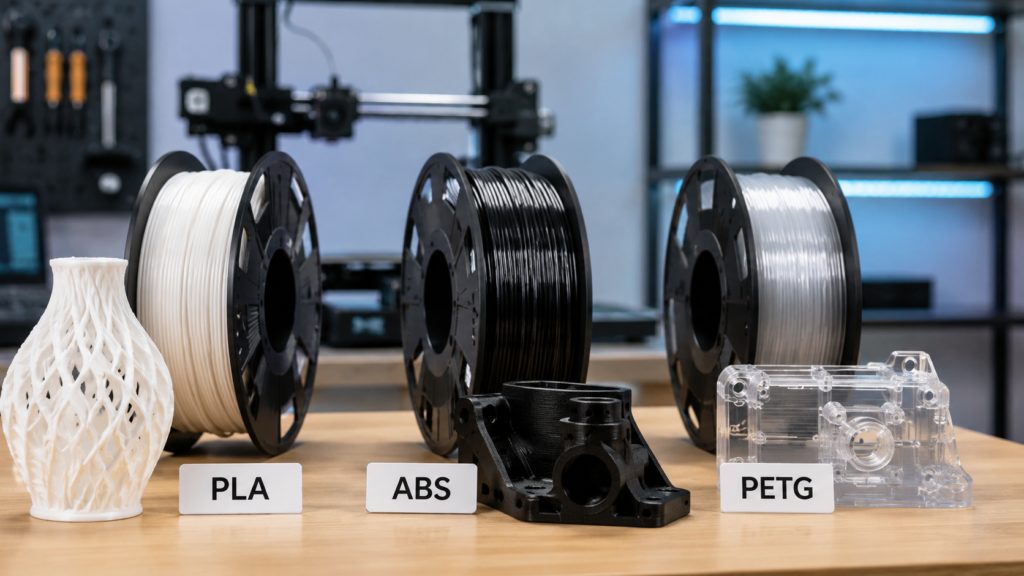
PLA
- PLA (Polylactic Acid) is one of the most popular materials for beginners. It is relatively easy to print, produces good-looking parts, and is available in many colors.
- PLA is suitable for decorative objects, models, prototypes, organizers, and many general-purpose projects. However, it is not the best choice for applications that require high heat resistance.
PETG
- PETG provides a useful combination of strength, durability, and relatively easy printing.
- It is often used for functional parts and objects that need more resistance than typical PLA prints.
ABS and ASA
- ABS and ASA can provide good strength and higher temperature resistance than PLA.
- However, they can be more difficult to print and may require controlled printing conditions and good ventilation.
- ASA is particularly useful for some outdoor applications because it has better resistance to weather and UV exposure than many common filaments.
TPU
- TPU is a flexible material that can produce rubber-like parts. It can be useful for grips, seals, protective covers, flexible hinges, and similar applications.
- Flexible materials can require different printer settings and may be more challenging for beginners to print successfully.
Resin
- Resin printers use liquid photopolymer resin. Resin can produce highly detailed models with smooth surfaces, making it popular for miniatures and other small, detailed objects.
- However, liquid resin requires careful handling. Uncured resin should be handled according to the manufacturer’s safety instructions, and printed parts normally require washing and curing.
How to Choose a Material?
- Choose the material based on what the finished object needs to do.
- Consider factors such as strength, flexibility, temperature resistance, appearance, outdoor durability, ease of printing, and safety requirements.
- For many beginners using an FDM printer, PLA is a practical material for learning the basics.
Important 3D Printer Specifications
| Parameter | What it tells you | Why it matters |
|---|---|---|
| Build volume | Maximum printable size | Determines what size objects you can make |
| Layer height | Thickness of each layer | Affects detail and print time |
| Nozzle diameter | Size of the nozzle opening | Affects detail and material flow |
| Print speed | How quickly the printer can move/print | Affects production time |
| Accuracy | How closely dimensions are reproduced | Important for precise parts |
| Nozzle temperature | Maximum/working hot-end temperature | Determines material compatibility |
| Bed temperature | Maximum/working build-plate temperature | Helps with adhesion and material compatibility |
| Materials | Filaments/resins the printer supports | Determines possible applications |
| Extruder type | How filament is fed | Affects material handling |
| Bed leveling | Manual or automatic leveling system | Affects first-layer quality |
| Connectivity | USB, Wi-Fi, Ethernet, etc. | Determines how files are transferred |
| Enclosure | Whether the printer is enclosed | Helps with environmental control and some materials |
| Noise level | Operating sound | Important for home/office use |
| Power requirements | Electrical requirements | Important for installation and energy use |
| Safety features | Protection systems | Reduces operational risks |
How to Choose a 3D Printer for Beginners?
Choosing your first 3D printer does not necessarily mean buying the fastest or most expensive model.
The best printer is the one that matches your projects, budget, materials, and experience level.
Decide What You Want to Print
- Think about the objects you plan to make. If you want household organizers, tools, toys, or functional parts, an FDM printer may be a practical choice.
- If you mainly want highly detailed miniatures or small models, a resin printer may be more appropriate.
Set a Realistic Budget
- Consider the total cost rather than only the printer’s purchase price.
- You may also need materials, tools, replacement parts, and other accessories.
Consider Ease of Use
Features such as automatic bed leveling, a straightforward interface, easy material loading, and good documentation can make the learning process easier.
Check Build Volume
- Make sure the printer is large enough for the objects you want to create.
- A very large printer is not necessary if you mainly plan to print small objects.
Consider Material Compatibility
- Check which materials the printer can reliably handle.
- If you plan to move beyond PLA, make sure the printer has the required temperature range and hardware.
Look at Reliability and Support
- A beginner-friendly printer should be reasonably reliable and have accessible documentation, replacement parts, and technical support.
- An active user community can also be helpful when learning how to solve problems.
Avoid Choosing Based Only on Specifications
- A printer with extremely high speed or resolution may not necessarily provide the best beginner experience.
- Reliability, ease of use, print quality, safety, and support are often more important when learning.
Essential 3D Printing Software
Hardware is only one part of 3D printing.
You also need software to create, prepare, and manage your digital models.
3D Modeling Software
- 3D modeling or CAD software allows you to create your own digital objects.
- Beginners can start with simple modeling tools and gradually move to more advanced CAD software as their skills develop.
- The software you choose depends on whether you want to create simple shapes, artistic models, or precise mechanical parts.
Slicer Software
- A slicer converts a 3D model into instructions that the printer can follow.
- It divides the model into layers and calculates the printer’s movements, temperatures, speeds, and material deposition.
- The slicer is one of the most important pieces of software in the 3D printing workflow.
Important Slicer Settings
Beginners should become familiar with settings such as:
- Layer height
- Infill
- Wall thickness
- Print speed
- Nozzle temperature
- Bed temperature
- Retraction
- Supports
You do not need to understand every setting immediately. Start with the basic recommended profile for your printer and material, then learn how individual settings affect the final print.
3D Model File Formats
- Common formats include STL, 3MF, and OBJ. STL is widely supported, while 3MF can store additional information about a model and printing project.
Where Software Fits Into the Printing Process
The basic workflow is:
Create or download a 3D model → Open it in a slicer → Choose printer and material settings → Slice the model → Transfer the file to the printer → Start printing.
- Learning this workflow is one of the most important steps for a beginner because the printer, material, model, and software settings all work together to determine the final result.
How to Set Up a 3D Printer?
Setting up a 3D printer correctly is an important first step toward getting successful prints. The exact procedure varies by printer model, so beginners should always follow the manufacturer’s instructions.
Start by placing the printer on a stable, level surface with enough space around it for ventilation and maintenance. Assemble any components that were shipped separately, then connect the required cables and power the printer on.
Next, check that the print bed, nozzle, and moving parts are installed correctly. Make sure the belts, screws, and other mechanical components are secure and can move freely.
For an FDM printer, load the appropriate filament and make sure it feeds correctly through the extruder and nozzle. For a resin printer, follow the manufacturer’s instructions for installing the resin vat and preparing the build plate.
Many modern printers provide automatic or assisted bed leveling. If your printer requires manual leveling, adjust the bed according to the manufacturer’s instructions.
Before starting a large project, run a small test print. This allows you to check that the printer is working correctly and that the first layer adheres properly to the build surface.
How to Make Your First 3D Print?
Making your first print involves several basic steps, from choosing a digital model to removing the finished object.
1. Choose a 3D Model
- Start with a simple model that is suitable for beginners.
- You can download an existing model or create your own using 3D modeling software.
2. Open the Model in Slicer Software
- Import the model into your slicer.
- Select your printer, material, and an appropriate printing profile.
3. Adjust Basic Settings
- For your first print, it is usually best to use the manufacturer’s or slicer’s recommended settings.
- Avoid changing many settings until you understand what each one does.
4. Slice the Model
- The slicer converts the 3D model into layers and generates the instructions required by the printer.
- Preview the result before sending it to the printer.
5. Prepare the Printer
- Make sure the correct material is loaded, the print surface is clean, and the printer is properly calibrated.
6. Start the Print
- Send the sliced file to the printer and start the job.
- Watch the beginning of the print, especially the first layer.
7. Check the First Layer
- The first layer should stick firmly to the print bed and form a consistent pattern.
- If it does not adhere correctly, stop the print and solve the problem before continuing.
8. Remove the Finished Print
- After the print is complete and has cooled when appropriate, carefully remove it from the build surface.
- Resin prints require additional washing and curing according to the resin manufacturer’s instructions.
Basic 3D Printing Settings
3D printer settings control how the machine creates each layer.
Understanding the most important settings helps beginners improve print quality without changing too many parameters at once.
Layer Height
- Layer height determines the thickness of each printed layer.
- Smaller layers can produce smoother surfaces and finer details but usually increase printing time.
Infill
- Infill is the internal structure inside a printed object.
- A higher infill percentage generally creates a heavier and potentially stronger part, while lower infill uses less material and reduces printing time.
Wall Thickness
- Walls or perimeters form the outer structure of the object.
- Increasing the number of walls can improve strength and durability.
Print Speed
- Print speed determines how quickly the printer moves while printing.
- Higher speeds can reduce printing time, but excessive speed may reduce quality or reliability.
Nozzle Temperature
- The nozzle temperature controls how the filament is heated.
- Different materials require different temperatures, so beginners should follow the material manufacturer’s recommended range.
Bed Temperature
- The bed temperature can affect first-layer adhesion and warping.
- The appropriate temperature depends on the printing material and printer.
Supports
- Supports are temporary structures used to hold up parts of a model that cannot be printed reliably in mid-air.
- They are removed after printing.
Retraction
- Retraction pulls filament back slightly when the nozzle moves between different areas.
- Correct retraction settings can help reduce stringing.
- Beginners should start with a proven printer and material profile, then make one change at a time when troubleshooting or improving a print.
3D Printer Calibration
- Calibration means adjusting the printer so that its mechanical movement, material flow, and other functions operate correctly.
- Proper calibration can improve print quality, accuracy, and reliability.
Bed Leveling
- The print bed needs to be positioned correctly relative to the nozzle.
- A level or properly compensated bed helps the first layer adhere evenly.
Z-Offset
- The Z-offset determines the distance between the nozzle and the print surface at the start of printing.
- If the nozzle is too high, the filament may not stick properly. If it is too low, the nozzle can press excessively against the bed.
Extrusion or Flow Calibration
- This calibration helps ensure that the printer deposits approximately the intended amount of material.
- Incorrect material flow can cause weak parts, gaps, excessive material, or dimensional inaccuracies.
Temperature Calibration
- Different materials print best at different temperatures.
- A temperature test can help identify a suitable range for a particular filament or resin.
Mechanical Calibration
- Belts, rails, screws, and other moving components should be properly adjusted.
- Loose or incorrectly tensioned components can contribute to problems such as layer shifting and inaccurate prints.
When Should You Calibrate?
- A new printer may require initial calibration, while some modern printers perform much of this process automatically.
- You may also need to recalibrate after changing important hardware, materials, or printer settings.
Common 3D Printing Problems and Solutions
3D printing problems are common when learning the technology.
The best approach is to identify the visible symptom and then check the simplest possible causes first.
Poor First-Layer Adhesion
- Problem: The first layer does not stick to the print bed.
- Possible causes: Incorrect bed leveling, incorrect Z-offset, dirty print surface, or unsuitable printing temperature.
- Possible solution: Clean the bed, check leveling and Z-offset, and verify the recommended material temperatures.
Warping
- Problem: The corners or edges of a print lift away from the bed.
- Possible causes: Temperature changes, poor bed adhesion, cooling, or material characteristics.
- Possible solution: Improve bed adhesion, use the recommended bed temperature, and consider an appropriate brim or other adhesion method.
Stringing
- Problem: Thin strands of filament appear between separate parts of the model.
- Possible causes: Retraction settings, temperature, or material characteristics.
- Possible solution: Adjust retraction and temperature gradually while keeping other settings unchanged.
Under-Extrusion
- Problem: The printer deposits less material than required, creating gaps or weak areas.
- Possible causes: Incorrect flow settings, a partially clogged nozzle, incorrect temperature, or filament-feeding problems.
- Possible solution: Check the nozzle, filament path, temperature, and extrusion settings.
Over-Extrusion
- Problem: Too much material is deposited, causing rough surfaces or excessive material buildup.
- Possible solution: Check the flow or extrusion settings and verify that the selected material profile is appropriate.
Layer Shifting
- Problem: One or more layers appear to move sideways compared with the layers below.
- Possible causes: Mechanical obstruction, loose belts, excessive printing speed, or motor-related issues.
- Possible solution: Check the printer’s moving components, belts, screws, and recommended speed settings.
Clogged Nozzle
- Problem: Filament does not come out of the nozzle correctly.
- Possible causes: Contamination, unsuitable temperature, or material buildup.
- Possible solution: Follow the printer manufacturer’s recommended nozzle-cleaning procedure.
Poor Surface Quality
- Problem: The finished model has rough surfaces, visible defects, or inconsistent layers.
- Possible causes: Incorrect settings, vibration, poor calibration, material issues, or mechanical problems.
- Possible solution: Check calibration, print speed, temperature, material condition, and mechanical components.
A useful troubleshooting rule is to change one setting at a time. This makes it easier to identify what actually solved the problem.
3D Printer Maintenance
Regular maintenance helps keep a 3D printer reliable and can extend the life of its components.
The required maintenance depends on the printer type and how frequently it is used.
Clean the Print Surface
- Keep the print bed clean and free from dust, grease, and leftover material.
- Use the cleaning method recommended by the printer manufacturer and build-surface material.
Check the Nozzle
- Inspect the nozzle regularly for material buildup or signs of blockage.
- A damaged or clogged nozzle can affect extrusion and print quality.
Inspect Belts and Moving Parts
- Check belts, rails, wheels, lead screws, and other moving components for looseness, wear, or contamination.
- Moving components should operate smoothly.
Check Screws and Connections
- Vibration can cause mechanical components to become loose over time.
- Periodically inspect important screws, connectors, and mounting points.
Lubricate Moving Components
- Some printers require lubrication of specific moving parts.
- Only use the lubricant and procedure recommended by the manufacturer.
Maintain the Extruder
- Keep the extruder and filament path clean and check for signs of wear.
- Problems in the extruder can cause inconsistent material flow.
Store Materials Properly
- Filament can absorb moisture from the air, which may affect print quality.
- Store moisture-sensitive materials in appropriate sealed containers.
- Resin should also be stored according to the manufacturer’s recommendations.
Keep Firmware and Software Updated
- Manufacturers may release firmware updates that improve performance, fix problems, or add features.
- Before updating, check the manufacturer’s instructions and compatibility requirements.
Follow a Maintenance Routine
- You do not need to perform every maintenance task after every print.
- Instead, follow the manufacturer’s recommended maintenance schedule and inspect the printer regularly, especially before important or long prints.
- Regular cleaning, inspection, and basic maintenance can prevent many problems before they affect your prints.
3D Printing Safety
- 3D printing is generally safe when the printer and materials are used correctly, but beginners should understand the potential hazards.
- A 3D printer contains hot surfaces, moving parts, electrical components, and, depending on the technology and material, substances that require careful handling.
Hot Components
- FDM printers use high temperatures to melt filament.
- The nozzle and heated print bed can become hot enough to cause burns.
- Avoid touching these components while they are hot and allow the printer to cool before performing maintenance.
Moving Parts
- The print head and other components move during operation.
- Keep fingers, clothing, cables, and other objects away from moving parts while the printer is running.
Ventilation
- Some printing materials can release particles or chemical emissions during printing.
- Use the printer in a suitable, well-ventilated area, particularly when working with materials known to produce stronger emissions.
Resin Safety
- Resin printing requires additional precautions.
- Uncured resin can irritate the skin and eyes, so avoid direct contact and follow the manufacturer’s safety instructions.
- Appropriate gloves and eye protection should be used when handling liquid resin.
- Printed resin parts generally need to be washed and fully cured before they are handled as finished objects.
Electrical and Fire Safety
- Place the printer on a stable surface and use appropriate electrical connections.
- Keep the area around the printer clear of flammable materials and follow the manufacturer’s safety recommendations.
- Do not modify electrical components unless you understand the risks and have the necessary technical knowledge.
Safe Printer Use
- Always read the printer and material manufacturer’s instructions.
- Beginners should understand the specific risks associated with their printer and materials rather than assuming that all 3D printers operate in the same way.
Where to Find 3D Models?
A 3D model is the digital design that tells the printer what object to create.
Beginners do not need to design every model themselves because many ready-made models are available online.
Downloading Ready-Made Models
- Online 3D model libraries provide thousands of designs, including tools, organizers, toys, decorations, replacement parts, and educational models.
- When choosing a model, check whether it is suitable for your printer, material, and available build volume.
Creating Your Own Models
- You can also create your own designs using 3D modeling or CAD software.
- This is especially useful when you need a customized object or a replacement part with specific dimensions.
Check the Model Before Printing
- Before sending a downloaded model to your printer, check its dimensions, orientation, required supports, and recommended settings.
- Previewing the model in your slicer can help identify potential problems.
Understand Model Licenses
- Not every downloadable model can be used for every purpose. Some models are available for personal use but prohibit commercial use or redistribution.
- Always check the model’s license and respect the creator’s usage requirements.
Beginner-Friendly 3D Printing Projects
Starting with simple projects is one of the best ways to learn 3D printing.
Small and uncomplicated models allow beginners to understand the printer and its settings without wasting large amounts of material or time.
Calibration Models
- Simple calibration models help you learn whether the printer is producing accurate and consistent results.
Phone Stands
- A phone stand is a useful beginner project because it is relatively simple while demonstrating how the printer creates functional objects.
Cable Organizers
- Cable clips and organizers are small, practical projects that can be printed relatively quickly.
Storage Boxes
- Simple boxes and containers help beginners practice dimensions, walls, infill, and other basic settings.
Keychains and Decorative Models
- Small decorative objects are useful for experimenting with different colors, shapes, and basic design techniques.
Household Replacement Parts
- Once you understand the basics, you can create simple replacement parts for household items.
- However, make sure the material and design are suitable for the intended application.
Progress to More Complex Projects
- Start with simple models and gradually increase the difficulty.
- As your skills improve, you can experiment with moving parts, mechanical components, custom designs, and more advanced materials.
How Much Does 3D Printing Cost?
The cost of 3D printing depends on the printer, materials, accessories, electricity, maintenance, and the type and number of objects you print.
Printer Cost
- The printer is usually the largest initial expense. FDM and resin printers are available at different price levels, with features and capabilities varying between models.
- A beginner should choose a printer based on their actual needs rather than simply buying the most expensive model.
Material Cost
- FDM printers require filament, while resin printers require liquid resin.
- The amount of material used depends on the size, infill, walls, supports, and number of objects printed.
Tools and Accessories
- You may also need basic tools and supplies for setup, cleaning, maintenance, and removing finished prints.
- Resin printing can require additional equipment for washing and curing printed parts.
Electricity
- 3D printers consume electricity while heating components, moving motors, and operating electronics.
- Electricity is usually only one part of the overall printing cost, but it should still be considered for frequent or long prints.
Failed Prints
- Failed prints are a normal part of learning 3D printing.
- They use material and electricity without producing a usable final object, so beginners should include some allowance for failed prints in their budget.
Maintenance and Replacement Parts
- Nozzle replacements, build surfaces, belts, and other components may eventually need maintenance or replacement.
- The frequency depends on the printer, materials, and amount of use.
Total Cost
- The true cost of 3D printing is therefore more than the purchase price of the printer.
- Before buying one, consider the printer, materials, tools, maintenance, electricity, and potential failed prints.
Frequently Asked Questions
Is 3D printing difficult for beginners?
- Modern 3D printers can be relatively easy to use, but beginners still need to learn basic setup, software, materials, and printing settings.
- Starting with simple projects makes the learning process easier.
Which type of 3D printer is best for beginners?
- For many beginners, an FDM printer is a practical starting point because it can print common materials such as PLA and is suitable for many general-purpose projects.
- Resin printers may be preferable when very fine details are the main priority.
What is the easiest 3D printing material to use?
- PLA is generally considered one of the easiest filament materials for beginners.
- It is widely available and can be printed on many consumer FDM printers.
How long does a 3D print take?
- Printing time varies depending on the object’s size, layer height, print speed, infill, supports, and printer.
- Small objects may take less than an hour, while larger or more detailed objects can take many hours.
Do I need to know 3D modeling?
- No. Beginners can download ready-made models and send them to a slicer.
- Learning 3D modeling becomes useful when you want to create customized designs or your own parts.
Is 3D printing safe at home?
- It can be used safely at home when appropriate precautions are followed.
- Users should consider ventilation, hot components, moving parts, electrical safety, and the specific requirements of the materials they use.
Does a 3D printer require maintenance?
- Yes. Regular cleaning, inspection, and occasional replacement of worn components help maintain print quality and reliability.
Can a 3D printer make strong parts?
- Yes. Some 3D-printed parts can be strong and functional.
- Strength depends on the material, design, layer orientation, wall thickness, infill, printing settings, and intended application.
Can I design my own 3D models?
- Yes: You can use CAD or 3D modeling software to create your own designs.
- Beginners can start with simple shapes and gradually learn more advanced modeling techniques.
Conclusion
3D printing allows beginners to turn digital designs into real physical objects by building them layer by layer. Although the technology may seem complicated at first, understanding the basic workflow makes it much easier to get started.
The most important steps are choosing a suitable printer, selecting the right material, learning how slicer software works, setting up and calibrating the printer correctly, and understanding basic printing settings.
Beginners should start with simple projects and use recommended settings before experimenting with advanced techniques. It is also important to follow proper safety procedures and perform regular maintenance.
With practice, you can gradually move from downloading simple models to creating your own designs and producing more complex functional parts. The key is to learn one step at a time, understand why problems occur, and use each print as an opportunity to improve your skills.
الطابعات ثلاثية الأبعاد للمبتدئين
قائمة المحتويات
- المقدمة.
- ما هي الطابعة ثلاثية الأبعاد؟
- كيف تعمل الطابعة ثلاثية الأبعاد؟
- تقنيات الطباعة ثلاثية الأبعاد
- طابعات FDM أم الطابعات الراتنجية: أيهما أفضل للمبتدئين؟
- الأجزاء الرئيسية للطابعة ثلاثية الأبعاد.
- مواد الطباعة ثلاثية الأبعاد.
- أهم مواصفات الطابعة ثلاثية الأبعاد.
- كيف تختار طابعة ثلاثية الأبعاد للمبتدئين؟
- البرامج الأساسية للطباعة ثلاثية الأبعاد.
- كيف تقوم بإعداد الطابعة ثلاثية الأبعاد؟
- كيف تنفذ أول عملية طباعة ثلاثية الأبعاد؟
- إعدادات الطباعة ثلاثية الأبعاد الأساسية.
- معايرة الطابعة ثلاثية الأبعاد.
- مشكلات الطباعة ثلاثية الأبعاد الشائعة وحلولها.
- صيانة الطابعة ثلاثية الأبعاد.
- السلامة عند استخدام الطباعة ثلاثية الأبعاد.
- أين تجد نماذج ثلاثية الأبعاد؟
- مشروعات طباعة ثلاثية الأبعاد مناسبة للمبتدئين.
- كم تبلغ تكلفة الطباعة ثلاثية الأبعاد؟
- الأسئلة الشائعة.
- الخلاصة.
مدة القراءة: حوالي 20 دقيقة.
المقدمة
غيّرت الطابعات ثلاثية الأبعاد الطريقة التي يمكن من خلالها تصنيع الأشياء، حيث أصبح من الممكن تحويل التصميم الرقمي إلى جسم حقيقي يتم بناؤه طبقة بعد طبقة. وعلى عكس الطابعات التقليدية التي تضع الحبر على الورق، تستخدم الطابعات ثلاثية الأبعاد مواد مثل خيوط البلاستيك أو الراتنج السائل لإنشاء أجسام ثلاثية الأبعاد.
تُستخدم الطباعة ثلاثية الأبعاد اليوم في مجالات كثيرة، مثل النماذج الأولية، والتعليم، وتطوير المنتجات، والمشروعات المنزلية، وتصنيع قطع الغيار، والهوايات الإبداعية. ومع انتشار هذه التقنية وتطورها، أصبحت هناك طابعات مصممة خصيصًا لتكون أسهل في الإعداد والاستخدام بالنسبة للمبتدئين.
ومع ذلك، قد يبدو اختيار أول طابعة ثلاثية الأبعاد واستخدامها أمرًا محيرًا في البداية. فهناك أنواع مختلفة من الطابعات والمواد والمواصفات والبرامج والإعدادات، وكلها تؤثر في عملية الطباعة والنتيجة النهائية.
يشرح هذا الدليل أهم المفاهيم التي يحتاج إليها المبتدئ للبدء في عالم الطباعة ثلاثية الأبعاد، بداية من طريقة عمل الطابعة وأنواعها وأجزائها الأساسية، وصولًا إلى اختيار الطابعة والمواد المناسبة، والإعداد والمعايرة والصيانة والسلامة وحل المشكلات الشائعة.
ما هي الطابعة ثلاثية الأبعاد؟
الطابعة ثلاثية الأبعاد هي جهاز يقوم بتحويل تصميم رقمي إلى جسم حقيقي له طول وعرض وارتفاع. ويتم ذلك من خلال إضافة المادة تدريجيًا طبقة فوق طبقة حتى يكتمل الشكل المطلوب.
تبدأ العملية بوجود نموذج ثلاثي الأبعاد رقمي. ويمكنك تصميم هذا النموذج بنفسك باستخدام برامج التصميم ثلاثي الأبعاد أو برامج CAD، كما يمكنك تحميل نماذج جاهزة من مكتبات النماذج المتوفرة عبر الإنترنت.
قبل بدء الطباعة، تتم معالجة النموذج باستخدام برنامج يسمى Slicer. يقوم هذا البرنامج بتقسيم النموذج إلى طبقات رفيعة جدًا وإنشاء التعليمات التي تحتاج إليها الطابعة لتنفيذ كل طبقة.
وبينما تعمل الطابعة التقليدية على سطح مستوٍ، تستطيع الطابعة ثلاثية الأبعاد بناء أجسام كاملة بأبعاد ثلاثية. وقد تستخدم خيوطًا بلاستيكية أو راتنجًا سائلًا أو مواد أخرى، حسب نوع تقنية الطباعة المستخدمة.
يمكن للطابعات ثلاثية الأبعاد إنتاج العديد من الأشياء، مثل النماذج الأولية والألعاب والزينة والأدوات والمنظمات وقطع الغيار والمكونات المصممة حسب الطلب.
كيف تعمل الطابعة ثلاثية الأبعاد؟
على الرغم من اختلاف تقنيات الطباعة ثلاثية الأبعاد، فإن الفكرة الأساسية متشابهة: يتم تحويل النموذج الرقمي إلى تعليمات، ثم تقوم الطابعة ببناء الجسم طبقة بعد طبقة.
تمر عملية الطباعة عادةً بالمراحل التالية:
- إنشاء نموذج ثلاثي الأبعاد أو تحميله: تبدأ بالحصول على التصميم الرقمي للجسم الذي تريد طباعته.
- تجهيز النموذج: افتح النموذج في برنامج التقطيع واختر نوع الطابعة والمادة المناسبة.
- تقطيع النموذج: يقوم البرنامج بتحويل النموذج إلى طبقات وإنشاء تعليمات الطباعة.
- تجهيز الطابعة: قم بتحميل خيط الطباعة أو الراتنج وتأكد من أن الطابعة جاهزة للعمل.
- بدء الطباعة: تتبع الطابعة التعليمات وتقوم بتكوين كل طبقة.
- بناء الجسم: تتراكم آلاف الطبقات تدريجيًا لتكوين الجسم ثلاثي الأبعاد.
- إنهاء الطباعة: يتم إخراج النموذج وتنظيفه أو إجراء المعالجة المطلوبة بعد الطباعة.
مثال على طريقة العمل
- في طابعة FDM يتم تسخين خيط البلاستيك حتى يصبح قادرًا على التدفق عبر الفوهة.
- تتحرك الفوهة فوق منطقة الطباعة وتضع المادة وفق مسارات دقيقة، ثم تنتقل الطابعة إلى الطبقة التالية بعد اكتمال الطبقة الحالية.
- تعمل الطابعات الراتنجية بطريقة مختلفة، حيث تستخدم الضوء لتصلب الراتنج السائل وتحويله إلى طبقات صلبة.
- تعتمد جودة النتيجة النهائية على عوامل متعددة، مثل نوع الطابعة والمادة وتصميم النموذج ودرجة الحرارة وارتفاع الطبقة وسرعة الطباعة والإعدادات الأخرى.
تقنيات الطباعة ثلاثية الأبعاد
توجد العديد من التقنيات المستخدمة في الطباعة ثلاثية الأبعاد، وتختلف كل تقنية عن الأخرى في طريقة بناء النموذج والمواد المستخدمة ومستوى الدقة والتطبيقات المناسبة لها. وفيما يلي أهم تقنيات الطباعة ثلاثية الأبعاد، مرتبة بشكل تدريجي من التقنيات الأكثر شيوعًا وانتشارًا إلى التقنيات الأكثر تخصصًا واستخدامًا في المجالات الصناعية المتقدمة.
1. نمذجة الترسيب المنصهر (FDM / FFF)
الفئة الرئيسية: بثق المواد.
تُعد تقنية FDM، والمعروفة أيضًا باسم FFF، من أشهر تقنيات الطباعة ثلاثية الأبعاد وأسهلها للمبتدئين. تعتمد على تمرير خيط من البلاستيك الحراري إلى فوهة ساخنة تعمل على صهره ثم ترسيبه تدريجيًا على شكل طبقات متتابعة حتى يتكون المجسم بالكامل. ومن أشهر المواد المستخدمة معها PLA وPETG وABS وTPU. وتتميز هذه التقنية بانخفاض تكلفة الطابعات والخامات وسهولة تشغيلها، لذلك تنتشر في المشاريع المنزلية والتعليمية والنماذج الأولية وتصنيع القطع الوظيفية. ومن أبرز عيوبها ظهور خطوط الطبقات على سطح القطعة وانخفاض نعومة السطح مقارنة ببعض تقنيات الطباعة بالراتنج.
2. الطباعة المجسمة بالليزر (SLA)
الفئة الرئيسية: المعالجة الضوئية للراتنج داخل الحوض.
تعتمد تقنية SLA على حوض يحتوي على راتنج سائل حساس للضوء، حيث يستخدم شعاع ليزر فوق بنفسجي لتصلّب أجزاء محددة من الراتنج طبقة بعد أخرى حتى يتشكل المجسم. وتتميز هذه التقنية بإنتاج تفاصيل دقيقة جدًا وأس surfaces ناعمة، مما يجعلها مناسبة للنماذج المصغرة والنماذج الأولية ونماذج الأسنان وتطبيقات المجوهرات. وبعد انتهاء الطباعة، تحتاج القطعة عادةً إلى غسلها ثم تعريضها للأشعة فوق البنفسجية لإتمام المعالجة. كما يتطلب التعامل مع الراتنج عناية أكبر مقارنة بخيوط الطباعة البلاستيكية.
3. المعالجة بالضوء الرقمي (DLP)
الفئة الرئيسية: المعالجة الضوئية للراتنج داخل الحوض.
تستخدم تقنية DLP الراتنج السائل نفسها المستخدمة في تقنيات الطباعة الضوئية، لكنها تعتمد على جهاز إسقاط ضوئي لمعالجة الراتنج بدلًا من تحريك الليزر نقطة بنقطة. ويمكن تعريض طبقة كاملة للضوء في وقت واحد، مما يساعد على تسريع عملية الطباعة في العديد من التطبيقات. وتوفر هذه التقنية دقة عالية وجودة سطح جيدة، ولذلك تستخدم في نماذج الأسنان والمجوهرات والنماذج الأولية والقطع الصغيرة التي تتطلب تفاصيل دقيقة. وكما هو الحال مع SLA، تحتاج القطع المطبوعة عادةً إلى الغسل والمعالجة اللاحقة بالأشعة فوق البنفسجية.
4. التلبيد الانتقائي بالليزر (SLS)
الفئة الرئيسية: دمج المسحوق بطبقات باستخدام الطاقة.
تعتمد تقنية SLS على استخدام الليزر لدمج مسحوق المادة بشكل انتقائي طبقة بعد أخرى حتى يتكون الجزء المطلوب. وتستخدم مساحيق البوليمرات، وخاصة النايلون، على نطاق واسع في هذه التقنية. ومن أهم مزاياها أن المسحوق غير المنصهر المحيط بالقطعة يعمل كدعامة طبيعية، مما يقلل الحاجة إلى هياكل دعم منفصلة. وتناسب SLS تصنيع القطع الوظيفية القوية والأشكال الهندسية المعقدة، وتستخدم في النماذج الأولية الاحترافية والإنتاج الصناعي. إلا أن تكلفتها عادةً أعلى بكثير من طابعات FDM المكتبية.
5. تقنية الانصهار متعدد النفاثات (MJF)
الفئة الرئيسية: التصنيع الإضافي باستخدام مسحوق البوليمر.
تعتمد تقنية MJF على بناء طبقات من مسحوق البوليمر مع وضع مواد مساعدة بشكل دقيق على مناطق محددة، ثم استخدام مصدر للطاقة لتحويل هذه المناطق إلى أجزاء صلبة. وتتميز بقدرتها على إنتاج قطع قوية ودقيقة بكفاءة عالية، كما تسمح بتصنيع عدد كبير من القطع ضمن دورة إنتاج واحدة. لذلك تستخدم في النماذج الأولية والقطع الوظيفية والإنتاج بكميات محدودة أو متوسطة. وتنتشر هذه التقنية بشكل أساسي في البيئات المهنية والصناعية، وليست من التقنيات المعتادة في ورش الطباعة المنزلية للمبتدئين.
6. الطباعة بالنفث المادي (Material Jetting)
الفئة الرئيسية: ترسيب المواد بالنفث.
تعمل تقنية Material Jetting بطريقة تشبه الطابعات النافثة للحبر، ولكنها بدلًا من رش الحبر تقوم بترسيب قطرات صغيرة جدًا من مادة البناء في أماكن محددة. ويتم عادةً تصلّب المادة مباشرة باستخدام الأشعة فوق البنفسجية. وتتميز هذه التقنية بإنتاج مجسمات عالية الدقة ذات أسطح ناعمة، كما تستطيع بعض الأنظمة استخدام أكثر من مادة داخل القطعة نفسها. وتستخدم في النماذج الأولية والنماذج الطبية والمجسمات التفصيلية للمنتجات، وتُعد تقنية PolyJet من أشهر الأمثلة عليها.
7. الانصهار الانتقائي بالليزر (SLM)
الفئة الرئيسية: دمج مسحوق المعادن بطبقات.
تُستخدم تقنية SLM بشكل أساسي لتصنيع الأجزاء المعدنية المعقدة. تبدأ العملية بنشر طبقة رقيقة من مسحوق المعدن على منصة البناء، ثم يقوم ليزر عالي القدرة بإذابة المناطق المطلوبة بدقة. وتتكرر العملية طبقة بعد أخرى حتى اكتمال الجزء. وتتيح هذه التقنية تصنيع مكونات معدنية قوية ومعقدة هندسيًا، ولذلك تستخدم في صناعات الطيران والفضاء والطب والسيارات والهندسة المتقدمة. وتتطلب أنظمتها معدات متخصصة وبيئة تشغيل مناسبة، كما أن تكلفتها أعلى بكثير من الطابعات ثلاثية الأبعاد الاستهلاكية.
8. التلبيد المباشر بالليزر للمعادن (DMLS)
الفئة الرئيسية: دمج مسحوق المعادن بطبقات.
تعتمد تقنية DMLS على مسحوق معدني يتم دمجه بشكل انتقائي باستخدام الليزر لبناء القطعة طبقة بعد أخرى. وتتيح هذه الطريقة تصنيع أشكال معدنية معقدة يصعب إنتاجها باستخدام أساليب التصنيع التقليدية مثل التشغيل الميكانيكي. كما تسمح بإنشاء هياكل داخلية معقدة وتصميمات خفيفة الوزن، مما يجعلها مفيدة في تطبيقات الطيران والطب والهندسة. وغالبًا ما تحتاج القطع بعد الطباعة إلى عمليات معالجة إضافية، مثل إزالة الدعامات وتحسين تشطيب السطح. وترتبط DMLS ارتباطًا وثيقًا بتقنيات أخرى تعتمد على دمج مسحوق المعادن.
9. النفث الرابط (Binder Jetting)
الفئة الرئيسية: النفث الرابط.
تعمل تقنية Binder Jetting من خلال ترسيب مادة رابطة سائلة بشكل انتقائي فوق طبقات من المسحوق لتجميع جزيئاته وتشكيل المجسم تدريجيًا. ويمكن أن يتكون المسحوق من المعادن أو الرمل أو السيراميك أو مواد أخرى، بحسب النظام المستخدم. وغالبًا لا تكون القطعة جاهزة للاستخدام مباشرة بعد الطباعة، بل تحتاج إلى عمليات معالجة لاحقة. وفي حالة الأجزاء المعدنية، تُستخدم عملية التلبيد عادةً للوصول إلى القوة والكثافة المطلوبة. وتتميز هذه التقنية بإمكانية إنتاج أشكال معقدة بكفاءة، وتستخدم بصورة رئيسية في التطبيقات الصناعية.
10. الانصهار بحزمة الإلكترونات (EBM)
الفئة الرئيسية: دمج مسحوق المعادن بطبقات.
تستخدم تقنية EBM حزمة من الإلكترونات بدلًا من الليزر لإذابة مسحوق المعدن بشكل انتقائي. وتتم عملية التصنيع داخل بيئة مفرغة من الهواء، مما يسمح بمعالجة مواد معدنية مناسبة للتطبيقات عالية الأداء. ويُعد التيتانيوم وبعض المعادن المتقدمة من أهم المواد المستخدمة في هذه التقنية. وتستخدم EBM في مجالات مثل صناعة الطيران والفضاء والتصنيع الطبي، إلا أن معداتها متخصصة ومرتفعة التكلفة وتتطلب بيئة تشغيل مناسبة.
11. الترسيب الموجّه بالطاقة (DED)
الفئة الرئيسية: الترسيب الموجّه بالطاقة.
تعتمد تقنية DED على ترسيب المادة في الوقت نفسه الذي يتم فيه تطبيق مصدر حراري مركز لإذابتها ودمجها مع السطح. ويمكن تغذية المادة على شكل مسحوق معدني أو سلك معدني، بينما يستخدم الليزر أو حزمة الإلكترونات أو مصدر طاقة مناسب لإذابة المادة أثناء ترسيبها. وتتميز هذه التقنية بقدرتها على إصلاح الأجزاء المعدنية المتضررة، كما يمكن استخدامها لتصنيع مكونات صناعية كبيرة الحجم. وتنتشر بشكل خاص في صناعات الطيران والفضاء والصناعات الثقيلة ومجالات التصنيع المتقدمة.
12. تصنيع الأجسام بالصفائح المصفحة (LOM)
الفئة الرئيسية: تصفيح الصفائح.
تقوم تقنية LOM ببناء المجسم من خلال تجميع صفائح رقيقة من المواد وربطها معًا. يتم تشكيل كل طبقة أو قصها وفق الشكل المطلوب قبل إضافة الطبقة التالية، وبذلك يتكون المجسم تدريجيًا نتيجة تراكم عدد كبير من الطبقات. ويمكن أن تستخدم بعض الأنظمة الورق أو البلاستيك أو غيرهما من المواد الصفائحية. وتختلف هذه التقنية بشكل واضح عن تقنيات البثق والطباعة بالراتنج والطباعة المعتمدة على المساحيق، ولذلك تستخدم غالبًا في تطبيقات متخصصة بدلًا من الاستخدامات الاستهلاكية العامة.
13. التصفيح بالترسيب الانتقائي (SDL)
الفئة الرئيسية: تصفيح الصفائح.
تُعد SDL من تقنيات التصنيع الإضافي التي تعتمد على الصفائح، حيث يتم ربط طبقات متتالية من المادة وتشكيل كل طبقة وفق التصميم المطلوب حتى يكتمل المجسم ثلاثي الأبعاد. تستخدم بعض أنظمة SDL مواد تعتمد على الورق، ويمكنها إنتاج نماذج ملونة بالكامل. وعلى الرغم من إمكاناتها، فإن هذه التقنية أقل انتشارًا من FDM وSLA وSLS، وترتبط بشكل أكبر بتطبيقات الطباعة المتخصصة. وتندرج SDL ضمن العائلة الأوسع لتقنيات تصفيح الصفائح.
14. التصنيع الإضافي بالموجات فوق الصوتية (UAM)
الفئة الرئيسية: تصفيح الصفائح.
تُعد UAM تقنية متخصصة للتصنيع الإضافي، وتستخدم الطاقة الناتجة عن الموجات فوق الصوتية لربط طبقات رقيقة من المعادن معًا. وعلى عكس العديد من تقنيات الطباعة المعدنية الأخرى، لا تعتمد العملية بصورة أساسية على إذابة المعدن بالكامل، بل يتم الربط من خلال الاهتزازات فوق الصوتية والضغط المناسب. ويمكن دمج عمليات التشغيل الميكانيكي مع عملية الإضافة للحصول على الشكل النهائي المطلوب. وتستخدم UAM في تصنيع هياكل معدنية متخصصة وتطبيقات هندسية متقدمة، وتوجد بشكل رئيسي في البيئات الصناعية المتخصصة.
15. التصنيع المستمر عند الواجهة السائلة (CLIP)
الفئة الرئيسية: المعالجة الضوئية للراتنج داخل الحوض.
تُعد CLIP من تقنيات الطباعة ثلاثية الأبعاد المتقدمة التي تعتمد على الراتنج السائل، حيث تستخدم الضوء والتحكم في الأكسجين لتكوين المجسم بصورة مستمرة من مادة الراتنج الحساسة للضوء. ويساعد هذا الأسلوب على تقليل التوقفات المتكررة المرتبطة بالطباعة التقليدية طبقة بعد أخرى، مما يمكن أن يحقق سرعات إنتاج مرتفعة في التطبيقات المناسبة. كما تستطيع التقنية إنتاج قطع دقيقة ذات أسطح ناعمة. وتستخدم CLIP بصورة أساسية في التطبيقات المهنية والصناعية التي تتطلب سرعة ودقة وجودة تصنيع مرتفعة.
طابعات FDM أم الطابعات الراتنجية: أيهما أفضل للمبتدئين؟
- لا توجد إجابة واحدة تناسب الجميع، لأن الاختيار يعتمد على نوع المشروعات التي تريد تنفيذها.
- تُعد طابعات FDM خيارًا مناسبًا للمبتدئين الذين يرغبون في تصنيع أدوات وأجزاء عملية ومنتجات منزلية ونماذج كبيرة نسبيًا.
- قد تكون الطباعة بالراتنج أفضل لمن يهتم بالتفاصيل الدقيقة والأسطح الناعمة، خاصة عند تصنيع المجسمات الصغيرة.
- يعتمد الاختيار الأفضل على ما تريد طباعته وميزانيتك والمواد التي ترغب في استخدامها ومدى استعدادك للتعامل مع خطوات الإعداد والمعالجة بعد الطباعة.
الأجزاء الرئيسية للطابعة ثلاثية الأبعاد
- يساعدك فهم الأجزاء الأساسية للطابعة على استخدامها وصيانتها وحل المشكلات بصورة أسهل.
- على الرغم من اختلاف التصميم بين الطابعات، فإن معظمها يحتوي على مجموعة من المكونات الأساسية.
سرير الطباعة
- سرير الطباعة، أو لوحة البناء، هو السطح الذي يتم عليه تصنيع النموذج.
- يجب أن تلتصق الطبقة الأولى جيدًا بهذا السطح لضمان استقرار الطباعة.
- تحتوي بعض الطابعات على سرير مُسخن لتحسين الالتصاق وتقليل مشكلة الالتواء في بعض المواد.
الفوهة
- الفوهة هي الفتحة الصغيرة التي يخرج منها البلاستيك المنصهر في طابعات FDM.
- يؤثر قطر الفوهة في سرعة الطباعة ومستوى التفاصيل وكمية المادة الموضوعة.
- يُعد قطر 0.4mm من أكثر المقاسات شيوعًا لأنه يوفر توازنًا جيدًا بين التفاصيل وسرعة الطباعة.
وحدة تغذية الخيط
- تتحكم وحدة التغذية في حركة خيط الطباعة ودفعه نحو الجزء الساخن.
- قد تستخدم بعض الطابعات نظام الدفع المباشر Direct Drive، بينما تستخدم طابعات أخرى نظام Bowden.
الجزء الساخن
- الجزء الساخن هو المسؤول عن تسخين خيط الطباعة إلى درجة الحرارة المناسبة.
- يحتوي عادةً على عنصر تسخين ومستشعر حرارة ومكونات تساعد على التحكم في درجة الحرارة.
نظام الحركة
- يتحكم نظام الحركة في تحريك رأس الطباعة أو سرير الطباعة أو كليهما على محاور الطابعة.
- تعمل المحركات والسيور والقضبان والبراغي الميكانيكية معًا لتحديد موقع الفوهة بدقة.
مراوح التبريد
- تساعد المراوح في التحكم بدرجات الحرارة أثناء الطباعة.
- قد تقوم مروحة بتبريد الجزء الساخن، بينما تقوم أخرى بتبريد البلاستيك بعد خروجه من الفوهة.
- يساعد التبريد المناسب على تحسين جودة الطباعة.
الإطار
- يوفر الإطار الهيكل الأساسي للطابعة ويحافظ على محاذاة الأجزاء المتحركة.
- يساعد الإطار القوي والمستقر على تقليل الاهتزاز وتحسين ثبات جودة الطباعة.
نظام التحكم
- تدير لوحة التحكم الإلكترونية المحركات والسخانات والمستشعرات والمراوح ووظائف الطابعة المختلفة.
- يمكن للمستخدم التحكم بالطابعة من خلال شاشة أو أزرار أو شاشة لمس، وأحيانًا من خلال الكمبيوتر أو تطبيق الهاتف.
مواد الطباعة ثلاثية الأبعاد
تستخدم الطابعات ثلاثية الأبعاد مواد مختلفة حسب تقنية الطباعة المستخدمة.
ويُعد اختيار المادة المناسبة أمرًا مهمًا لأنها تؤثر في قوة النموذج ومرونته ومظهره ومتانته ومتطلبات عملية الطباعة.
PLA
- يُعد PLA من أكثر المواد المناسبة للمبتدئين بسبب سهولة طباعته وتوفره بألوان متنوعة.
- يناسب النماذج والزينة والأجزاء التعليمية والمنظمات والعديد من المشروعات العامة.
- لكنه ليس الخيار الأفضل للتطبيقات التي تحتاج إلى مقاومة عالية للحرارة.
PETG
- يوفر PETG توازنًا جيدًا بين القوة والمتانة وسهولة الطباعة نسبيًا.
- يُستخدم غالبًا في الأجزاء العملية التي تحتاج إلى مقاومة أكبر من PLA.
ABS وASA
- يوفر كل من ABS وASA قوة جيدة ومقاومة أعلى للحرارة مقارنةً بـ PLA.
- لكن طباعتهما قد تكون أكثر صعوبة وتتطلب ظروف طباعة مناسبة وتهوية جيدة.
- يتميز ASA بقدرة أفضل على مقاومة الظروف الجوية والأشعة فوق البنفسجية في بعض التطبيقات الخارجية.
TPU
- TPU مادة مرنة يمكن استخدامها لإنتاج أجزاء تشبه المطاط.
- تناسب المقابض والأغطية الواقية والأختام والمفصلات المرنة.
- قد تحتاج المواد المرنة إلى إعدادات خاصة، وقد تكون أكثر تحديًا للمبتدئين.
الراتنج
- تستخدم طابعات الراتنج مادة فوتوبوليمر سائلة لإنتاج نماذج عالية التفاصيل.
- تتميز النماذج الناتجة بأسطح ناعمة ودقة جيدة، مما يجعلها مناسبة للمجسمات الصغيرة.
- يجب التعامل مع الراتنج السائل بحذر واتباع تعليمات السلامة الخاصة بالشركة المصنعة.
كيف تختار مادة الطباعة المناسبة؟
- اختر المادة بناءً على الوظيفة التي سيؤديها النموذج النهائي.
- ضع في الاعتبار القوة والمرونة ومقاومة الحرارة والمظهر ومقاومة العوامل الخارجية وسهولة الطباعة ومتطلبات السلامة.
- بالنسبة للكثير من المبتدئين الذين يستخدمون طابعات FDM، يُعد PLA نقطة بداية عملية لتعلم الأساسيات.
أهم مواصفات الطابعة ثلاثية الأبعاد
| المواصفة | ماذا تعني؟ | لماذا هي مهمة؟ |
|---|---|---|
| حجم الطباعة | أكبر حجم يمكن طباعته. | يحدد حجم النماذج التي يمكنك إنتاجها. |
| ارتفاع الطبقة | سماكة كل طبقة. | يؤثر في التفاصيل ووقت الطباعة. |
| قطر الفوهة | حجم فتحة الفوهة. | يؤثر في التفاصيل وتدفق المادة. |
| سرعة الطباعة | سرعة حركة الطابعة أثناء العمل. | تؤثر في مدة إنتاج النموذج. |
| الدقة | مدى دقة أبعاد النموذج. | مهمة للأجزاء الدقيقة. |
| درجة حرارة الفوهة | درجة حرارة الجزء الساخن. | تحدد المواد التي يمكن استخدامها. |
| تسوية السرير | يدوية أو تلقائية. | تؤثر في جودة الطبقة الأولى. |
| الاتصال | USB أو Wi-Fi أو Ethernet وغيرها. | يحدد طريقة نقل ملفات الطباعة. |
| ميزات السلامة | أنظمة الحماية المختلفة. | تساعد على تقليل المخاطر أثناء التشغيل. |
كيف تختار طابعة ثلاثية الأبعاد للمبتدئين؟
اختيار أول طابعة لا يعني بالضرورة شراء أسرع أو أغلى طراز متوفر. أفضل طابعة بالنسبة لك هي التي تناسب مشروعاتك وميزانيتك والمواد التي تريد استخدامها ومستوى خبرتك.
حدد ما الذي تريد طباعته
- فكر في نوع الأشياء التي تريد تصنيعها.
- إذا كنت ترغب في طباعة أدوات وأجزاء عملية ومنظمات منزلية، فقد تكون طابعة FDM خيارًا مناسبًا.
- أما إذا كان اهتمامك الرئيسي بالنماذج الصغيرة عالية التفاصيل، فقد تناسبك الطابعة الراتنجية أكثر.
حدد ميزانية واقعية
- لا تنظر إلى سعر الطابعة فقط، بل احسب التكلفة الإجمالية.
- قد تحتاج أيضًا إلى مواد وأدوات وقطع غيار وملحقات إضافية.
ضع سهولة الاستخدام في الاعتبار
يمكن لميزات مثل التسوية التلقائية لسرير الطباعة والواجهة البسيطة وسهولة تحميل المواد والتعليمات الواضحة أن تجعل تجربة التعلم أسهل بكثير.
تحقق من حجم الطباعة
- تأكد من أن مساحة الطباعة مناسبة لحجم النماذج التي تريد إنتاجها.
- لا تحتاج بالضرورة إلى طابعة كبيرة إذا كنت ستطبع نماذج صغيرة فقط.
تحقق من توافق المواد
- تأكد من المواد التي تستطيع الطابعة التعامل معها بشكل موثوق.
- إذا كنت تخطط لاستخدام مواد تتجاوز PLA، فتأكد من توفر درجات الحرارة والمكونات المناسبة.
ابحث عن الاعتمادية والدعم
- من الأفضل أن تكون الطابعة موثوقة وسهلة الاستخدام.
- يساعد توفر الوثائق وقطع الغيار والدعم الفني على تسهيل تجربة المبتدئ.
- كما يمكن أن يكون مجتمع المستخدمين النشط مصدرًا مفيدًا لحل المشكلات.
البرامج الأساسية للطباعة ثلاثية الأبعاد
لا تعتمد الطباعة ثلاثية الأبعاد على الأجهزة فقط، بل تحتاج أيضًا إلى برامج لإنشاء النماذج الرقمية وتجهيزها للطباعة.
برامج التصميم ثلاثي الأبعاد
- تسمح لك برامج التصميم ثلاثي الأبعاد وبرامج CAD بإنشاء نماذجك الخاصة.
- يمكن للمبتدئ البدء ببرامج بسيطة ثم الانتقال تدريجيًا إلى برامج أكثر تقدمًا.
- يعتمد اختيار البرنامج على نوع النماذج التي تريد تصميمها، سواء كانت أشكالًا بسيطة أو نماذج فنية أو أجزاء ميكانيكية دقيقة.
برامج التقطيع Slicer
- يقوم برنامج Slicer بتحويل النموذج ثلاثي الأبعاد إلى تعليمات تستطيع الطابعة تنفيذها.
- يقسم النموذج إلى طبقات ويحسب حركة الطابعة ودرجات الحرارة والسرعات وتدفق المادة.
- يُعد برنامج التقطيع أحد أهم عناصر عملية الطباعة ثلاثية الأبعاد.
أهم إعدادات برنامج التقطيع
- ارتفاع الطبقة.
- نسبة التعبئة الداخلية Infill.
- سماكة الجدران.
- سرعة الطباعة.
- درجة حرارة الفوهة.
- درجة حرارة السرير.
- التراجع Retraction.
- الدعامات Supports.
لا تحتاج إلى فهم جميع الإعدادات منذ البداية. يمكنك البدء بالإعدادات الموصى بها للطابعة والمادة، ثم التعرف تدريجيًا على تأثير كل إعداد في النتيجة النهائية.
كيف تقوم بإعداد الطابعة ثلاثية الأبعاد؟
يُعد الإعداد الصحيح للطابعة خطوة أساسية للحصول على نتائج ناجحة. وتختلف الخطوات الدقيقة من طراز إلى آخر، لذلك يجب دائمًا اتباع تعليمات الشركة المصنعة.
- ضع الطابعة على سطح ثابت ومستوي مع توفير مساحة مناسبة حولها للتهوية والصيانة.
- قم بتجميع الأجزاء التي تأتي منفصلة وتوصيل الكابلات اللازمة.
- تأكد من تثبيت سرير الطباعة والفوهة والأجزاء المتحركة بشكل صحيح.
- تحقق من السيور والبراغي والمكونات الميكانيكية.
- في طابعات FDM، قم بتحميل خيط الطباعة والتأكد من مروره بشكل صحيح.
- في الطابعات الراتنجية، اتبع تعليمات تركيب حوض الراتنج وتجهيز لوحة البناء.
- قم بتسوية سرير الطباعة يدويًا أو باستخدام نظام التسوية التلقائي.
- نفذ طباعة اختبار صغيرة قبل البدء في مشروع كبير.
كيف تنفذ أول عملية طباعة ثلاثية الأبعاد؟
1. اختر نموذجًا ثلاثي الأبعاد
- ابدأ بنموذج بسيط ومناسب للمبتدئين.
- يمكنك تحميل نموذج جاهز أو تصميم نموذجك بنفسك.
2. افتح النموذج في برنامج التقطيع
- قم باستيراد النموذج إلى برنامج Slicer.
- اختر الطابعة والمادة وملف الإعداد المناسب.
3. اضبط الإعدادات الأساسية
- استخدم الإعدادات الموصى بها للطابعة والمادة في أول تجربة.
- تجنب تغيير عدد كبير من الإعدادات قبل فهم وظيفة كل منها.
4. قم بتقطيع النموذج
- يحول البرنامج النموذج إلى طبقات وتعليمات للطابعة.
- راجع معاينة الطباعة قبل إرسال الملف.
5. جهز الطابعة
- تأكد من تحميل المادة الصحيحة.
- تأكد من نظافة سطح الطباعة ومعايرة الطابعة بشكل صحيح.
6. ابدأ الطباعة
- أرسل الملف إلى الطابعة وابدأ عملية الطباعة.
- راقب بداية الطباعة، خصوصًا الطبقة الأولى.
7. افحص الطبقة الأولى
- يجب أن تلتصق الطبقة الأولى جيدًا بسرير الطباعة.
- إذا ظهرت مشكلة في الالتصاق، أوقف الطباعة وحل المشكلة قبل الاستمرار.
8. أخرج النموذج بعد الانتهاء
- بعد اكتمال الطباعة وترك النموذج ليبرد عند الحاجة، قم بإزالته بحذر.
- تحتاج النماذج الراتنجية إلى الغسل والمعالجة وفق تعليمات المادة المستخدمة.
إعدادات الطباعة ثلاثية الأبعاد الأساسية
تتحكم إعدادات الطباعة في الطريقة التي تقوم بها الطابعة بتكوين كل طبقة. ويساعد فهم أهم هذه الإعدادات على تحسين جودة النتائج دون تغيير عدد كبير من الخيارات في الوقت نفسه.
ارتفاع الطبقة
- يحدد ارتفاع الطبقة سماكة كل طبقة مطبوعة.
- تنتج الطبقات الأصغر أسطحًا أكثر نعومة وتفاصيل أدق، لكنها تحتاج عادةً إلى وقت أطول.
التعبئة الداخلية Infill
- التعبئة الداخلية هي البنية الموجودة داخل النموذج المطبوع.
- تؤدي زيادة نسبة التعبئة عادةً إلى زيادة الوزن واستخدام كمية أكبر من المادة، وقد تساهم في زيادة القوة حسب التصميم.
سماكة الجدران
- تشكل الجدران الهيكل الخارجي للنموذج.
- يمكن أن تساعد زيادة عدد الجدران على تحسين القوة والمتانة.
سرعة الطباعة
- تحدد سرعة الطباعة مدى سرعة حركة الطابعة أثناء تكوين النموذج.
- قد تقلل السرعات العالية وقت الطباعة، لكنها قد تؤثر في الجودة أو الاعتمادية إذا كانت مفرطة.
درجة حرارة الفوهة
- تتحكم في درجة تسخين خيط الطباعة.
- تحتاج المواد المختلفة إلى درجات حرارة مختلفة، لذلك يجب اتباع النطاق الموصى به للمادة.
الدعامات Supports
- الدعامات عبارة عن هياكل مؤقتة تساعد على طباعة الأجزاء التي لا يمكن طباعتها في الهواء بشكل مباشر.
- تتم إزالة هذه الهياكل بعد اكتمال الطباعة.
معايرة الطابعة ثلاثية الأبعاد
- تعني المعايرة ضبط الطابعة بحيث تعمل الحركة الميكانيكية وتدفق المادة والوظائف المختلفة بشكل صحيح.
- تساعد المعايرة الجيدة على تحسين الجودة والدقة والاعتمادية.
تسوية سرير الطباعة
- يجب أن يكون سرير الطباعة في الوضع المناسب بالنسبة إلى الفوهة.
- يساعد الضبط الصحيح على التصاق الطبقة الأولى بشكل متساوٍ.
إزاحة المحور Z
- تحدد قيمة Z-Offset المسافة بين الفوهة وسطح الطباعة عند بداية العمل.
- إذا كانت الفوهة مرتفعة جدًا، فقد لا تلتصق المادة جيدًا.
- وإذا كانت منخفضة جدًا، فقد تضغط على سطح الطباعة بشكل زائد.
معايرة تدفق المادة
- تساعد هذه المعايرة على ضمان خروج كمية مناسبة من المادة.
- قد يؤدي التدفق غير الصحيح إلى فجوات أو أجزاء ضعيفة أو تراكم زائد للمادة.
مشكلات الطباعة ثلاثية الأبعاد الشائعة وحلولها
تُعد المشكلات جزءًا طبيعيًا من مرحلة تعلم الطباعة ثلاثية الأبعاد. وأفضل طريقة للتعامل معها هي تحديد المشكلة الظاهرة والبدء بفحص الأسباب البسيطة أولًا.
ضعف التصاق الطبقة الأولى
- المشكلة: لا تلتصق الطبقة الأولى بسرير الطباعة.
- الأسباب المحتملة: عدم ضبط السرير، أو قيمة Z-Offset غير المناسبة، أو اتساخ السطح، أو درجة حرارة غير مناسبة.
- الحل المحتمل: نظف السطح وتحقق من التسوية وZ-Offset ودرجات الحرارة المناسبة للمادة.
التواء النموذج Warping
- المشكلة: ارتفاع زوايا النموذج أو أطرافه عن سطح الطباعة.
- الأسباب المحتملة: تغيرات الحرارة أو ضعف الالتصاق أو خصائص المادة.
- الحل المحتمل: تحسين الالتصاق واستخدام درجة الحرارة المناسبة ووسائل المساعدة المناسبة.
الخيوط الرفيعة Stringing
- المشكلة: ظهور خيوط بلاستيكية رفيعة بين أجزاء النموذج.
- الأسباب المحتملة: إعدادات التراجع أو درجة الحرارة أو خصائص المادة.
- الحل المحتمل: تعديل إعدادات التراجع والحرارة تدريجيًا.
نقص تدفق المادة Under-Extrusion
- المشكلة: خروج كمية أقل من المادة المطلوبة وظهور فجوات.
- الحل: افحص الفوهة ومسار الخيط ودرجة الحرارة وإعدادات تدفق المادة.
انسداد الفوهة
- المشكلة: عدم خروج خيط الطباعة بشكل صحيح.
- الأسباب المحتملة: تراكم المادة أو التلوث أو درجة حرارة غير مناسبة.
- الحل: اتبع طريقة تنظيف الفوهة الموصى بها من الشركة المصنعة.
قاعدة مهمة عند حل المشكلات: قم بتغيير إعداد واحد في كل مرة، لأن ذلك يساعدك على معرفة العامل الذي أدى فعليًا إلى حل المشكلة.
صيانة الطابعة ثلاثية الأبعاد
تساعد الصيانة الدورية على الحفاظ على موثوقية الطابعة وإطالة عمر مكوناتها.
تنظيف سطح الطباعة
- حافظ على نظافة سرير الطباعة وخلوه من الغبار والزيوت وبقايا المواد.
- استخدم طريقة التنظيف الموصى بها للطابعة وسطح الطباعة.
فحص الفوهة
- افحص الفوهة بانتظام للتأكد من عدم وجود تراكمات أو انسداد.
- يمكن للفوهة التالفة أو المسدودة أن تؤثر في جودة الطباعة.
فحص السيور والأجزاء المتحركة
- تحقق من السيور والقضبان والعجلات والبراغي المتحركة.
- يجب أن تعمل الأجزاء المتحركة بسلاسة.
تخزين المواد بشكل صحيح
- يمكن لخيوط الطباعة امتصاص الرطوبة من الهواء، مما قد يؤثر في جودة الطباعة.
- احفظ المواد الحساسة للرطوبة في حاويات مناسبة ومغلقة.
- يجب أيضًا تخزين الراتنج وفق تعليمات الشركة المصنعة.
السلامة عند استخدام الطباعة ثلاثية الأبعاد
تُعد الطباعة ثلاثية الأبعاد آمنة بشكل عام عند استخدام الطابعة والمواد بطريقة صحيحة، لكن يجب على المبتدئين معرفة المخاطر المحتملة.
الأجزاء الساخنة
- تستخدم طابعات FDM درجات حرارة مرتفعة لصهر خيوط البلاستيك.
- قد تصبح الفوهة وسرير الطباعة الساخن بدرجة حرارة تسبب الحروق.
- تجنب لمس هذه الأجزاء أثناء سخونتها واترك الطابعة تبرد قبل الصيانة.
الأجزاء المتحركة
- يتحرك رأس الطباعة ومكونات أخرى أثناء التشغيل.
- أبعد الأصابع والملابس والكابلات عن الأجزاء المتحركة أثناء عمل الطابعة.
التهوية
- قد تنتج بعض مواد الطباعة جسيمات أو انبعاثات أثناء التشغيل.
- استخدم الطابعة في مكان مناسب وجيد التهوية.
سلامة الراتنج
- يتطلب الراتنج غير المتصلب عناية إضافية أثناء التعامل معه.
- تجنب ملامسته للجلد والعينين واتبع تعليمات السلامة الخاصة بالشركة المصنعة.
- استخدم القفازات ووسائل حماية العين المناسبة عند التعامل مع الراتنج السائل.
- يجب غسل النماذج ومعالجتها بشكل كامل قبل اعتبارها جاهزة للاستخدام.
أين تجد نماذج ثلاثية الأبعاد؟
النموذج ثلاثي الأبعاد هو التصميم الرقمي الذي يحدد الشكل الذي ستقوم الطابعة بإنتاجه. ولا يحتاج المبتدئ إلى تصميم كل النماذج بنفسه، لأن هناك العديد من النماذج الجاهزة المتاحة عبر الإنترنت.
تحميل نماذج جاهزة
- توفر مكتبات النماذج ثلاثية الأبعاد آلاف التصاميم الجاهزة.
- يمكنك العثور على أدوات ومنظمات وألعاب وزينة وقطع غيار ونماذج تعليمية.
- تأكد من أن النموذج مناسب لطابعتك والمادة المستخدمة وحجم الطباعة المتاح.
تصميم نماذجك الخاصة
- يمكنك إنشاء تصميماتك باستخدام برامج التصميم ثلاثي الأبعاد أو CAD.
- يفيد ذلك عند الحاجة إلى نموذج مخصص أو قطعة لها أبعاد محددة.
تحقق من النموذج قبل الطباعة
- راجع الأبعاد والاتجاه والدعامات المطلوبة والإعدادات المناسبة.
- تساعد معاينة النموذج داخل برنامج Slicer على اكتشاف المشكلات المحتملة قبل بدء الطباعة.
مشروعات طباعة ثلاثية الأبعاد مناسبة للمبتدئين
يُعد البدء بمشروعات بسيطة من أفضل الطرق لتعلم الطباعة ثلاثية الأبعاد. فالنماذج الصغيرة وغير المعقدة تساعدك على فهم الطابعة وإعداداتها دون إهدار كمية كبيرة من المواد أو الوقت.
نماذج المعايرة
- تساعد نماذج المعايرة البسيطة على معرفة مدى دقة وثبات أداء الطابعة.
حوامل الهاتف
- يُعد حامل الهاتف مشروعًا بسيطًا وعمليًا للمبتدئين.
منظمات الكابلات
- مشابك ومنظمات الكابلات نماذج صغيرة وعملية ويمكن طباعتها في وقت قصير نسبيًا.
صناديق التخزين
- تساعد الصناديق البسيطة على التدريب على الأبعاد والجدران والتعبئة الداخلية.
سلاسل المفاتيح والنماذج الزخرفية
- تساعد النماذج الصغيرة على تجربة الألوان والأشكال وتقنيات التصميم الأساسية.
كم تبلغ تكلفة الطباعة ثلاثية الأبعاد؟
تعتمد تكلفة الطباعة ثلاثية الأبعاد على سعر الطابعة والمواد والملحقات واستهلاك الكهرباء والصيانة وعدد النماذج التي تقوم بطباعتها.
تكلفة الطابعة
- تمثل الطابعة عادةً أكبر تكلفة أولية.
- تتوفر طابعات FDM والراتنج بأسعار ومستويات مختلفة.
- يجب اختيار الطابعة بناءً على احتياجاتك الفعلية.
تكلفة المواد
- تحتاج طابعات FDM إلى خيوط الطباعة.
- تحتاج الطابعات الراتنجية إلى راتنج سائل.
- تعتمد كمية المادة المستخدمة على حجم النموذج ونسبة التعبئة والجدران والدعامات.
الطباعة الفاشلة
- تُعد الطباعة الفاشلة جزءًا طبيعيًا من مرحلة التعلم.
- تستهلك المادة والكهرباء، لذلك من الأفضل وضعها في الاعتبار عند حساب الميزانية.
التكلفة الإجمالية
- لا تقتصر التكلفة الحقيقية على سعر شراء الطابعة فقط.
- يجب حساب تكلفة الطابعة والمواد والأدوات والصيانة والكهرباء والطباعة الفاشلة المحتملة.
الأسئلة الشائعة
هل الطباعة ثلاثية الأبعاد صعبة بالنسبة للمبتدئين؟
- أصبحت الطابعات الحديثة أسهل في الاستخدام، لكن المبتدئ يحتاج إلى تعلم أساسيات الإعداد والبرامج والمواد وإعدادات الطباعة.
- يساعد البدء بمشروعات بسيطة على تسهيل عملية التعلم.
ما أفضل نوع من الطابعات ثلاثية الأبعاد للمبتدئين؟
- تُعد طابعات FDM خيارًا عمليًا للكثير من المبتدئين لأنها تستخدم مواد شائعة مثل PLA وتناسب العديد من المشروعات.
- قد تكون الطابعات الراتنجية أفضل عندما تكون التفاصيل الدقيقة هي الأولوية الأساسية.
ما أسهل مادة للطباعة ثلاثية الأبعاد؟
- يُعتبر PLA من أسهل المواد بالنسبة للكثير من المبتدئين.
- وهو متوفر بشكل واسع ويمكن استخدامه مع العديد من طابعات FDM المنزلية.
كم تستغرق الطباعة ثلاثية الأبعاد؟
- يعتمد وقت الطباعة على حجم النموذج وارتفاع الطبقة وسرعة الطباعة ونسبة التعبئة والدعامات ونوع الطابعة.
- قد تستغرق النماذج الصغيرة أقل من ساعة، بينما قد تحتاج النماذج الكبيرة أو التفصيلية إلى ساعات طويلة.
هل أحتاج إلى معرفة التصميم ثلاثي الأبعاد؟
- لا، يمكنك تحميل نماذج جاهزة واستخدامها في برنامج التقطيع.
- تصبح مهارات التصميم مفيدة عندما ترغب في إنشاء نماذج وأجزاء مخصصة.
هل تحتاج الطابعة ثلاثية الأبعاد إلى صيانة؟
- نعم، تساعد عمليات التنظيف والفحص الدوري واستبدال الأجزاء المستهلكة عند الحاجة على الحفاظ على جودة الطباعة والاعتمادية.
الخلاصة
تمنح الطباعة ثلاثية الأبعاد المبتدئين القدرة على تحويل التصاميم الرقمية إلى أجسام حقيقية من خلال بنائها طبقة بعد طبقة. وعلى الرغم من أن هذه التقنية قد تبدو معقدة في البداية، فإن فهم خطوات العمل الأساسية يجعل البدء أسهل بكثير.
تشمل أهم الخطوات اختيار طابعة مناسبة، واختيار المادة الصحيحة، وفهم طريقة عمل برنامج التقطيع، وإعداد الطابعة ومعايرتها بشكل صحيح، والتعرف على إعدادات الطباعة الأساسية.
من الأفضل للمبتدئين البدء بمشروعات بسيطة واستخدام الإعدادات الموصى بها قبل الانتقال إلى التجارب والإعدادات المتقدمة. كما يجب الاهتمام بإجراءات السلامة وإجراء الصيانة الدورية للطابعة.
ومع اكتساب الخبرة، يمكنك الانتقال تدريجيًا من تحميل النماذج الجاهزة إلى تصميم نماذجك الخاصة وإنتاج أجزاء أكثر تعقيدًا. والأهم هو التعلم خطوة بخطوة وفهم أسباب المشكلات والاستفادة من كل تجربة لتحسين مهاراتك.




Leave a comment
You must be logged in to post a comment.