


Introduction
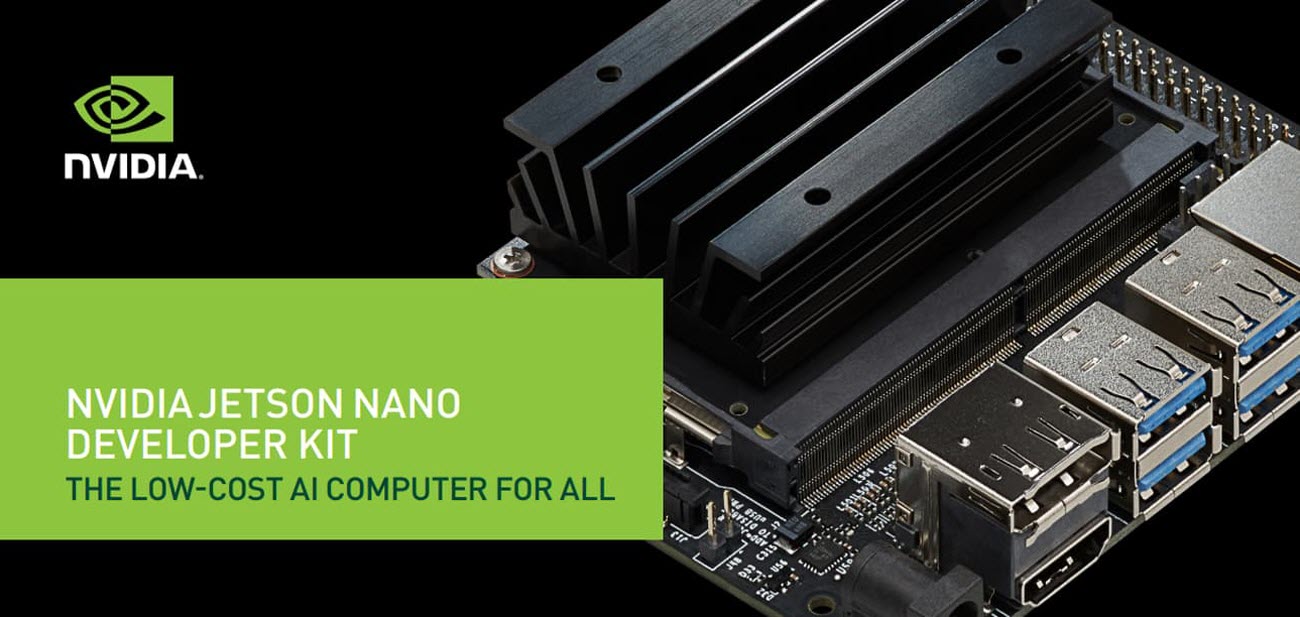
The NVIDIA Jetson Nano is a compact yet powerful developer kit designed for AI and machine learning applications at the edge. Whether you’re a hobbyist, a student, or a professional developer, the Jetson Nano provides an accessible platform for running AI models, computer vision tasks, and robotics projects efficiently.
In this blog, we’ll explore:
- What is the Jetson Nano?
- Key Features & Specifications
- Setting Up the Jetson Nano
- Popular Use Cases
- Getting Started with AI Projects
What is the Jetson Nano?
The Jetson Nano is part of NVIDIA’s Jetson family of embedded computing boards, optimized for AI workloads. It enables real-time processing for applications like object detection, image classification, and autonomous robotics without requiring cloud connectivity.
Unlike traditional single-board computers (SBCs) like the Raspberry Pi, the Jetson Nano is specifically designed for AI and deep learning tasks, thanks to its CUDA-capable GPU and optimized software stack.
Key Features & Specifications
| Feature | Specification |
|---|---|
| CPU | Quad-core ARM Cortex-A57 @ 1.43 GHz |
| GPU | 128-core NVIDIA Maxwell GPU |
| Memory | 4GB LPDDR4 |
| Storage | microSD (OS & storage) |
| Video Encode | 4K @ 30 FPS (H.264/H.265) |
| Connectivity | Gigabit Ethernet, 4x USB 3.0, HDMI, DisplayPort |
| AI Performance | 472 GFLOPS (FP16) |
| Power | 5V/4A (Micro-USB or Barrel Jack) |
Why Choose the Jetson Nano?
- GPU-Accelerated AI – Run TensorFlow, PyTorch, and CUDA-based models efficiently.
- Low Power Consumption – Ideal for edge AI and IoT applications.
- Full Linux Support – Runs Ubuntu-based OS with NVIDIA JetPack SDK.
- Robotics & IoT Ready – Supports ROS, OpenCV, and various sensors.
Setting Up the Jetson Nano
1. Hardware Requirements
- Jetson Nano Developer Kit
- microSD card (32GB or larger recommended)
- 5V/4A power supply (barrel jack or micro-USB)
- Monitor (HDMI or DisplayPort)
- Keyboard and mouse
- Internet connection (Ethernet or Wi-Fi dongle)
2. Flashing the OS
- Download NVIDIA JetPack SDK (includes the OS image).
- Use Balena Etcher to flash the image onto the microSD card.
- Insert the microSD card into the Jetson Nano and power it on.
3. Initial Setup
Follow the on-screen instructions to complete the Ubuntu setup.
Update system packages:
sudo apt update && sudo apt upgrade -y4. Installing AI Frameworks
NVIDIA provides pre-configured containers and SDKs for AI development:
# Install pip3
sudo apt install python3-pip

# Install TensorFlow for Jetson
sudo pip3 install --pre --extra-index-url https://developer.download.nvidia.com/compute/redist/jp/v50 tensorflow
Popular Use Cases
The Jetson Nano is versatile and widely used across multiple industries.
1. Computer Vision
- Real-time object detection (YOLO, SSD)
- Face recognition and tracking
- Smart surveillance systems
2. Robotics & Drones
- Autonomous navigation using ROS (Robot Operating System)
- AI-powered drones for inspection and monitoring
3. Edge AI & IoT
- Smart home automation
- Industrial defect detection
4. Education & Prototyping
- AI and machine learning workshops
- University research projects
Getting Started with AI Projects
Here is a simple object detection example using OpenCV and a pre-trained model:
import cv2
import numpy as np

# Load pre-trained model (MobileNet SSD)
net = cv2.dnn.readNetFromCaffe("deploy.prototxt", "mobilenet.caffemodel")

# Capture video from camera
cap = cv2.VideoCapture(0)

while True:
    ret, frame = cap.read()
    blob = cv2.dnn.blobFromImage(frame, 0.007843, (300, 300), 127.5)
    net.setInput(blob)
    detections = net.forward()

    for i in range(detections.shape[2]):
        confidence = detections[0, 0, i, 2]
        if confidence > 0.5:
            box = detections[0, 0, i, 3:7] * np.array([
                frame.shape[1],
                frame.shape[0],
                frame.shape[1],
                frame.shape[0]
            ])

            (x1, y1, x2, y2) = box.astype("int")
            cv2.rectangle(
                frame,
                (x1, y1),
                (x2, y2),
                (0, 255, 0),
                2
            )

    cv2.imshow("Object Detection", frame)

    if cv2.waitKey(1) & 0xFF == ord('q'):
        break

cap.release()
cv2.destroyAllWindows()
Conclusion
The Jetson Nano is an excellent choice for developers looking to explore AI at the edge. With its GPU acceleration, compact form factor, and strong community support, it provides an ideal platform for prototyping AI-powered applications.
Next Steps
Explore NVIDIA’s Jetson AI Certification:
Gain practical AI skills and validate your expertise through NVIDIA’s certification programs.
Try NVIDIA JetBot:
Experiment with NVIDIA’s open-source AI robot platform to build and test autonomous robotics projects.
Join the Jetson Developer Forum:
Connect with other developers, ask questions, and get support from the Jetson community.
Have you used the Jetson Nano for a project? Share your experience in the comments!
مقدمة
يُعد NVIDIA Jetson Nano واحدًا من أشهر الحواسيب المصغّرة المخصصة لتطبيقات الذكاء الاصطناعي والتعلم الآلي على الأجهزة الطرفية. وعلى الرغم من حجمه الصغير، فإنه يقدم قدرات معالجة قوية تجعله خيارًا مناسبًا للهواة والطلاب والمطورين الذين يرغبون في بناء مشاريع تعتمد على الرؤية الحاسوبية والروبوتات والذكاء الاصطناعي.
في هذا المقال سنتعرف على:
- ما هو Jetson Nano؟
- أبرز المزايا والمواصفات التقنية.
- كيفية إعداد وتشغيل الجهاز.
- أشهر الاستخدامات العملية.
- الخطوات الأولى للبدء بمشاريع الذكاء الاصطناعي.
ما هو Jetson Nano؟
ينتمي Jetson Nano إلى سلسلة Jetson من شركة NVIDIA، وهي مجموعة من اللوحات الحاسوبية المدمجة المصممة خصيصًا للتعامل مع تطبيقات الذكاء الاصطناعي. يتميز بقدرته على تنفيذ عمليات معالجة آنية مثل اكتشاف الأجسام وتصنيف الصور وتشغيل الروبوتات الذكية دون الحاجة إلى الاعتماد المستمر على الخدمات السحابية.
وعلى عكس الحواسيب أحادية اللوحة التقليدية مثل Raspberry Pi، تم تصميم Jetson Nano ليتعامل بكفاءة مع مهام التعلم العميق بفضل معالج الرسوميات الداعم لتقنية CUDA والبيئة البرمجية المحسنة من NVIDIA.
المزايا والمواصفات التقنية
| الميزة | المواصفة |
|---|---|
| المعالج CPU | Quad-core ARM Cortex-A57 بسرعة 1.43GHz |
| معالج الرسوميات GPU | 128-Core NVIDIA Maxwell GPU |
| الذاكرة | 4GB LPDDR4 |
| التخزين | بطاقة microSD |
| ترميز الفيديو | دقة 4K بمعدل 30 إطارًا في الثانية |
| الاتصالات | Gigabit Ethernet و USB 3.0 و HDMI و DisplayPort |
| أداء الذكاء الاصطناعي | 472 GFLOPS (FP16) |
| الطاقة | 5V / 4A |
لماذا يُعد Jetson Nano خيارًا مميزًا؟
- تسريع تطبيقات الذكاء الاصطناعي باستخدام معالج رسومي قوي.
- استهلاك منخفض للطاقة مقارنة بالأداء الذي يقدمه.
- دعم كامل لنظام Linux وبيئة Ubuntu.
- جاهزية للعمل مع مشاريع الروبوتات ومشاريع IOT.
- دعم أدوات شهيرة مثل TensorFlow وPyTorch وOpenCV.
إعداد وتشغيل Jetson Nano
المتطلبات الأساسية
- لوحة Jetson Nano Developer Kit.
- بطاقة microSD بسعة 32 جيجابايت أو أكثر.
- مزود طاقة 5V / 4A.
- شاشة تدعم HDMI أو DisplayPort.
- لوحة مفاتيح وفأرة.
- اتصال بالإنترنت عبر Ethernet أو Wi-Fi.
تثبيت نظام التشغيل
- تحميل حزمة NVIDIA JetPack SDK التي تتضمن صورة النظام.
- استخدام برنامج Balena Etcher لنسخ النظام على بطاقة microSD.
- إدخال البطاقة داخل الجهاز وتشغيله.
الإعداد الأولي
اتبع التعليمات التي تظهر على الشاشة لإكمال إعداد نظام Ubuntu.
بعد ذلك قم بتحديث الحزم باستخدام الأمر التالي:
sudo apt update && sudo apt upgrade -yتثبيت مكتبات الذكاء الاصطناعي
توفر NVIDIA مجموعة من الأدوات والمكتبات الجاهزة لتطوير تطبيقات الذكاء الاصطناعي.
# Install pip3
sudo apt install python3-pip

# Install TensorFlow for Jetson
sudo pip3 install --pre --extra-index-url https://developer.download.nvidia.com/compute/redist/jp/v50 tensorflow
أشهر الاستخدامات العملية
يُستخدم Jetson Nano في العديد من المجالات التقنية والتعليمية بفضل مرونته وقدراته المتقدمة.
الرؤية الحاسوبية
- اكتشاف الأجسام في الوقت الحقيقي.
- التعرف على الوجوه وتتبعها.
- أنظمة المراقبة الذكية.
الروبوتات والطائرات بدون طيار
- الملاحة الذاتية باستخدام ROS.
- طائرات مسيرة تعتمد على الذكاء الاصطناعي للفحص والمراقبة.
IOT والذكاء الاصطناعي الطرفي
- أنظمة المنزل الذكي.
- اكتشاف العيوب الصناعية بشكل آلي.
- مراقبة الأجهزة وتحليل البيانات محليًا.
التعليم والنماذج الأولية
- ورش عمل الذكاء الاصطناعي والتعلم الآلي.
- المشاريع الجامعية والأبحاث العلمية.
- تطوير النماذج الأولية بسرعة وبتكلفة منخفضة.
البدء في مشاريع الذكاء الاصطناعي
يوضح المثال التالي كيفية تنفيذ مشروع بسيط لاكتشاف الأجسام باستخدام OpenCV ونموذج مدرب مسبقًا:
import cv2
import numpy as np

# Load pre-trained model (MobileNet SSD)
net = cv2.dnn.readNetFromCaffe("deploy.prototxt", "mobilenet.caffemodel")

# Capture video from camera
cap = cv2.VideoCapture(0)

while True:
    ret, frame = cap.read()
    blob = cv2.dnn.blobFromImage(frame, 0.007843, (300, 300), 127.5)
    net.setInput(blob)
    detections = net.forward()

    for i in range(detections.shape[2]):
        confidence = detections[0, 0, i, 2]
        if confidence > 0.5:
            # Draw bounding box

    cv2.imshow("Object Detection", frame)

    if cv2.waitKey(1) & 0xFF == ord('q'):
        break

cap.release()
cv2.destroyAllWindows()
الخاتمة
يُعتبر Jetson Nano خيارًا ممتازًا لكل من يرغب في دخول عالم الذكاء الاصطناعي على الأجهزة الطرفية. فهو يجمع بين الأداء القوي والحجم الصغير والدعم البرمجي الواسع، مما يجعله منصة مثالية لتطوير النماذج الأولية والتطبيقات الذكية.
الخطوات
1-الحصول على شهادة Jetson AI من NVIDIA
- اكتساب مهارات عملية في الذكاء الاصطناعي.
- إثبات الخبرة من خلال برامج الاعتماد الرسمية.
2-تجربة مشروع JetBot
- بناء روبوت مفتوح المصدر يعتمد على الذكاء الاصطناعي.
- اختبار تطبيقات الملاحة والتعرف على البيئة المحيطة.
3-الانضمام إلى مجتمع مطوري Jetson
- التواصل مع المطورين والخبراء.
- الحصول على المساعدة ومشاركة المشاريع والأفكار.
هل سبق لك استخدام Jetson Nano في أحد مشاريعك؟ شاركنا تجربتك في قسم التعليقات.


Leave a comment
You must be logged in to post a comment.