


Soldering for Beginners: How to Solder, Choose an Iron and Avoid Common Mistakes
Contents List
- Introduction.
- What You Need on the Bench.
- Choosing a Soldering Iron or Station.
- Solder and Flux.
- Temperature: How Hot Should the Iron Be?.
- How to Solder a Through-hole Part: Five Steps.
- Good and Bad Solder Joints.
- Taking Care of the Tip.
- Removing Solder: Pump, Wick and Hot Air.
- Soldering SMD Parts.
- Safety.
- Common Mistakes to Avoid.
- Frequently Asked Questions.
- Conclusion.
Time reading is 15min.
1. Introduction
Soldering joins electronic parts to a circuit board or to each other with a metal alloy that melts at a low temperature. It is the skill behind every PCB, every repaired cable and every Arduino or ESP32 project that moves from a breadboard to something permanent. A good joint is strong and conducts well. A bad one fails slowly, works only when you press on it, or shorts two pins together.
This guide covers what you need on the bench, how to choose a soldering iron or station, the temperature to use, the five steps of a clean joint, how to spot and fix bad joints, how to remove solder, and the safety rules. It is written for beginners, and the same habits apply when you move on to SMD parts and hot air.
2. What You Need on the Bench
A beginner’s kit is small. You can start with the first four items and add the rest as you go:

Soldering Wire 0.6mm|100Gm (Alloy:63/37) Made in China

M&R UA78 Eco Flux Solder Flux for PCB Repair 10cc

Soldering Iron Sponge
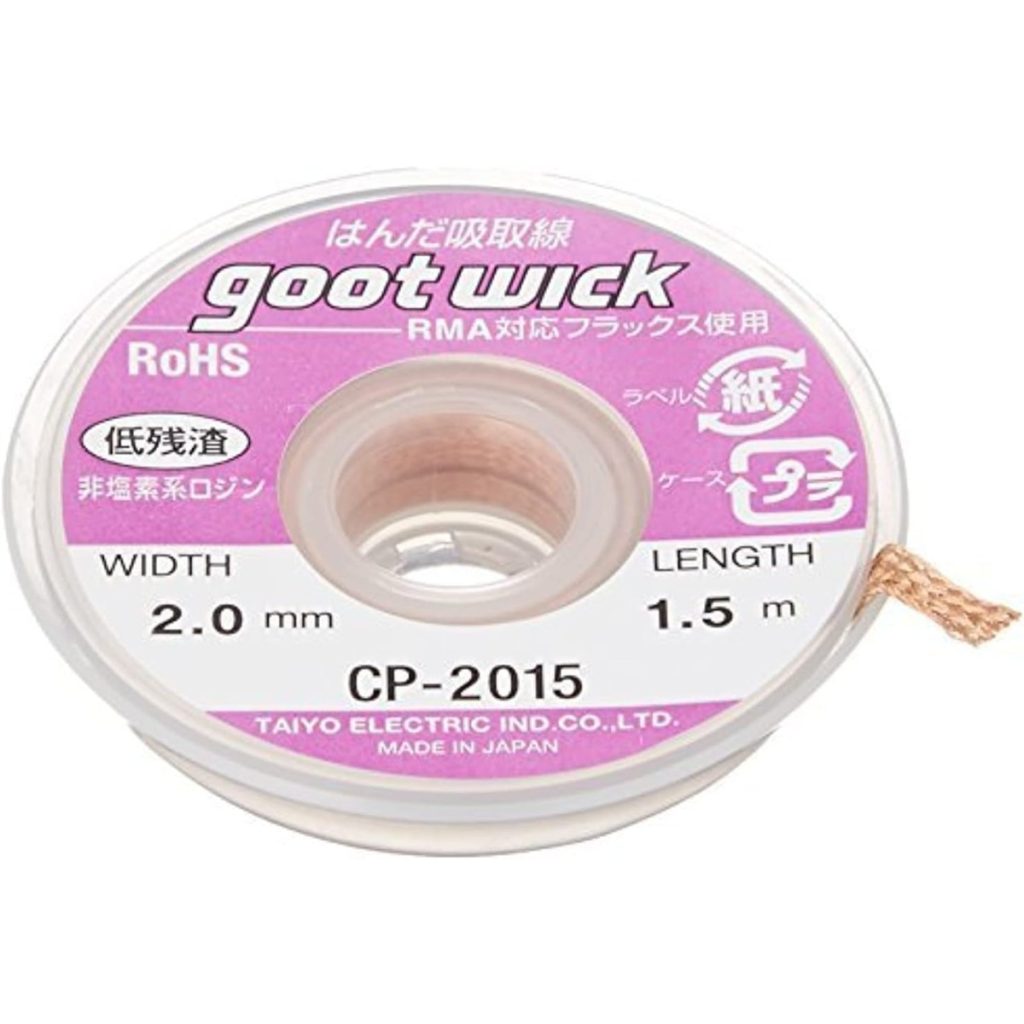
Solder Wick CP-2015 goot – Japan (W 2.0mm, L 1.5m)

TOPLIA EH06-135 Desoldering Pump

M&R MR-108 Cutting Pliers
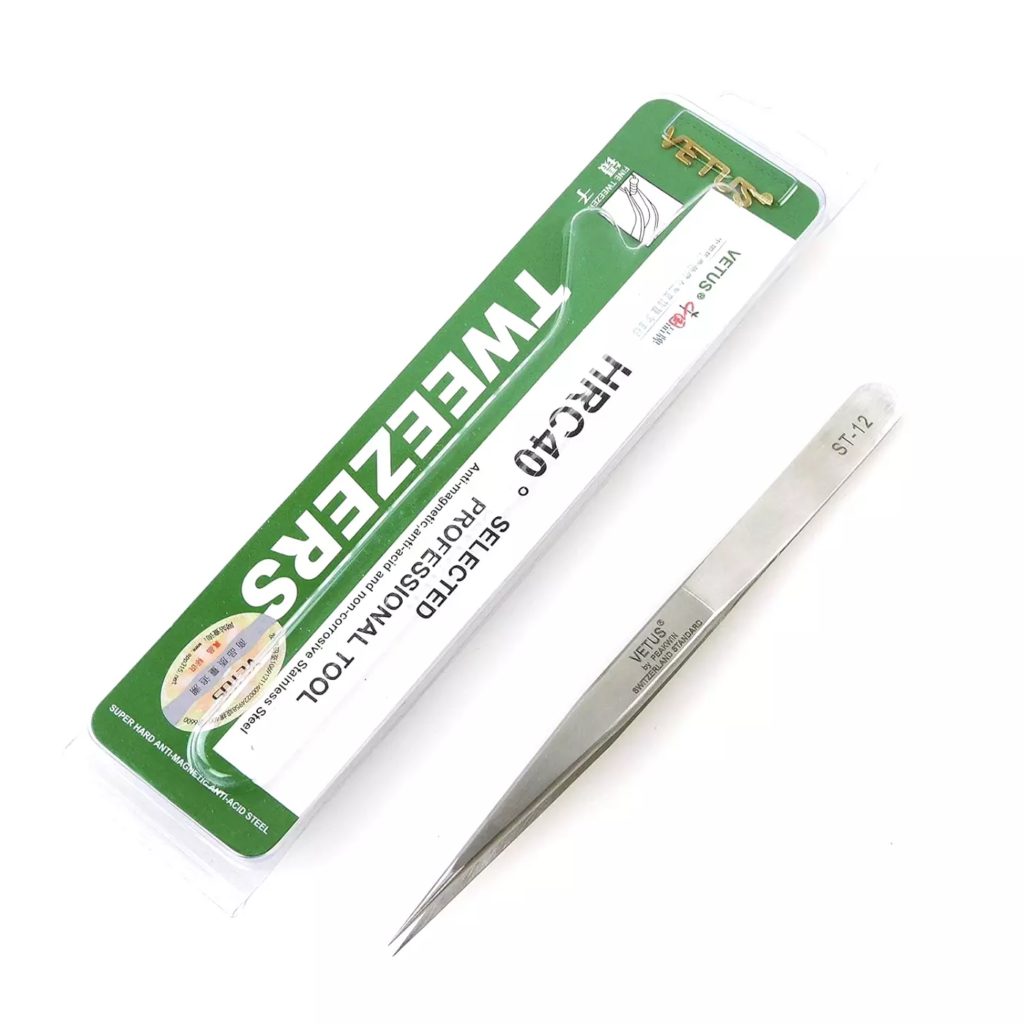
ST-12 TWEEZERS HRC40°
- Soldering iron or station: the heat source. A temperature-controlled iron or station is easier to learn with. Browse our soldering stations and soldering tools.
- Solder wire: a tin alloy with a flux core. For electronics, 0.5 to 1 mm is the common range, and thinner wire suits SMD.
- Flux: cleans the metal and helps the solder flow. The core of solder wire already contains some. A flux pen or paste helps for SMD parts and for rework.
- Tip cleaner and iron stand: a damp sponge or brass wool keeps the tip clean, and the stand keeps the hot iron off your table and cables.
- Desoldering wick and pump: for fixing mistakes and removing parts.
- Tweezers, side cutters and safety glasses: to hold small parts, trim leads and protect your eyes from flying lead ends and solder.
- A practice board and a few cheap resistors: learn on parts you do not mind wasting.
3. Choosing a Soldering Iron or Station
Heat control matters more than a high wattage number. A plain iron has a fixed power and its tip temperature changes with the job. A temperature-controlled iron or station keeps the tip at the temperature you set, which gives repeatable joints and is gentler on parts.
| Type | How it works | Good for |
|---|---|---|
| Plain iron (fixed power, for example 25 to 40 W) | Heats as long as it is plugged in. No temperature setting. | Occasional jobs, wires, simple through-hole work |
| Temperature-controlled iron (adjustable, for example 200 to 450°C) | Dial sets the tip temperature | Regular electronics work and learning |
| Soldering station | Control base with a display and a stand, fast recovery, replaceable tips | A permanent bench, repairs, SMD work |
| Hot air station | Heats a part with a controlled airflow | SMD chips, shrink tubing, desoldering many pins at once |
| High-power iron or gun | More watts to heat big parts quickly | Thick wires, large connectors, metal work |
What to look for: a tip that heats up fast and holds its temperature, tips that are easy to find and replace, a stable stand, and a grounded power cable. Remember that tips are not interchangeable between systems, so buy spares that match your model. The most common beginner choice is a temperature-controlled iron or a small station with a few tip shapes.
| Tip shape | Best for |
|---|---|
| Conical (pencil) | Fine detail, small pads, SMD parts |
| Chisel | General use, through-hole parts, wires, large pads |
| Bevel (hoof) | Drag soldering, flat contact on pins |
| Knife | SMD and drag soldering with flux |
Examples of replacement T12 tips from our range, and the irons and stations they fit:

M&R T12-SKUS Soldering Iron Tip Knife-shaped
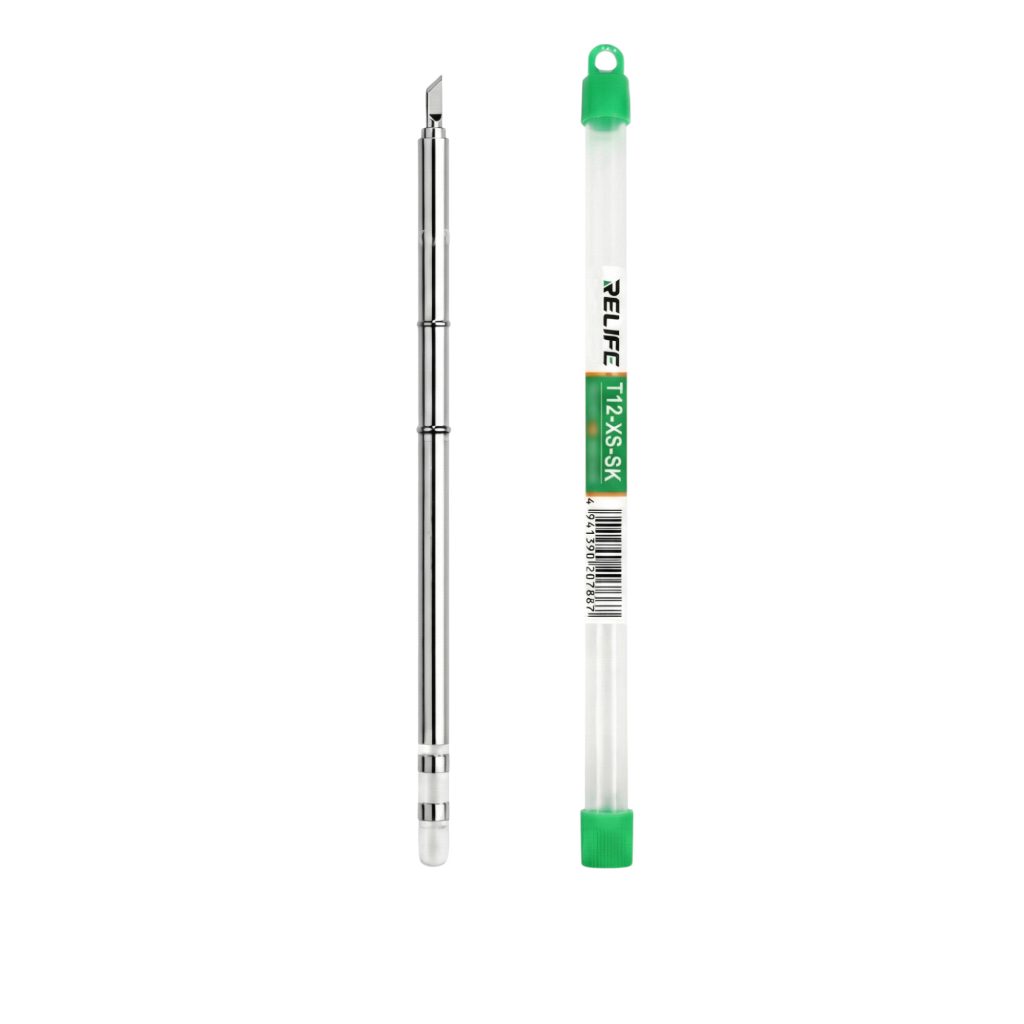
RELIFE T12-XS-SK Soldering Iron Tip For Digital Soldering Iron Station
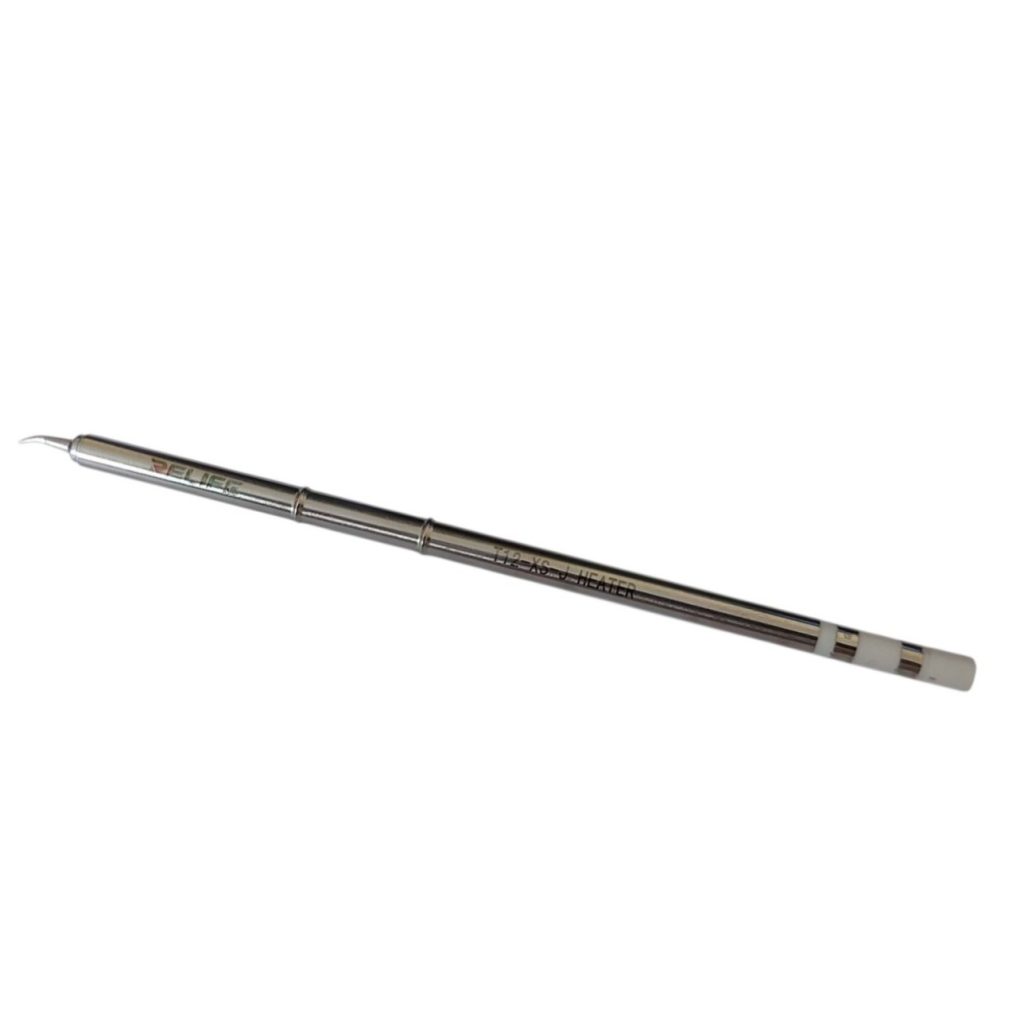
RELIFE T12-XS-J Soldering Iron Tip For Digital Soldering Iron Station
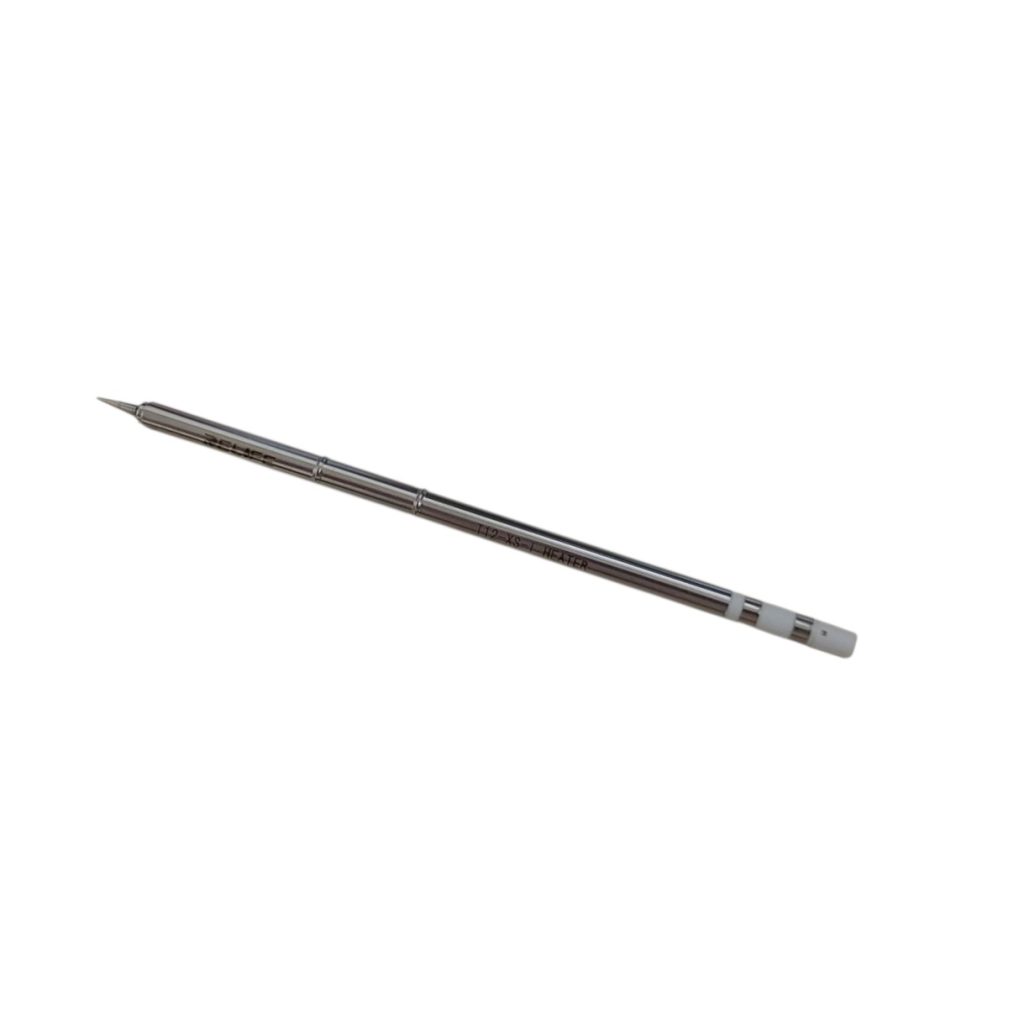
RELIFE T12-XS-I Soldering Iron Tip For Digital Soldering Iron Station

M&R V909 Adjustable Temperature Soldering Iron 60W

M&R 936A+ Hot Air Soldering Iron Station

TOPLIA EH858D HOT AIR Rework Station
A chisel or small bevel tip is a good all-round choice for through-hole work, a conical tip suits fine detail, and a knife tip helps with SMD and drag soldering. For a longer comparison of what to buy, see our soldering stations and tools in Egypt page.
4. Solder and Flux
Solder is a metal alloy. The two families you will meet are:
- Leaded solder: tin and lead, such as Sn63/Pb37 or Sn60/Pb40. It melts at about 183°C, flows easily and is the easiest to learn on. Lead is toxic, so wash your hands after handling it and never eat at the bench.
- Lead-free solder: usually tin with silver and copper, such as SAC305. It melts at about 217 to 220°C and needs a hotter iron. It is required for products sold under RoHS rules and is gradually becoming the default.
Both are normally sold as a thin wire with a rosin flux core. The flux removes the oxide on the metal and lets the solder wet the surface, which is what makes a strong joint. Use only electronics solder. Plumbing solder and acid flux are not for electronics: they corrode the board.
Extra flux (a pen, liquid or paste) helps on oxidized parts, on SMD pads and when you remove solder. After soldering, clean sticky flux residue with isopropyl alcohol and a small brush.
5. Temperature: How Hot Should the Iron Be?
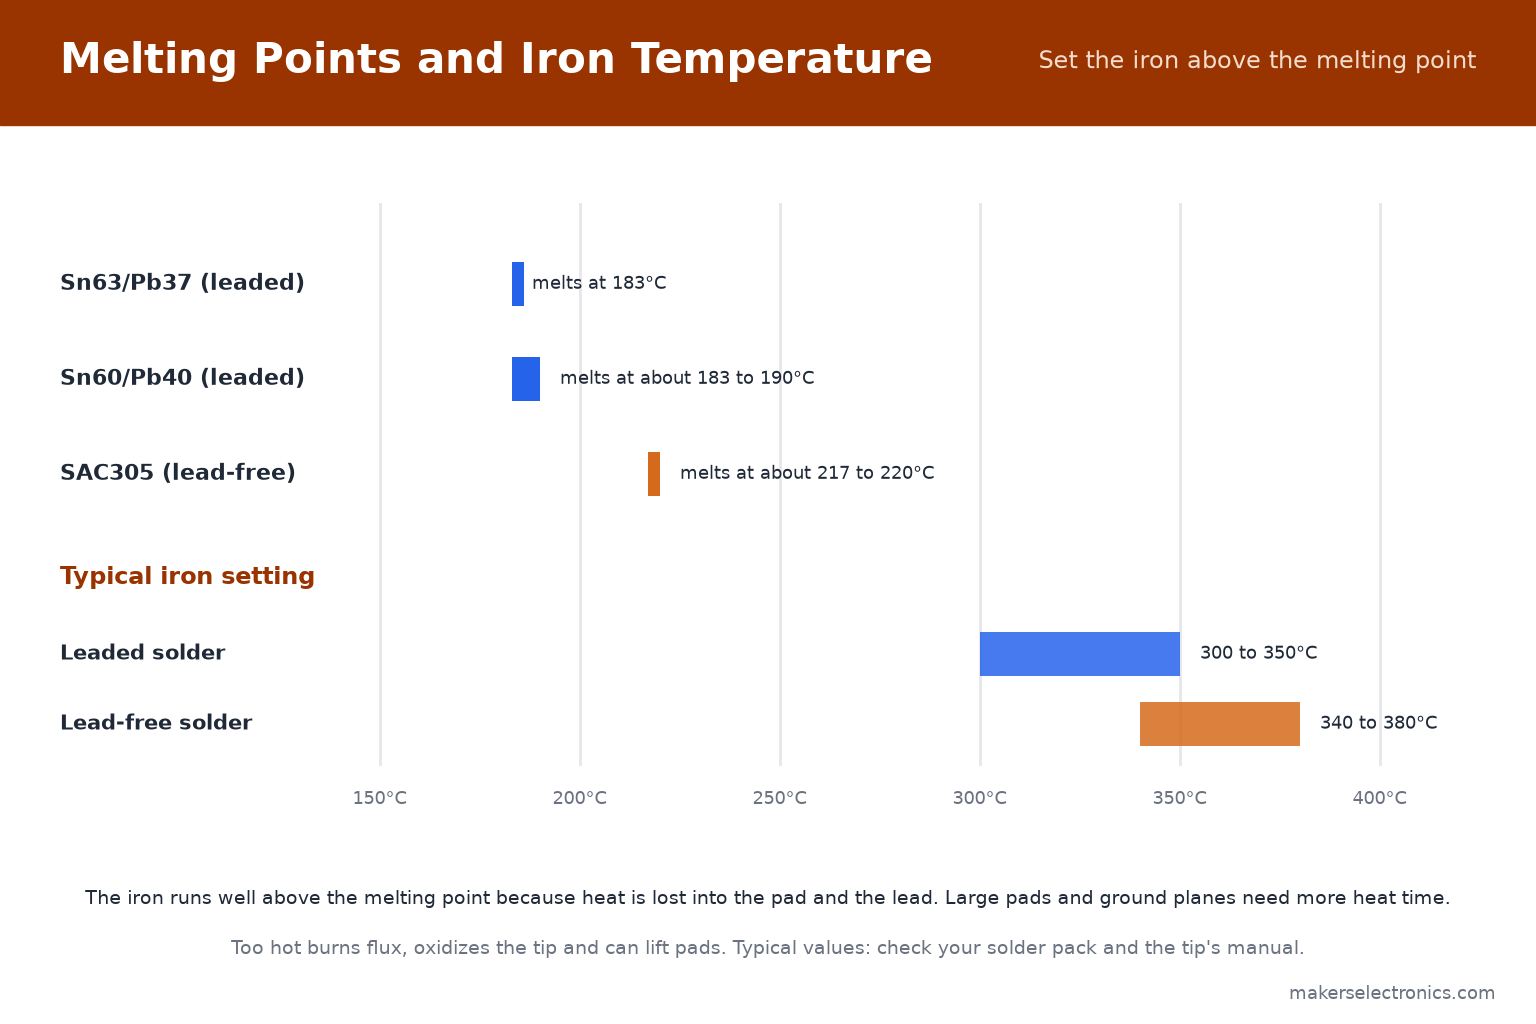
The iron needs to be well above the melting point of the solder, because heat is lost into the pad, the lead and the air as you work. These are typical starting points. Check the pack of your solder and the manual of your iron.
| Solder | Melts at about | Typical iron setting |
|---|---|---|
| Sn63/Pb37 or Sn60/Pb40 (leaded) | 183 to 190°C | 300 to 350°C |
| SAC305 (lead-free) | 217 to 220°C | 340 to 380°C |
- Too cold gives dull, lumpy cold joints because the solder never flows properly.
- Too hot burns the flux, oxidizes the tip quickly, discolors the board and can lift pads or damage parts.
- Large pads, ground planes and thick wires pull heat away: give them a little more time, or a higher temperature, not a longer wait on a tiny pad.
- Heat-sensitive parts (sockets, LEDs, plastic connectors) need quick work. Leave a few seconds between joints on the same part.
6. How to Solder a Through-hole Part: Five Steps
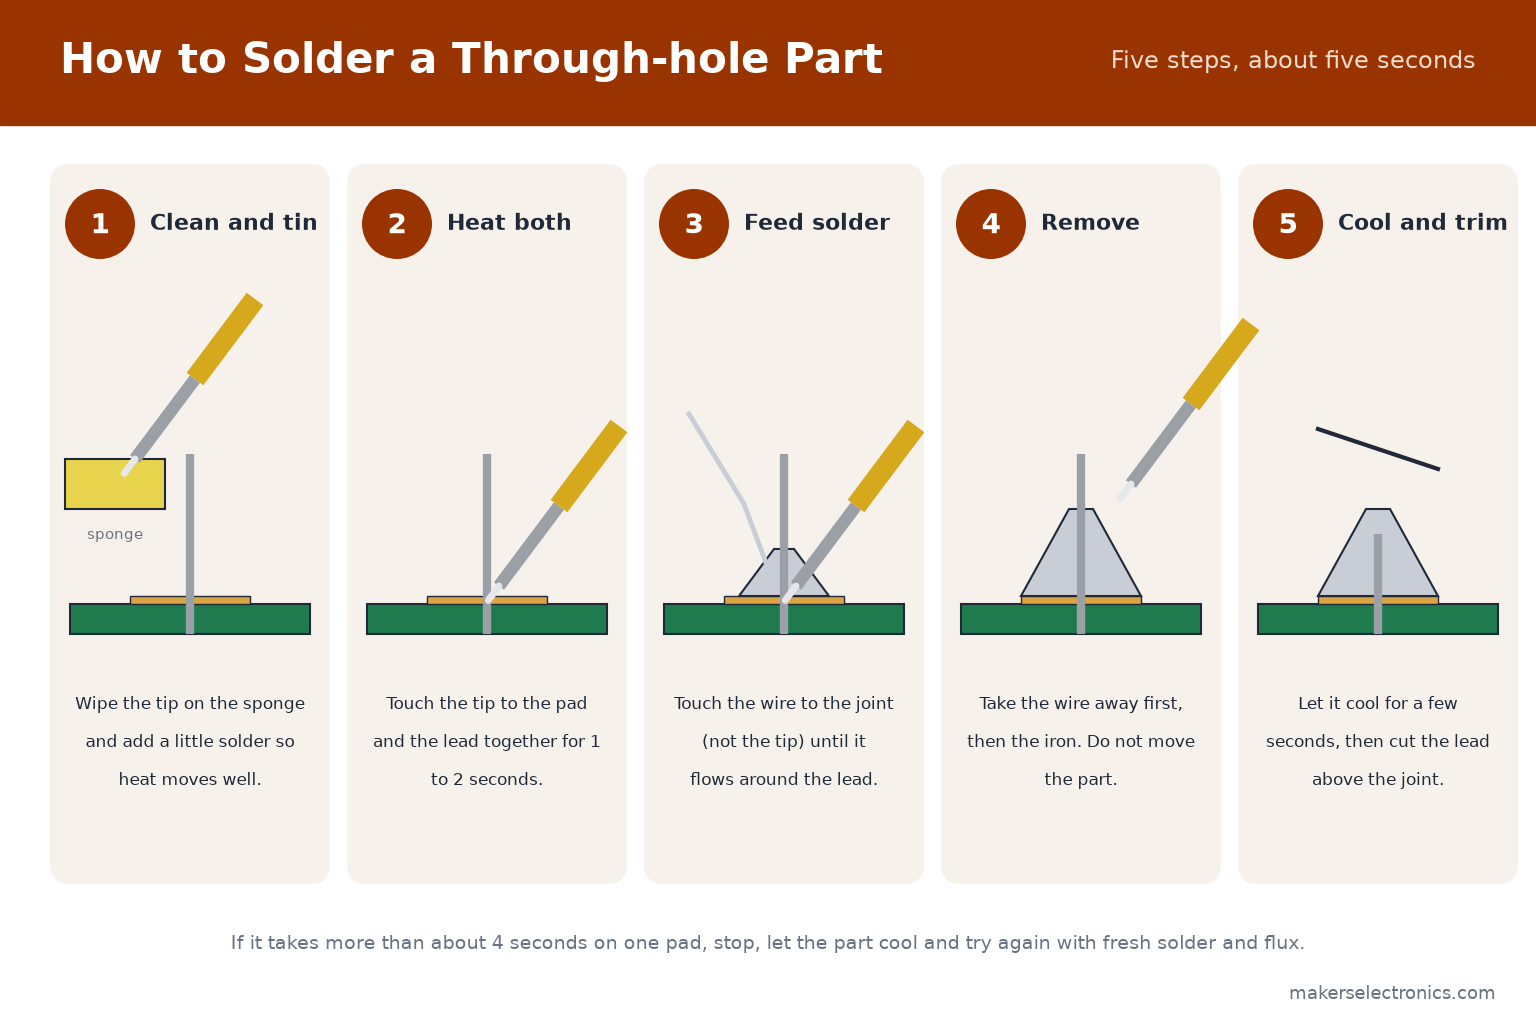
- Clean and tin the tip. Wipe the tip on the damp sponge or brass wool, then add a little solder to cover it. A shiny, tinned tip transfers heat well.
- Heat both parts. Place the component, bend the legs slightly so it stays put, and touch the tip to the pad and the lead together for about one to two seconds.
- Feed the solder. Touch the solder wire to the joint, on the side opposite the tip, not to the tip itself. It should flow around the lead and across the pad in one to three seconds.
- Remove the wire, then the iron. Pull the wire away first, then the iron. Do not move the part while the solder is still shiny and liquid.
- Let it cool and trim. Wait a few seconds, then cut the lead just above the joint with side cutters.
A good joint is shiny and smooth, shaped like a small cone that is curved inward (concave) and covers both the pad and the lead. If a step takes longer than about four seconds on one pad, stop, let it cool, and start again with fresh solder and a little flux.
7. Good and Bad Solder Joints
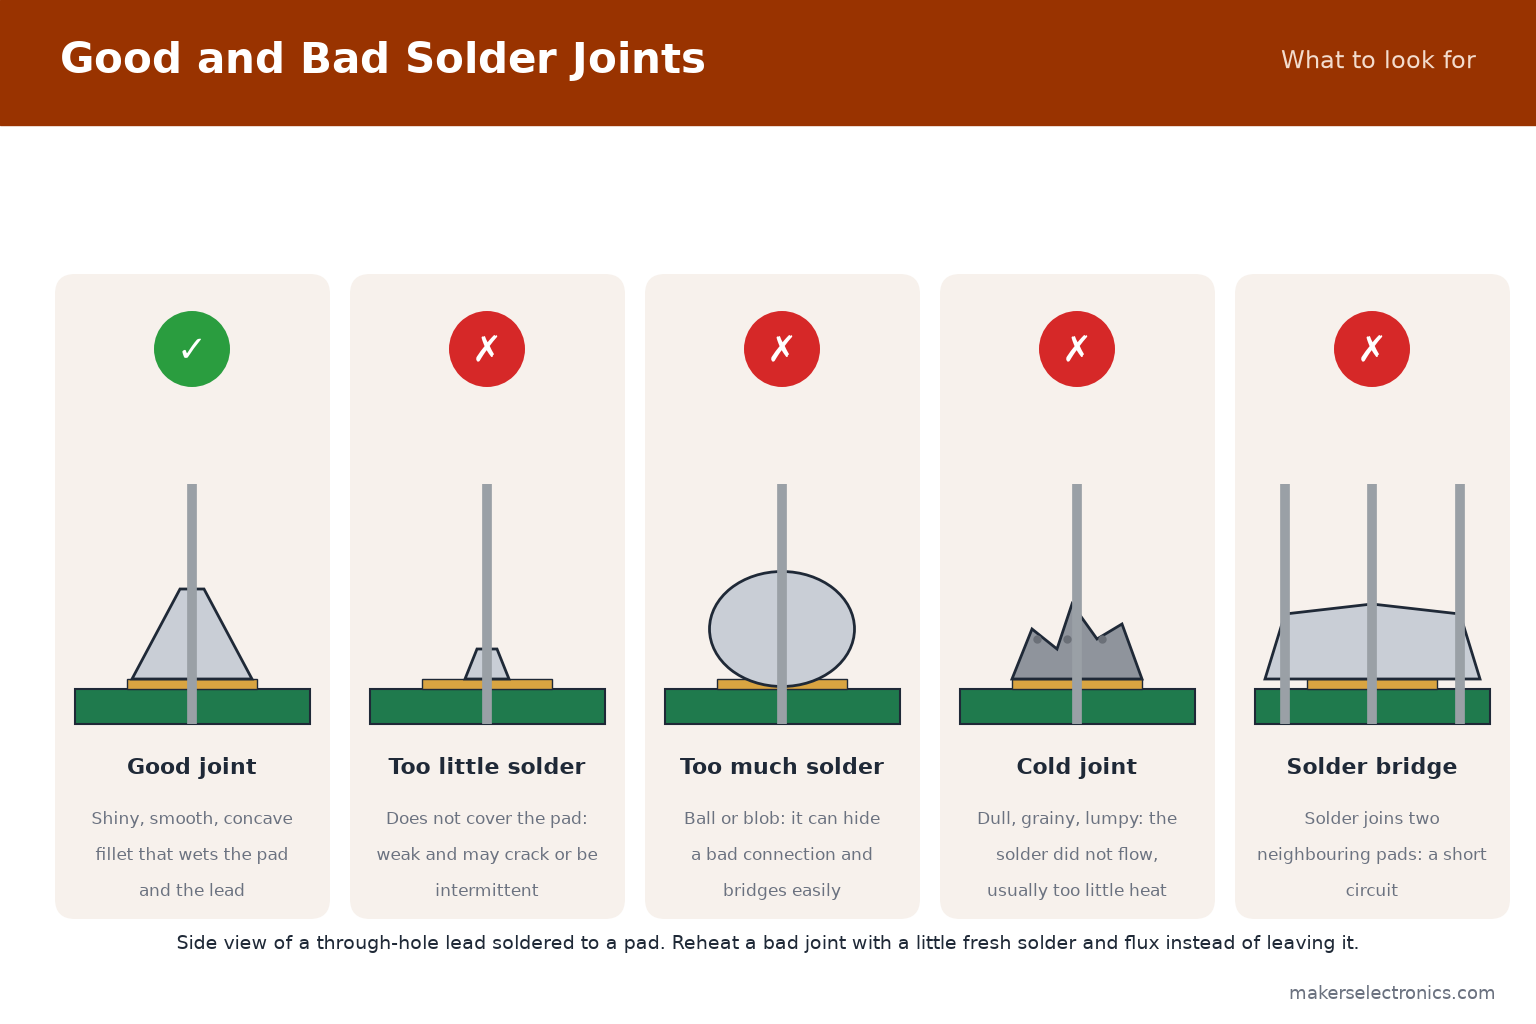
| Problem | What it looks like | Cause | Fix |
|---|---|---|---|
| Cold joint | Dull, grainy or lumpy | Not enough heat or the part moved while cooling | Reheat with a little fresh solder and flux |
| Too little solder | Does not cover the pad | Wire not fed long enough | Add solder to the joint |
| Too much solder | Ball or blob | Too much wire | Remove extra with wick or a pump, then reflow |
| Solder bridge | Solder joins neighboring pads | Too much solder, large tip | Wick it away with flux, or drag a clean tip |
| Lifted pad | Pad separated from the board | Too much heat or force | Prevent it: work faster, lower the temperature |
Test your joints after soldering. A multimeter in continuity mode shows whether a joint conducts, and the diode test and resistance modes check the part itself. See our guide to using a multimeter.
8. Taking Care of the Tip
- Tin the tip before you put the iron down, so it is covered in a thin layer of solder when it cools.
- Wipe the tip on a damp sponge or brass wool before each joint. Do not scrape it with a file or sandpaper: that removes its protective plating.
- Do not leave the iron on at high temperature for long periods. A hot, idle tip oxidizes and turns black.
- If the tip is black and will not take solder, use a tip tinner or a little flux on a tip cleaner to restore it, or replace the tip.
- Always rest the iron in its stand.
9. Removing Solder: Pump, Wick and Hot Air
You will need to remove solder when you make a mistake, change a part or repair a board.
TOPLIA EH06-135 Desoldering Pump
Solder Wick CP-2015 goot – Japan (W 2.0mm, L 1.5m)
TOPLIA EH858D HOT AIR Rework Station
- Desoldering pump: melt the joint, then press the trigger to suck the solder away. Good for through-hole legs.
- Desoldering wick: lay the copper braid on the joint, heat it from above, and the solder flows into the braid. Good for pads, SMD parts and bridges. Add flux for a better result.
- Hot air: heats the whole part with a controlled airflow. The best way to remove SMD chips and multi-pin connectors. Shield nearby plastic and use low airflow so small parts do not blow away.
Browse our soldering tools for desoldering wick, pumps and hot air stations.
10. Soldering SMD Parts
SMD parts are soldered on the surface of the board without holes. The skills are the same, with more flux, smaller tips and steadier hands:
- Add flux to the pads.
- Tin one pad with a small amount of solder.
- Hold the part with tweezers, in place, and reflow the tinned pad to fix one side.
- Solder the other side(s) with a little wire.
- For multi-pin chips, use plenty of flux and drag the tip along the pins, or use hot air.
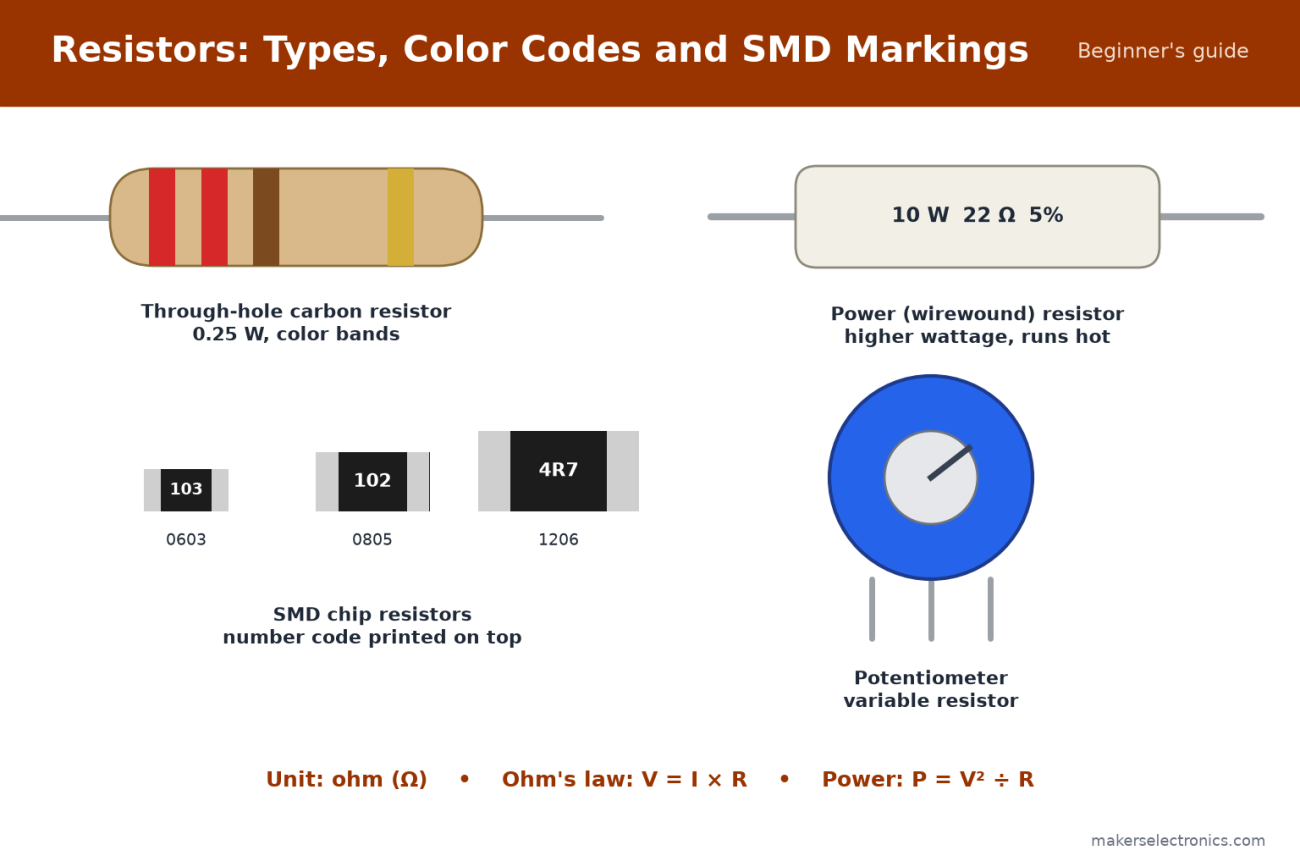
The sizes 0805 and 1206 are the easiest to start with, while 0603 and smaller need practice and good lighting. To read the markings on SMD resistors, see the resistors guide.
11. Safety
- The tip runs at 300°C or more. Use the stand, and never leave a hot iron unattended.
- Ventilate the room. Flux fumes irritate the eyes and lungs, so use a small fan to move air away from you, or a fume extractor.
- Wear safety glasses when you trim leads and when you desolder. Hot solder can splash and cut leads fly.
- Keep leaded solder away from food and wash your hands after handling it.
- Work on a heat-resistant surface, away from paper, plastic and cables, and keep children away from the bench.
- Unplug the iron when you finish and let it cool before you store it. Do not touch the tip to check if it is hot.
12. Common Mistakes to Avoid
- Melting the solder on the iron tip and dropping it on the joint instead of heating the joint itself.
- Using too little heat, then moving the part before the solder is solid.
- Using too much solder or a tip that is too large for the pad.
- Heating a pad for too long, which can lift it.
- Using plumbing solder or acid flux.
- Not cleaning the tip, so heat does not transfer.
- Soldering with a loose or damaged part, and not testing the joint.
- Not wearing safety glasses when trimming leads.
13. Frequently Asked Questions
What wattage soldering iron do I need for electronics?
For most electronics, 30 to 60 W with temperature control is enough. A higher wattage mainly means faster recovery on big joints, not a hotter tip.
Why does my solder ball up and not stick?
The surface is dirty or oxidized, or the iron is too cold or the tip is not clean. Clean the parts, add flux, tin the tip and heat both the pad and the lead.
What is the best solder for beginners?
A thin rosin-core wire, around 0.6 to 0.8 mm. Leaded solder is easier to learn on, but wash your hands and follow the safety rules. Lead-free is the default in commercial products and needs a hotter iron.
How do I know if a joint is good?
It is shiny, smooth and curved inward, it covers the pad and the lead, and the part does not move. A dull, grainy or ball-shaped joint should be reworked.
Can I solder without flux?
The flux inside the solder wire is often enough for clean parts. Extra flux makes joints easier and is useful on oxidized parts and for SMD work.
How do I clean flux residue?
Use isopropyl alcohol (IPA) and a small brush, and let the board dry. Rosin residue is not harmful but can be sticky and attract dust.
Why is my iron tip turning black?
It has oxidized, usually because it was left hot and untinned. Clean it, tin it, and keep it tinned when you are not using it. A badly worn tip needs replacing.
What is the difference between a soldering iron and a soldering station?
An iron is a single tool. A station is a control base with a display, usually a stand and a temperature setting, plus tips that are easy to change. Stations are easier to control and recover heat faster.
14. Conclusion
Soldering rewards a few habits: a clean tinned tip, the right temperature, heating the pad and the lead together, feeding the solder to the joint and not the tip, and keeping still while it cools. Start with simple through-hole parts, check each joint, and move to SMD when you are comfortable.
When you are ready to build your bench, see our soldering stations and the full range of soldering tools. And for the meter you will use to test your work, read how to use a multimeter.


Leave a comment
You must be logged in to post a comment.