



Arduino or Raspberry Pi? Where to Start?
Contents List
- Introduction
- Understanding the Basics
- What is Arduino?
- What is Raspberry Pi?
- Comparison between Arduino and Raspberry Pi
- Key Differences Between Arduino and Raspberry Pi
- When to Choose Arduino
- When to Choose Raspberry Pi
- Advantages and Disadvantages of Arduino
- Advantages and Disadvantages of Raspberry Pi
- Most common Arduino applications
- Most common Raspberry Pi applications
- Cost and Required Components for Arduino Project
- Cost and Required Components for Raspberry Pi Project
- Setting Up Arduino
- Setting Up Raspberry Pi
- Common Mistakes to Avoid
- Frequently Asked Questions
- Conclusion
Reading Time is 20 minute
1- Introduction
Choosing between Arduino and Raspberry Pi represents a foundational decision for anyone entering the world of electronics, programming, and physical computing. Both platforms have achieved immense popularity and have been instrumental in democratizing technology for hobbyists, students, educators, and engineers alike.
However, they are not interchangeable; they are fundamentally different tools designed for distinct purposes. Arduino is an open-source electronics platform centered around a microcontroller, making it ideal for dedicated, real-time hardware control.
In contrast, the Raspberry Pi is a credit-card-sized single-board computer that runs a full operating system, offering powerful computational capabilities for complex software and multitasking applications.
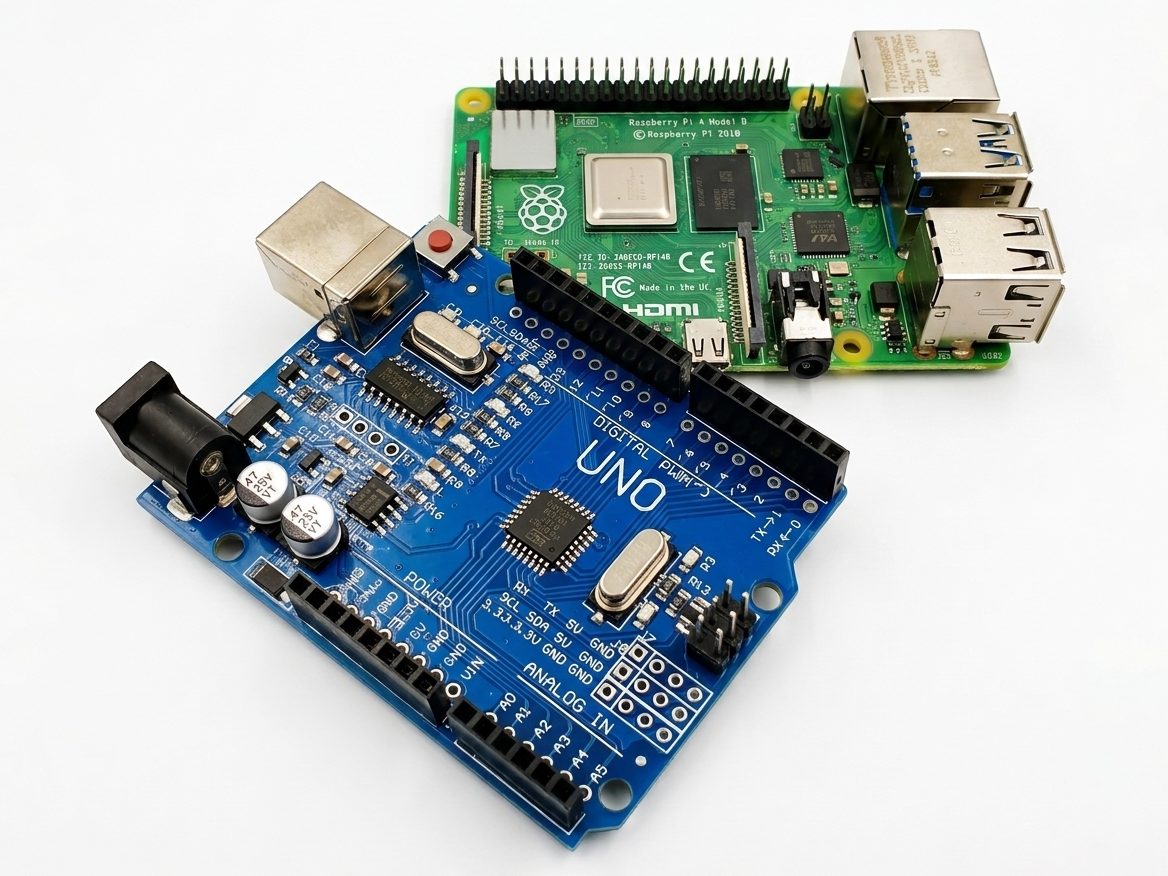
This guide is designed to demystify the choice by providing a comprehensive comparison of their core differences, practical setup instructions, and guidance on selecting the right tool for your specific project goals.
By understanding the unique strengths and limitations of each platform, you can confidently embark on your maker journey and build projects that perfectly match your creative and technical ambitions.
2- Understanding the Basics
Before diving into a detailed comparison, it is essential to grasp the fundamental nature of each platform.
While both can interact with sensors, motors, and other electronic components via GPIO pins, their underlying architectures dictate vastly different use cases and development experiences.
3- What is Arduino?
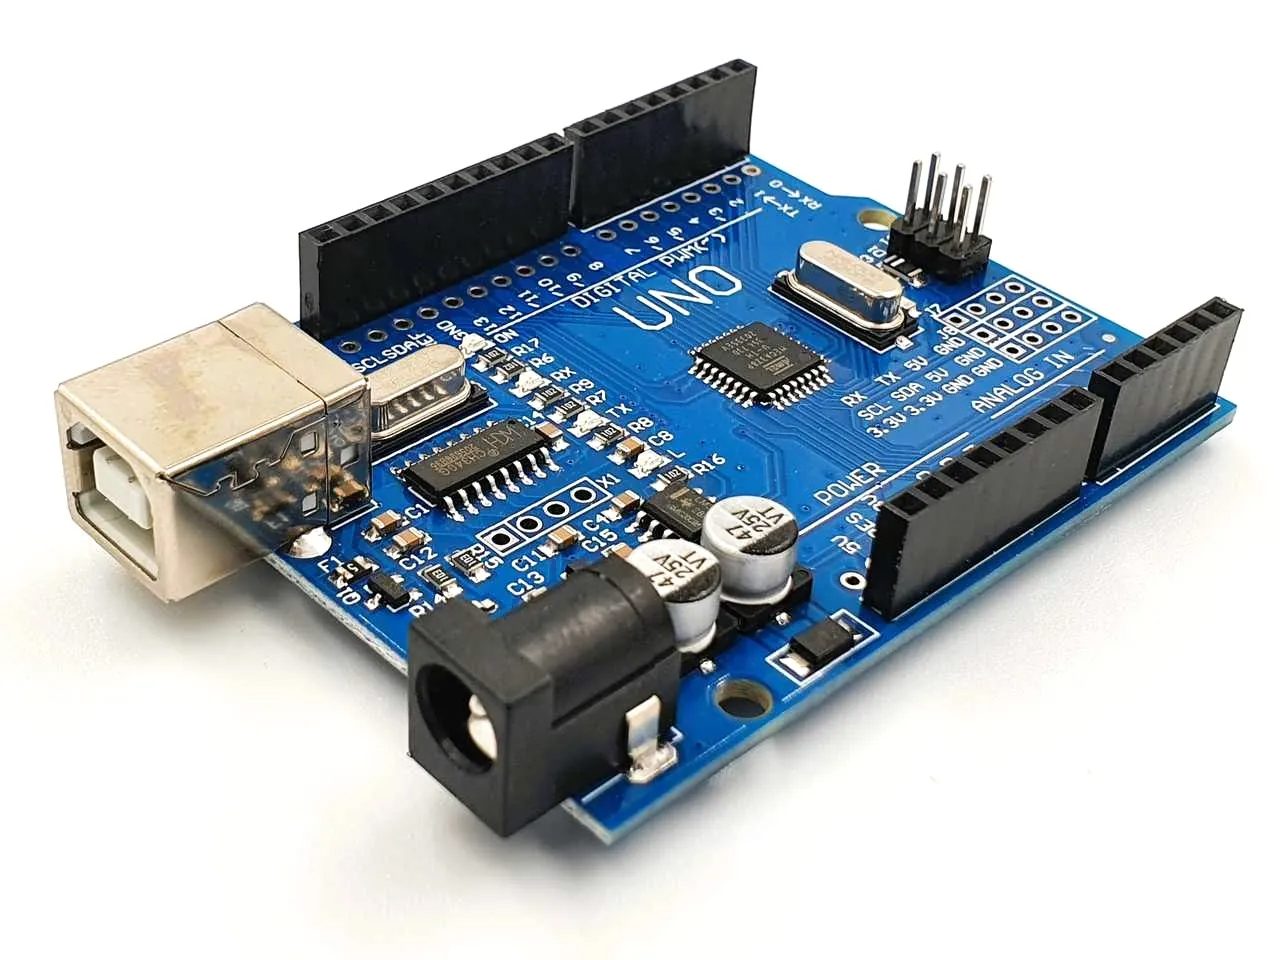
Arduino is an open-source electronics platform built around easy-to-use microcontroller boards and a user-friendly Integrated Development Environment (IDE).
At its heart, an Arduino board is a microcontroller—a small, self-contained computer designed to execute a single program repeatedly and predictably.
Unlike a standard computer, an Arduino does not run a general-purpose operating system like Windows or Linux. Instead, it operates with minimal overhead, allowing it to dedicate all its processing power directly to the task at hand.
When you write a program, known as a “sketch,” in the Arduino IDE, it gets compiled into machine code and uploaded to the microcontroller’s memory.
The board then powers on and executes this code from the beginning of the loop() function over and over again, continuously reading inputs and controlling outputs.
The most iconic model, the Arduino Uno, features an ATmega328P microcontroller, 32 KB of flash memory, and 2 KB of SRAM.
Its design philosophy prioritizes simplicity and direct hardware interaction, making it exceptionally well-suited for embedded systems where reliability, low power consumption, and precise timing are paramount.
The vast ecosystem includes thousands of tutorials, community-created libraries for interfacing with almost any sensor or actuator imaginable, and a supportive global community, ensuring that even absolute beginners can quickly turn their ideas into functioning hardware.
4- What is Raspberry Pi?
The Raspberry Pi is a series of small, affordable single-board computers developed by the Raspberry Pi Foundation to promote computer science education.
Unlike Arduino, the Raspberry Pi is a complete computer system packed onto a single circuit board.
It contains a multi-core ARM processor, a significant amount of RAM, and an SD card slot for booting a full-fledged operating system, typically a Linux-based distribution called Raspberry Pi OS.
Because it runs an operating system, the Raspberry Pi can perform a wide range of tasks similar to a desktop computer: browsing the web, playing high-definition video, running office suites, and compiling complex software.
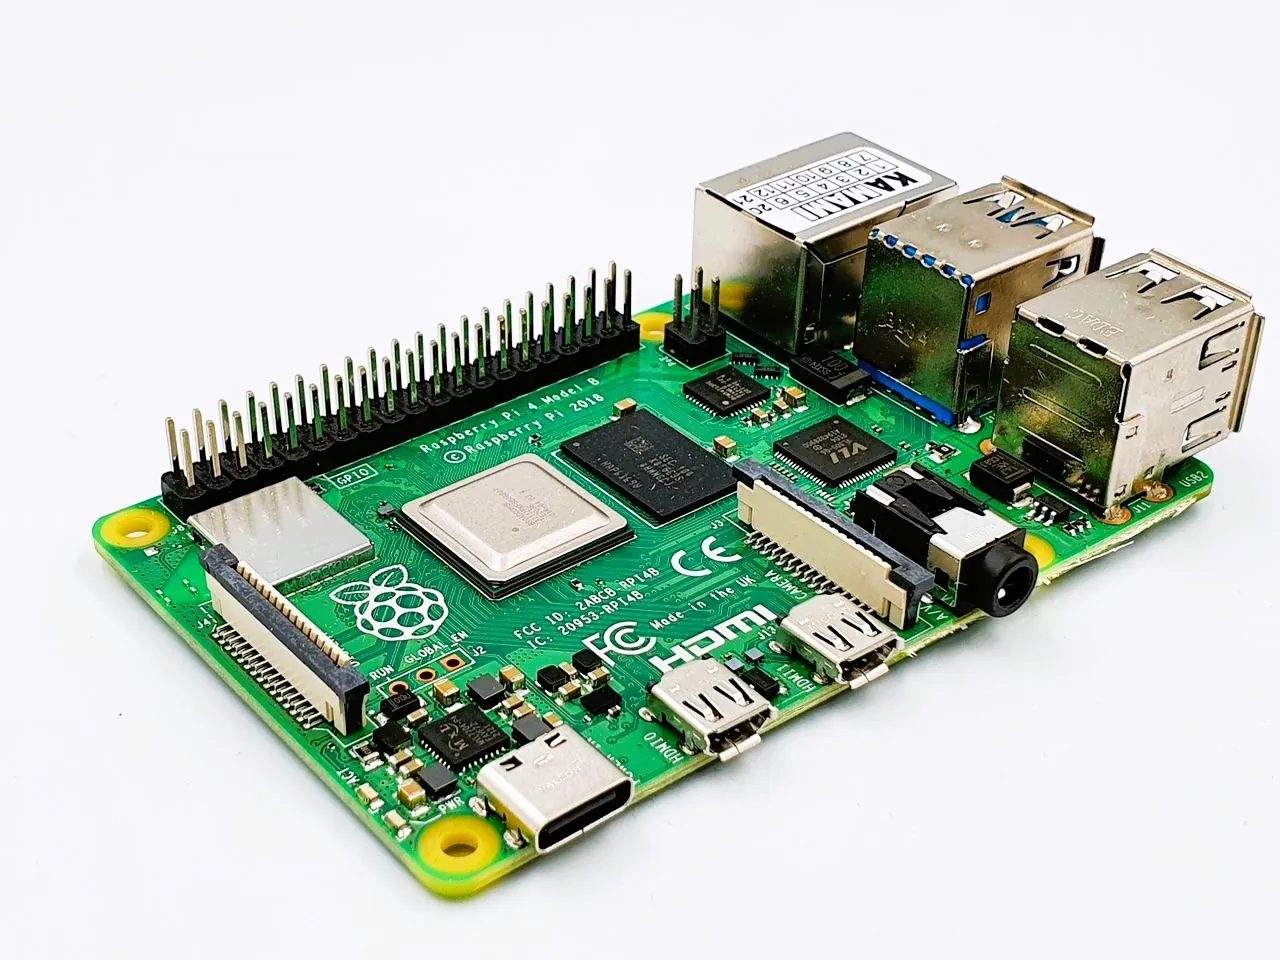
However, its true power for makers lies in its General Purpose Input / Output (GPIO) pins.
These pins allow the Raspberry Pi to connect to and control external electronic components, just like Arduino.
This combination of high processing power, extensive connectivity options, including built-in Wi-Fi, Bluetooth, and Ethernet on modern models, and the ability to run a full operating system makes the Raspberry Pi perfect for projects that require significant computation, media handling, internet connectivity, or complex software environments.
The Raspberry Pi 5 offers substantial performance improvements over previous generations, solidifying its position as a versatile tool for everything from home servers to robotics.
5- Comparison between Arduino and Raspberry Pi
The table below summarizes the fundamental differences that determine which board fits your project.
| No. | Parameter | Arduino | Raspberry Pi |
|---|---|---|---|
| 1 | Introduction | First introduced in 2005 at the Interactive Design Institute Ivrea (IDII), Italy | First Raspberry Pi board launched in 2012 by the Raspberry Pi Foundation |
| 2 | Architecture | Microcontroller | Microprocessor / System-on-Chip |
| 3 | Main Type | Microcontroller board | Single-board computer |
| 4 | Usage | Designed primarily for controlling connected electrical components and devices | Designed for computing data and managing electrical components and devices |
| 5 | Software Complexity | Simple | Complex |
| 6 | Hardware Complexity | Simple | Complex |
| 7 | CPU Architecture | Depends on the model: 8-bit on classic Uno/Nano boards; 32-bit on boards such as Due, Zero, and Portenta H7 | 32-bit on older models such as Pi Zero, Pi 1, and Pi 2; 64-bit on newer models such as Pi 3, Pi 4, and Pi 5 |
| 8 | RAM | Depends on the model; classic Arduino Uno has about 2 KB SRAM | Depends on the model; Raspberry Pi boards range from hundreds of MB to several GB of RAM |
| 9 | Clock Speed | Depends on the model; classic Uno, Nano, and Mega operate at 16 MHz | Depends on the model; Raspberry Pi boards range from about 700 MHz on early models to 2.4 GHz on Raspberry Pi 5 |
| 10 | Processing Power | Low | High |
| 11 | Memory | On-board flash memory | Typically uses a microSD card for storage; some models also include additional storage options |
| 12 | Operating System | No operating system required; RTOS is possible on some models | Yes; normally runs a Linux-based operating system such as Raspberry Pi OS |
| 13 | Programming | Mainly C/C++ using the Arduino IDE | Python, C/C++, Java, JavaScript, and many other languages |
| 14 | Development Tools | Arduino IDE | Multiple development environments and programming tools |
| 15 | I/O Voltage | Depends on the model; commonly 5 V on classic Uno/Nano/Mega boards and 3.3 V on many newer boards | 3.3 V GPIO |
| 16 | Input/ Output Capabilities | Digital and analog I/O | Primarily digital GPIO; analog input generally requires an external ADC |
| 17 | Communication Interfaces | UART, SPI, and I²C, depending on the model | UART, SPI, I²C, HDMI, Ethernet, USB, and other interfaces depending on the model |
| 18 | Sensors | Excellent for direct sensor interfacing | Supports sensors through GPIO and communication interfaces |
| 19 | Motor Control | Excellent with suitable driver circuits | Possible with suitable driver circuits |
| 20 | Real-Time Control | Excellent and highly predictable | More complex because of operating-system scheduling |
| 21 | I/O Current Drive | Generally better suited to direct low-power hardware control | GPIO current capability is more limited; external drivers are often required |
| 22 | Connectivity | Connectivity options vary; additional modules may be required | Many models provide built-in Wi-Fi and Bluetooth; Ethernet is available on many models |
| 23 | Expandability | Shields and expansion boards | Extensive HATs and expansion boards |
| 24 | Power Consumption | Low; varies by model | Higher; varies by model and peripherals |
| 25 | Battery Projects | Very suitable for low-power applications | Less suitable for long battery operation, depending on the model |
| 26 | Cameras | Limited | Excellent support for camera-based projects |
| 27 | AI Projects | Limited; depends on the board and available resources | Better suited to many AI and machine-learning applications |
| 28 | Web Servers | Limited and resource-constrained | Well suited to web servers and network applications |
| 29 | Beginner Electronics | Easier for learning basic electronics and hardware control | More complex because it functions more like a computer |
| 30 | Cost | Generally lower | Generally higher |
| 31 | Typical Applications | Sensor systems, automation, traffic-light controllers, motor control, robots, and embedded projects | Web servers, media centers, robotics, camera systems, game servers, AI, and advanced computing |
| 32 | Best For | Direct hardware control, simple automation, sensors, and real-time embedded systems | Computing, networking, multimedia, advanced robotics, AI, and software-intensive projects |
6- Key Differences Between Arduino and Raspberry Pi
The choice between Arduino and Raspberry Pi hinges on a deep understanding of their fundamental architectural differences, which manifest in performance, power usage, programming, and scalability.
While both platforms can interact with electronic hardware, their roles within a project are complementary rather than competitive.
Hardware Architecture
The most critical distinction lies in their hardware architecture.
An Arduino is a microcontroller, a device designed to run one program continuously. It has a simple processor, limited memory, and no operating system, which makes it extremely reliable and efficient for its designated tasks.
A Raspberry Pi conversely, is a microprocessor-based single-board computer. It possesses a powerful processor, large amounts of RAM, and relies on an operating system stored on an SD card to manage resources and run multiple applications simultaneously.
This difference is analogous to a dedicated appliance, such as an Arduino-controlled coffee maker, versus a general-purpose kitchen, like a Raspberry Pi capable of baking, boiling, and blending.
Programming Languages
Arduino programs are written in a simplified dialect of C/C++ using the official Arduino IDE.
The language is structured around two essential functions: setup(), which runs once when the board is powered on, and loop(), which contains the main program logic and runs perpetually.
This structure is intuitive for hardware projects.
Furthermore, the Arduino ecosystem provides a vast library of pre-written code that abstracts away the complexities of communicating with sensors and actuators, enabling rapid prototyping.
The Raspberry Pi due to its operating system, offers much greater flexibility in programming languages.
While it can run C/C++, Python is overwhelmingly the most popular choice for beginners and hobbyists because of its readability and extensive support for hardware interaction, data analysis, and artificial intelligence.
The ability to use professional-grade development tools and leverage a massive software repository gives the Raspberry Pi a significant advantage for projects that extend beyond simple hardware control.
Power Requirements
Power efficiency is a decisive factor for many projects, particularly those intended to be portable or deployed remotely.
Arduino boards are renowned for their low power consumption. An Arduino Uno, for example, typically draws around 50 milliamps (mA) of current, while low-power variants can operate on just a few milliamps.
This allows Arduino-based projects to run for months or even years on batteries, making them ideal for environmental sensors, wearable technology, and solar-powered installations.
The Raspberry Pi, being a more powerful computer, requires significantly more power.
A Raspberry Pi 4 can draw 500–1000 mA or more under heavy load, and even the efficient Raspberry Pi Zero requires more power than a typical microcontroller.
This necessitates a stable 5 V power supply capable of delivering sufficient current, making it less practical for long-term battery operation without a large-capacity power source.
For projects constrained by power, Arduino is often the superior choice.
Project Scalability
Scalability differs fundamentally between the two platforms.
Arduino scales horizontally. It excels at creating networks of devices where each Arduino handles a specific, simple task.
For instance, a home automation system might use one Arduino to control lights in the living room, another to monitor temperature in the basement, and a third to manage a garage door opener.
Each unit operates independently but communicates with a central hub if needed.
However, the individual processing power and memory of Arduino are limited, preventing it from handling computationally intensive tasks.
The Raspberry Pi in contrast, scales vertically.
One powerful Raspberry Pi can serve as a central hub, media center, web server, and IoT controller simultaneously.
Its ability to run multiple programs, access the internet, process images, and store large datasets makes it the go-to platform for projects whose complexity grows with computational demands.
For a beginner, this means choosing Arduino for projects focused on interacting with many simple components, and Raspberry Pi for projects requiring a rich software environment or significant data processing.
7- When to Choose Arduino
Arduino remains the definitive choice for a wide range of projects where reliability, real-time performance, and low power consumption are more important than raw computational power.
Its simplicity and direct hardware control make it an excellent starting point for learning the fundamentals of electronics and embedded systems.
Best Arduino Projects for Beginners
For those new to the world of physical computing, Arduino offers a gentle learning curve combined with immediate and tangible results.
Starting with simple projects builds confidence and foundational skills before tackling more complex endeavors.
Some of the best Arduino projects for beginners include:
LED Control and Lighting
- The classic “Blink” tutorial is the first step.
- From there, you can progress to fading LEDs with PWM, creating patterns with LED arrays, building a simple traffic light simulation, or designing a mood lamp that changes color based on sensor input.
Sensor-Based Projects
- Arduino’s strength in real-time sampling makes it perfect for working with sensors.
- Build a digital thermometer and hygrometer using a DHT sensor, create a motion-activated night light with a PIR sensor, construct a proximity alarm with an ultrasonic sensor, or build a plant moisture monitor that waters a plant automatically.
Motor Control and Robotics
- Arduino is widely used in robotics due to its precise timing.
- Create a simple line-following robot, control a servo motor to build a robotic arm, or drive a DC motor to power a small rover.
- The availability of motor driver shields simplifies connecting motors and relays to the board.
Interactive Art and Wearables
- The low power consumption of Arduinos like the Pro Mini makes them ideal for wearable projects.
- Design an LED-studded costume that reacts to music, build an interactive art installation that responds to touch or movement, or create a smart mirror that displays the time and weather.
Home Automation
- Arduino can form the basis of a simple home automation system.
- Build a remote-controlled power outlet, create a security system with a buzzer and motion sensor, or automate window blinds using a motor shield.
8- When to Choose Raspberry Pi
While Arduino dominates in the realm of dedicated hardware control, the Raspberry Pi occupies an important niche for projects that demand significant computational power, sophisticated software, and robust connectivity.
Its ability to function as a full computer makes it a versatile tool for a diverse range of applications.
Best Raspberry Pi Projects for Beginners
The Raspberry Pi’s strengths become apparent when a project moves beyond simple on/off control and into the realms of software, media, and networking.
Ideal beginner projects include:
Media Centers and Entertainment
- The Raspberry Pi can become a capable media center.
- Using software such as Kodi or Plex, it can stream movies, television shows, and music from a local network or the internet to a television, transforming it into a smart entertainment hub.
Home Servers and NAS
- Due to its lower power consumption compared with a traditional desktop PC, the Raspberry Pi can be an excellent candidate for a home server.
- Beginners can set up a file server to share documents, a print server, or a Network Attached Storage (NAS) device for backing up photos and videos from other computers on the network.
Smart Home Hub
- Platforms such as Home Assistant, Node-RED, and OpenHAB can be installed on a Raspberry Pi to create a centralized control system for a smart home.
- You can control lights, thermostats, cameras, and other IoT devices through a single, customizable web interface.
Learning to Code
- The Raspberry Pi provides an accessible entry point into serious programming.
- With a full Linux operating system, it supports many programming languages, but Python is one of the most common starting points.
- You can learn programming fundamentals, develop graphical games with Pygame, or explore web development by creating your own website.
Camera and Vision Projects
- The Raspberry Pi Camera Module enables a wide range of creative projects.
- Beginners can build a time-lapse camera, a webcam, or a DIY security system that detects motion and sends notifications.
- More advanced users can experiment with computer vision and facial recognition.
Web Servers and IoT Dashboards
- The Raspberry Pi can host a personal website or dashboard to visualize data from sensors connected to another device such as an Arduino.
- This is useful for monitoring environmental conditions, tracking energy usage, or creating a custom control panel for a project, all accessible from a web browser.
9- Advantages and Disadvantages of Arduino
Advantages of Arduino
- User Friendly: Arduino IDE is so user-friendly that even a complete beginner finds it very easy to learn.
- Above all: Open-source, Arduino has an enormous community providing a huge number of tutorials, libraries, and other resources.
- variety of shields: There exist a variety of shields that can give extended capabilities to an Arduino for wireless, motor control, and even Internet connectivity.
- Economical: Arduino boards are much cheaper in price than most other microcontrollers or development boards.
- Platform Independent: The Arduino Software runs on Windows, Mac OS X and Linux.
Disadvantages of Arduino
- Limited Computational Power: The processing and memory resources of the Arduino boards are actually quite limited, so they cannot be used for higher operations, such as an operating system workable through intensive computation.
- Absence of Multitasking: Arduino boards are fundamentally designed for single-task execution, signifying their inability to manage several tasks concurrently.
- Connectivity is limited: While shields can absolutely extend the connective selection, the basic model of an Arduino does have its features lacking, such as Wi-Fi and Ethernet.
10- Advantages and Disadvantages of Raspberry Pi
Advantages of Raspberry Pi
- Full-Fledged Computer: Raspberry Pi is running on a full-fledged operating system, which can perform tasks like running a desktop computer, including multitasking.
- Versatile: Means that the Raspberry Pi is useful for a wide range of uses — from simple projects like home automation to complex applications in artificial intelligence and machine learning.
- Extensive Connectivity: Raspberry Pi has numerous options for connectivity, such as HDMI, USB, Ethernet, Wi-Fi, and Bluetooth, making the system ideal for networked projects.
- Strong Community Support: Besides Arduino, the Raspberry Pi is also developed on a Dynamite-sized community that boasts very active forums, tutorials, and resources.
- GPIO Pins: The Raspberry Pi makes it possible to interface with electronic components by the use of General Purpose Input/Output GPIO Pins, this is by far sophisticated compared to Arduino inputs.
Disadvantages of Raspberry Pi
- Complexity: Setting up and using the Raspberry Pi is a bit more complicated compared to Arduino, because it requires some knowledge of operating systems and possibly command-line interfaces.
- High Power Consumption: The Raspberry Pi has high power consumption compared to an Arduino, which could become a problem for battery-powered projects.
- Cost: Raspberry Pi is pretty cheap, though becomes rather expensive with the designing of the SD cards, power supplies, and cases in comparison to Arduino boards. Overkill for Simple Projects: For simple electronics projects, Raspberry Pi might be overpowered and unnecessary, making Arduino a considerably better option.
11- Most common Arduino applications
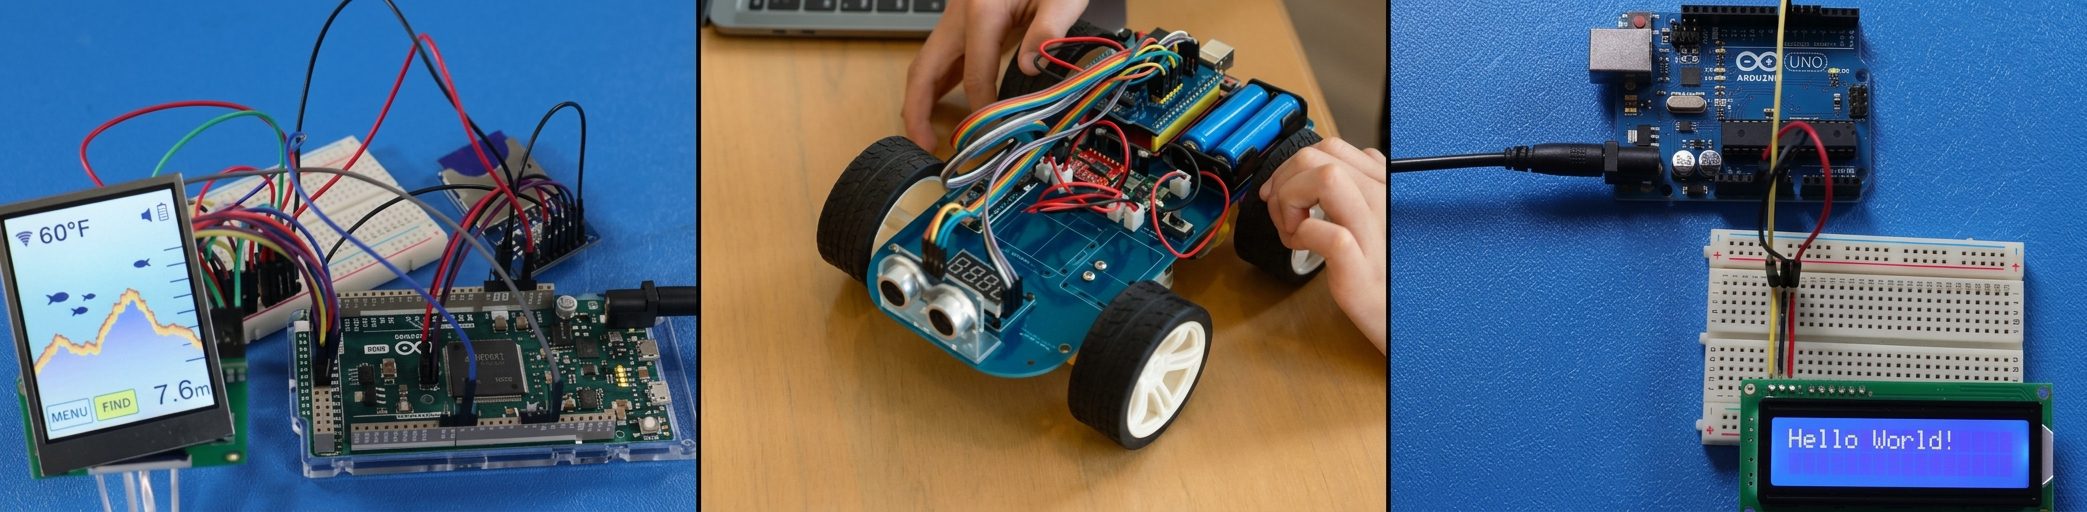
- Robotics
- Home automation
- Electronics prototyping
- IoT (Internet of Things)
- Data logging
- Hobby and educational projects
- Wearable technology
12- Most common Raspberry Pi applications
- Advanced robotics
- Industrial control systems
- Home automation
- Web server management
- Security systems
- Image and video systems
- IoT (Internet of Things)
- Educational computing
- Artificial intelligence

13- Cost and Required Components for Arduino Project
- Understanding the total cost of a project is crucial for beginners.
- The price of the main board is only the beginning; a complete setup requires several other essential components.
- Generally, Arduino projects tend to be less expensive to get started with, though both platforms offer budget-friendly entry points.
- Arduino boards themselves are relatively inexpensive.
- Official boards like the Uno are generally affordable, while compatible clones can be found for less.
- However, a functional project requires more than just the board.
- A basic Arduino starter kit, which bundles necessary components, can be an excellent way for beginners to get started without making individual purchases.
| Component | Descriptions and Cost |
| Arduino Uno board | Arduino UNO R4 Minima board (Clone) Type-C |
| Arduino Nano board | Arduino Nano Atmega328PU-PH with CH340G Uploader – Mini USB
Arduino Nano ATmega328PU-TH with CH340G Uploader – USB Type-C Arduino Nano ATmega328PU-TH with CH340G Uploader – Micro USB Arduino Nano ATmega328PB-U CH340C Driver 5V 16MHz Mini USB |
| USB cable | USB Cable For Arduino Uno |
| Breadboard | Breadboard 1660-Tie Point BB-2T4D with Metal Plate |
| Jumper wires | All types of Jumper Wires |
| Sensors (temperature, light, motion) | All types for temperature, Light, motion Sensors |
| Resistors | All Types for Resistors |
| LEDs | All Types for LEDs |
| Boxes / project enclosures | All Types for Project Boxes |
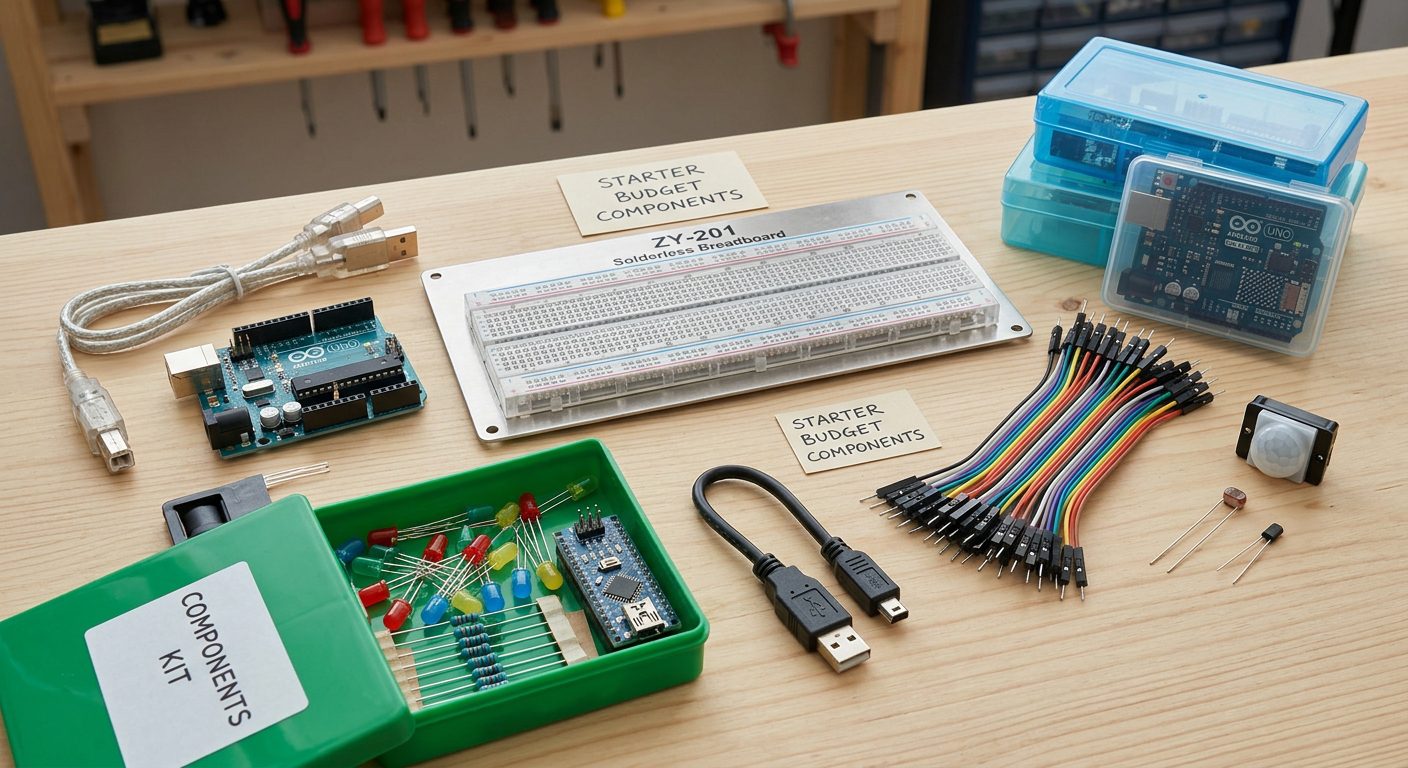
Arduino Project Required Components
- Arduino Board : The main microcontroller board.
- USB Cable : Used for programming the board and providing power. Often included with the board.
- Breadboard : A solderless board for prototyping circuits.
- Jumper Wires : Used to connect components on the breadboard to the Arduino.
- Basic Sensors : Examples include temperature, light, and motion sensors.
- Basic Components : Includes LEDs, resistors, buttons, and potentiometers.
- Boxes / project enclosures : Used to protect the Arduino board, wiring, sensors, and other electronic components. Particularly more practical and protected project.
14- Cost and Required Components for Raspberry Pi Project
- Raspberry Pi boards are generally more expensive than their Arduino counterparts.
- Beyond the board, a Raspberry Pi may require several additional components for a functional setup.
| Component |
Descriptions and Cost |
| Raspberry Pi board | Raspberry Pi 4 Computer Model B – 4GB RAM – Made in UK
Raspberry Pi 4 Computer Model B – 8GB RAM – Made in UK |
| 5V/3A power supply | XBS-0530 Adapter 5V 3A C-Type |
| MicroSD card (16–32 GB) | |
| Keyboard & Mouse | All Types for Keyboard and Mouse |
| Display / monitor | All Types for Display / Monitor |
| Boxes / project enclosures | All Types for Project Boxes |
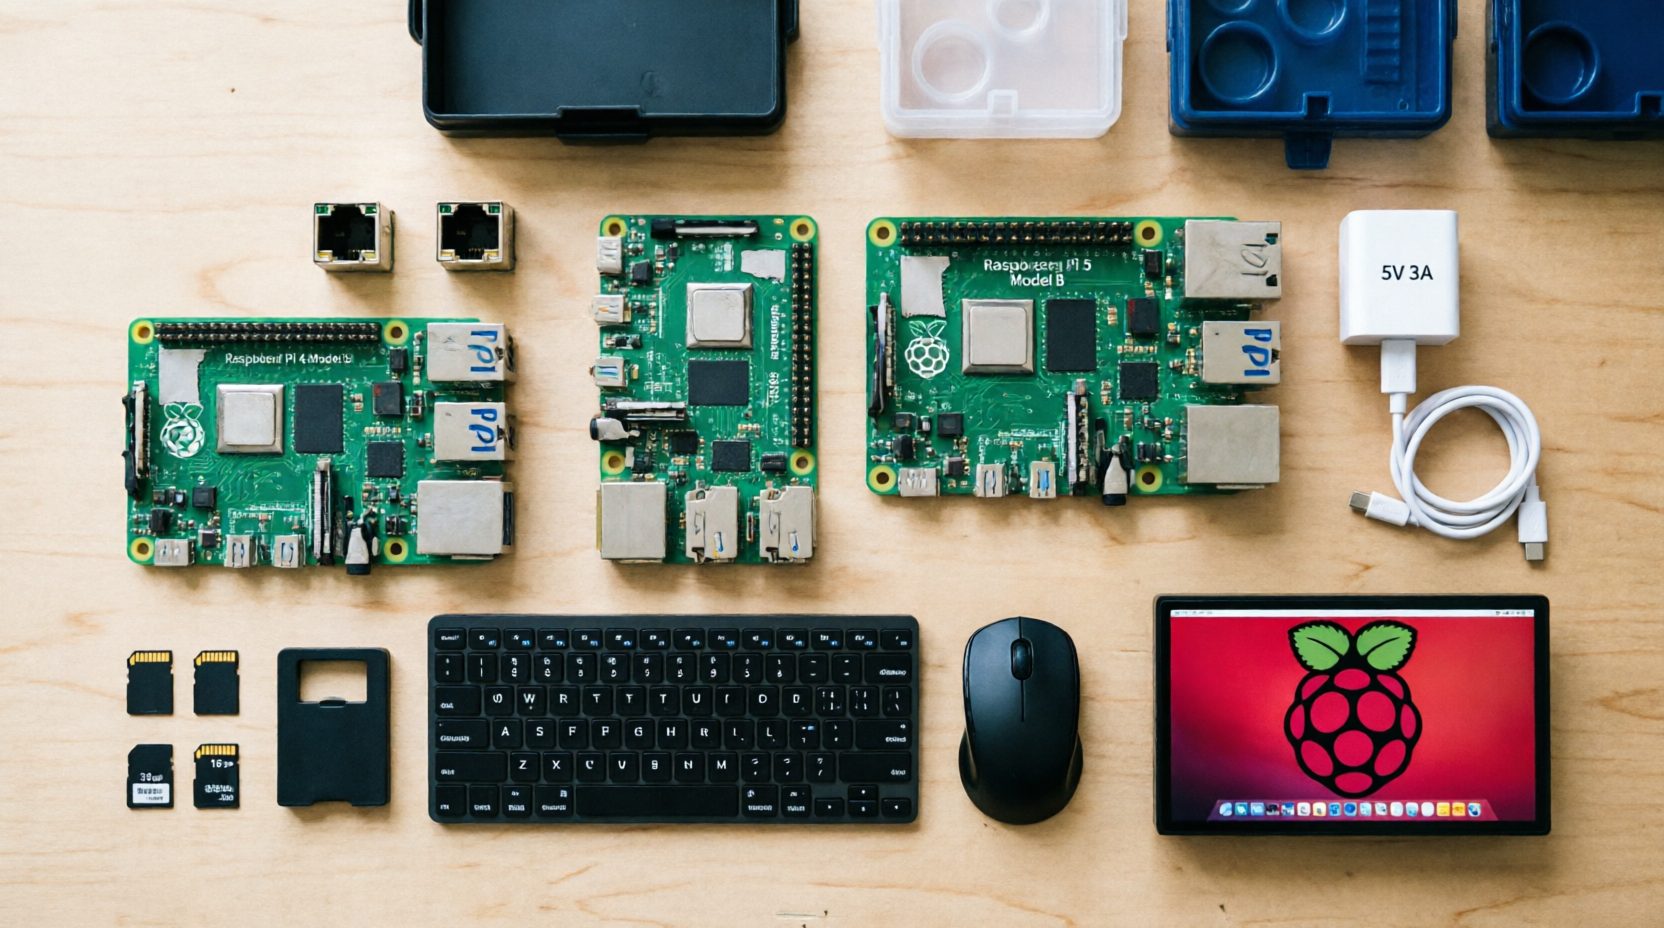
Raspberry Pi Project Required Components
- Raspberry Pi Board : The main single-board computer.
- Power Supply : A stable USB-C power adapter suitable for the selected Raspberry Pi model.
- MicroSD Card : Used to install the operating system and store data.
- Keyboard and Mouse : Useful for initial setup and configuration when using a desktop environment.
- Display or Monitor : Useful for initial setup, although a Raspberry Pi can also be configured for headless operation.
- Boxes / project enclosures : Used to protect the Raspberry Pi board, Particularly more protected project.
Note:
- The total cost of a Raspberry Pi setup depends on which accessories you already have.
- If you already own a monitor, keyboard, and mouse, the additional cost can be significantly reduced.
- Another option is setting up the Pi in “headless” mode, where you configure it from another computer and then access it remotely.
15- Setting Up Arduino
- The initial setup process is often a major hurdle for beginners.
- The process for setting up an Arduino is remarkably simple and consistent across different operating systems.
Step 1: Install the Arduino IDE
- Download the Arduino Integrated Development Environment (IDE) from the official Arduino website.
- The IDE is available for Windows, macOS, and Linux.
- Run the installer and follow the on-screen instructions.
Step 2: Connect Your Arduino
- Use the appropriate USB cable to connect your Arduino board to a USB port on your computer.
- The board should power on, and an onboard LED should illuminate.
Step 3: Select Your Board and Port
- Open the Arduino IDE.
- Go to the Tools menu and select your specific Arduino board model.
- Then select the correct communication port.
- On Windows, this is typically a COM port. On macOS and Linux, the device name depends on the operating system and connected board.
Step 4: Upload Your First Sketch
The Arduino IDE comes with a collection of example sketches.
To get started, navigate to:
File → Examples → 01.Basics → Blink
- This sketch makes the onboard LED blink on and off.
- Click the Upload button.
- The IDE will compile the code, check for errors, and then upload it to your board.
- After a few seconds, the onboard LED should begin to blink, confirming that your setup was successful.
Step 5: Start Building
- Once you have successfully uploaded the Blink sketch, you are ready to start experimenting.
- Modify the code to change the blinking speed, or begin connecting external components to a breadboard to expand your project.
16- Setting Up Raspberry Pi
Setting up a Raspberry Pi involves preparing storage with an operating system and then performing an initial boot configuration.
Step 1: Prepare the MicroSD Card
- Download the Raspberry Pi Imager tool from the official Raspberry Pi website.
- Insert a microSD card into your computer.
- Launch the Imager and select Raspberry Pi OS from the available operating-system choices.
- Then choose the microSD card and write the operating system to it.
Step 2: Configure Basic Settings
- Before writing the image, you can pre-configure several settings.
- These may include your country and language, time zone, hostname, SSH access, and Wi-Fi credentials.
- Pre-configuring Wi-Fi is especially useful when setting up the Pi in “headless” mode without a monitor or keyboard.
Step 3: Assemble Your Raspberry Pi
- Insert the prepared microSD card into the Raspberry Pi.
- Connect a keyboard, mouse, and display if you are using a graphical setup.
- Finally, connect the appropriate power supply.
Step 4: First Boot and Setup
- Power on your Raspberry Pi by connecting the power supply.
- The first boot may take some time while the system initializes.
- If you did not pre-configure your settings, you will be guided through an initial setup process.
- Follow the prompts to create your password, connect to Wi-Fi, and complete the configuration.
Step 5: Update the System
- After the initial setup, it is good practice to update the operating system and installed software.
- Open the terminal and run:
- Sudo apt update
- Sudo apt full-upgrade -y
- These commands update the package lists and upgrade installed software.
Step 6: Enable GPIO Access
To control hardware using GPIO pins, you may need appropriate Python libraries depending on your application.
For example:
- Sudo apt install python3-rpi.gpio python3-gpiozero -y
- GPIO Zero provides a simpler programming interface that can be particularly convenient for beginners.
Step 7: Start Your First Project
- You are now ready to control hardware.
- A classic first project is to make an LED blink using a Python script.
- Connect an LED to a GPIO pin through an appropriate resistor, connect the circuit correctly, and use the gpiozero library to control the LED.
17- Common Mistakes to Avoid
- Embarking on your first electronics project is an exciting journey, but it comes with a learning curve.
- Being aware of common pitfalls can save you time, prevent frustration, and protect your components from damage.
Mistake 1: Skipping the Fundamentals
- Many newcomers dive straight into complex projects without first understanding basic electronics principles such as voltage, current, resistance, and Ohm’s Law.
- It is crucial to start with simple concepts.
- Learn how to read a resistor’s color code, understand what a circuit is, and know the difference between series and parallel connections.
- Attempting to build a project involving motors or relays without understanding these basics can lead to short circuits and damaged components.
Mistake 2: Incorrect Power Connections
- Connecting power incorrectly is one of the fastest ways to damage a board.
- Always double-check your wiring before applying power.
- Pay close attention to polarity, voltage levels, and current requirements.
- A critical point of confusion is the logic level of GPIO pins.
- Most Arduino boards use 5 V logic levels, meaning their digital pins may operate at approximately 5 V. In contrast, Raspberry Pi GPIO uses 3.3 V logic and is not designed to accept 5 V signals.
- Connecting an incompatible 5 V output directly to a Raspberry Pi GPIO input can permanently damage the Pi.
Mistake 3: Not Using Current-Limiting Resistors
- Light Emitting Diodes (LEDs) and some other components are sensitive to excessive current.
- To prevent damage, use a current-limiting resistor in series with the LED.
- The required resistor value depends on the LED’s forward voltage and the supply voltage.
Mistake 4: Ignoring Documentation and Datasheets
- Every electronic component, from a simple sensor to a complex IC, comes with a datasheet or product guide.
- These documents contain important information about operating voltages, pin configurations, communication protocols such as I²C or SPI, maximum ratings, and example code.
- Before integrating a new component into your project, take the time to read its documentation.
- It will save you hours of troubleshooting and help ensure that you are using the component correctly.
Mistake 5: Copying Code Without Understanding
- While it is tempting to copy and paste code from online tutorials, it is important to understand what each line of code does.
- This helps you troubleshoot problems when something goes wrong and enables you to adapt the code for your specific project.
- Blindly copying code without understanding it turns you into a passive operator rather than an active creator.
Mistake 6: Poor Wiring Practices
- Messy, tangled wires are frustrating to debug and are prone to coming loose or causing short circuits.
- Take the time to plan your circuit and route your wires neatly.
- Use jumper wires of appropriate length and keep the prototype organized.
- A clean and organized prototype is easier to build, test, and modify.
Mistake 7: Not Backing Up Your Work
- Data loss can be devastating.
- For Raspberry Pi projects, regularly back up your SD card or important project data.
- For Arduino projects, save your sketches in clearly named folders with descriptive comments.
- Using a version-control system such as Git is also a good practice for tracking changes and preventing permanent loss of your work.
Mistake 8: Expecting Immediate Perfection
Electronics and programming are skills that develop with practice.
Your first projects will likely encounter bugs and may not work exactly as expected on the first attempt.
Troubleshooting is a fundamental part of the learning process.
Be methodical:
- Check your wiring.
- Verify your code.
- Consult the documentation.
- Use reliable technical communities and resources.
- Do not be discouraged by initial failures. Persistence is an important part of learning.
18- Frequently Asked Questions
To further clarify the Arduino vs. Raspberry Pi debate, here are answers to some of the most common questions beginners ask.
Q1: Can I use Arduino and Raspberry Pi together in the same project?
Yes, Using Arduino and Raspberry Pi together can be a powerful approach because you can combine the strengths of both platforms.
A common setup involves using Arduino for real-time, precise hardware control, such as reading analog sensor data or driving a stepper motor, while Raspberry Pi handles higher-level tasks that require more processing power, such as connecting to the internet, analyzing data, or displaying information on a screen.
They can communicate through methods including USB serial communication, I²C, or wireless technologies such as Wi-Fi and Bluetooth.
Q2: Which is better for an absolute beginner with no programming experience?
Both platforms are beginner-friendly, but they appeal to different interests.
Arduino introduces programming through a C/C++-based environment with immediate physical feedback. Your code can control an LED, motor, or sensor, which can be very motivating.
Raspberry Pi, with its emphasis on Linux and Python, can be attractive to people who are more interested in software and web development.
The best choice depends on your primary interest.
If you want to learn electronics and hardware control first, start with Arduino.
If you are more interested in coding and software applications, Raspberry Pi can be a suitable starting point.
Q3: Do I need to buy an official Arduino or Raspberry Pi board, or are clones okay?
Official boards are produced by the organizations behind the platforms and generally offer the highest level of compatibility with official documentation and software.
For beginners, starting with an official board can make troubleshooting easier.
However, there are many compatible Arduino boards and other single-board computers available at lower prices.
Once you are comfortable with the fundamentals, exploring compatible alternatives can be a useful way to reduce costs, provided that their specifications are checked carefully.
Q4: Can Raspberry Pi replace Arduino for all projects?
A Raspberry Pi can perform many tasks that an Arduino can perform, but it is not always the most practical solution.
Raspberry Pi’s higher power consumption makes it less suitable for many battery-powered or portable projects.
Its operating-system-based architecture can also make it less appropriate for applications requiring highly predictable, time-critical control.
It can also be more expensive and more complex than necessary for simple repetitive tasks.
Therefore, use Raspberry Pi when you need its computational power, multitasking abilities, or extensive connectivity.
Use Arduino for simple, dedicated hardware tasks or projects where power efficiency and predictable control are important.
Q5: How long does it take to learn Arduino or Raspberry Pi?
The timeline depends heavily on your dedication, background, and the complexity of the projects you attempt.
With focused practice, you can complete basic Arduino projects such as blinking an LED or reading a sensor relatively quickly.
Becoming comfortable with more moderate projects, where you can independently design and build something new, requires regular practice.
Advanced mastery involving complex systems, custom code, and hardware design can take considerably longer.
The key is to start small, be patient, and consistently challenge yourself with new projects.
Q6: What programming language should I learn first?
If you choose Arduino, you will primarily work in its C/C++-based programming environment.
If you choose Raspberry Pi, Python is one of the most popular and beginner-friendly languages to start with.
For someone with no programming experience, Python can provide a gentle entry into programming and is useful far beyond electronics.
However, if your primary goal is to work with hardware and embedded systems, the Arduino C/C++ environment is also an accessible place to begin because of the extensive examples and immediate physical feedback.
Q7: Can I power Arduino or Raspberry Pi with batteries?
Yes, but there are significant differences in feasibility and runtime.
Arduino is well suited to low-power operation.
Depending on the specific Arduino model, configuration, and battery, it can operate for long periods, making it useful for portable and autonomous applications.
Raspberry Pi requires a stable power source capable of supplying sufficient current.
Although a Raspberry Pi can be powered from a battery pack or USB power bank, its higher power consumption generally results in shorter battery life than a comparable low-power microcontroller system.
For projects intended to remain portable or autonomous for long periods, Arduino is often the more practical choice.
19- Conclusion
The decision of whether to start with Arduino or Raspberry Pi is not about determining a winner; it is about selecting the right tool for the job at hand.
Both platforms are exceptional educational tools that have opened the doors of technology to millions, empowering people to create, invent, and solve problems.
Your choice should be guided by the specific requirements of your project and your personal learning objectives.
Choose Arduino if your project involves:
- Precise, real-time control of hardware, such as motors, servos, or sensors that require predictable timing.
- Deployment in a portable or remote location where low power consumption and long battery life are critical.
- A focus on electronics and embedded systems, where you want to learn about hardware interaction at a fundamental level.
- A tight budget for a basic electronics project.
Choose Raspberry Pi if your project requires:
- Significant computational power for tasks such as video processing, machine learning, or complex simulations.
- Internet connectivity and the ability to run multiple programs or services simultaneously.
- A graphical user interface (GUI), display output, or interaction with a keyboard and mouse.
- Extensive software development in a full operating-system environment.
- Large-scale data logging, storage, or operation as a central hub for a network of devices.
For many aspiring makers, the best path is not to pick one platform and stick with it, but to start with the platform that aligns with the initial project idea.
Master the fundamentals of one, and then explore the other as your skills and project ambitions grow.
Many impressive projects leverage the strengths of both, using an Arduino for real-time sensing and a Raspberry Pi for higher-level data processing and communication.
Whichever path you choose, embrace the process of learning, experimenting, and troubleshooting.
The maker community is vast and welcoming, and every expert was once a beginner.
Your journey begins not with perfection, but with curiosity and a willingness to build.
Arduino أم Raspberry Pi؟ من أين تبدأ؟
قائمة المحتويات
- المقدمة
- فهم الأساسيات
- ما هو Arduino؟
- ما هو Raspberry Pi؟
- مقارنة بين Arduino وRaspberry Pi
- أهم الاختلافات بين Arduino وRaspberry Pi
- متى تختار Arduino؟
- متى تختار Raspberry Pi؟
- مميزات وعيوب Arduino
- مميزات وعيوب Raspberry Pi
- أشهر استخدامات Arduino
- أشهر استخدامات Raspberry Pi
- تكلفة ومكونات مشروع Arduino
- تكلفة ومكونات مشروع Raspberry Pi
- طريقة إعداد Arduino
- طريقة إعداد Raspberry Pi
- أخطاء شائعة يجب تجنبها
- الأسئلة الشائعة
- الخلاصة
وقت القراءة حوالي : 20 دقيقة
1- المقدمة
يُعد اختيارك بين Arduino وRaspberry Pi من أهم القرارات التي يواجهها أي شخص يبدأ في عالم الإلكترونيات والبرمجة والمشروعات العملية. فقد أصبحت المنصتان من أشهر الأدوات التعليمية والمشروعات الإلكترونية، وساعدتا الطلاب والهواة والمهندسين والمطورين على تحويل الأفكار إلى تطبيقات حقيقية.
ورغم أن كليهما يستطيع التعامل مع الحساسات والمحركات والمكونات الإلكترونية، فإنهما ليسا بديلين متطابقين. فلكل منصة طبيعتها واستخداماتها الخاصة. يعتمد Arduino على المتحكم الدقيق، ولذلك يتميز بالبساطة والتحكم المباشر والاستجابة المناسبة للمهام التي تتطلب توقيتًا دقيقًا. أما Raspberry Pi فهو حاسوب كامل صغير الحجم يعمل بنظام تشغيل، ولذلك يوفر قدرة أكبر على المعالجة وتشغيل البرامج المتعددة والتعامل مع الشبكات والوسائط والمهام البرمجية المتقدمة.
يهدف هذا الدليل إلى توضيح الفروق الأساسية بين Arduino وRaspberry Pi، ومساعدتك على فهم نقاط القوة والقيود في كل منصة، بالإضافة إلى التعرف على متطلبات الإعداد وأهم المشروعات المناسبة لكل منهما.
وبمجرد فهمك لطبيعة كل منصة، ستتمكن من اختيار اللوحة الأنسب لمشروعك بدلًا من اختيارها بناءً على الشهرة أو السعر فقط.
2- فهم الأساسيات
قبل الدخول في المقارنة التفصيلية، من المهم معرفة طبيعة كل منصة أولًا.
يمكن لكل من Arduino وRaspberry Pi التعامل مع الحساسات والمحركات والمكونات الإلكترونية من خلال منافذ الإدخال والإخراج، لكن الاختلاف في البنية الداخلية لكل منهما يؤدي إلى اختلاف كبير في طريقة الاستخدام والبرمجة ونوع المشروعات المناسبة.
3- ما هو Arduino؟
Arduino هو منصة إلكترونيات مفتوحة المصدر تعتمد على لوحات مزودة بمتحكمات دقيقة سهلة الاستخدام، إلى جانب بيئة تطوير مبسطة تُعرف باسم Arduino IDE.
المتحكم الدقيق هو في الأساس حاسوب صغير مخصص لتنفيذ برنامج معين بصورة متكررة ومنظمة. وعلى عكس الحاسوب التقليدي، لا يحتاج Arduino عادةً إلى نظام تشغيل مثل Windows أو Linux، مما يسمح له بتخصيص موارده مباشرة للمهمة المطلوبة.
عند كتابة البرنامج، أو ما يُعرف باسم Sketch، داخل Arduino IDE، يتم تحويله إلى تعليمات يفهمها المتحكم ثم رفعها إلى ذاكرته. وبعد تشغيل اللوحة، يبدأ البرنامج في قراءة المدخلات والتحكم في المخرجات وفقًا للتعليمات التي تمت برمجتها.
على سبيل المثال، يتميز Arduino Uno الشهير بالمتحكم ATmega328P، مع ذاكرة Flash بسعة 32KB وذاكرة SRAM بسعة 2KB.
وتتمثل أهم نقاط قوة Arduino في البساطة، والتحكم المباشر في المكونات، وانخفاض استهلاك الطاقة، والاستجابة المنتظمة، مما يجعله مناسبًا جدًا للأنظمة المدمجة والمشروعات التي تحتاج إلى تحكم دقيق في الأجهزة.
كما يتمتع Arduino ببيئة تطوير واسعة تضم مكتبات وبرامج تعليمية وأمثلة جاهزة، الأمر الذي يجعل البدء بالمشروعات الإلكترونية أسهل حتى للمبتدئين.
4- ما هو Raspberry Pi؟
Raspberry Pi هو حاسوب صغير أحادي اللوحة طورته مؤسسة Raspberry Pi بهدف دعم تعلم علوم الحاسوب والبرمجة وتشجيع المستخدمين على بناء مشروعات تقنية عملية.
وعلى عكس Arduino، فإن Raspberry Pi ليس مجرد متحكم دقيق، بل هو حاسوب كامل مصغر على لوحة واحدة.
يحتوي Raspberry Pi على معالج ARM متعدد الأنوية وذاكرة RAM أكبر بكثير، كما يعتمد عادةً على بطاقة microSD لتخزين نظام التشغيل والملفات والبرامج.
وبفضل تشغيل نظام تشغيل مبني على Linux، مثل Raspberry Pi OS، يستطيع الجهاز تنفيذ مهام تشبه تلك التي يقوم بها الحاسوب التقليدي، مثل تشغيل البرامج وتصفح الإنترنت وتشغيل الوسائط وإنشاء الخوادم ومعالجة البيانات.
وتزداد أهمية Raspberry Pi في المشروعات الإلكترونية بفضل منافذ GPIO التي تسمح له بالتواصل مع الحساسات والمحركات والمكونات الخارجية.
كما توفر العديد من إصدارات Raspberry Pi الحديثة اتصالًا مدمجًا عبر Wi-Fi وBluetooth، بالإضافة إلى Ethernet في العديد من الطرازات، مما يجعله مناسبًا للمشروعات التي تحتاج إلى اتصال بالإنترنت أو معالجة بيانات أو تشغيل برامج متقدمة.
5- مقارنة Arduino وRaspberry Pi
يوضح الجدول التالي أهم الفروق بين Arduino وRaspberry Pi بطريقة مختصرة ومنظمة، لمساعدتك على تحديد المنصة الأنسب لطبيعة مشروعك.
| رقم | العنصر | Arduino | Raspberry Pi |
|---|---|---|---|
| 1 | التعريف والبنية | لوحة تعتمد على متحكم دقيق | حاسوب أحادي اللوحة يعتمد على معالج ونظام SoC |
| 2 | الاستخدام الأساسي | التحكم المباشر في المكونات والأجهزة الإلكترونية | معالجة البيانات وتشغيل البرامج وإدارة الأجهزة والمكونات |
| 3 | تعقيد النظام | بنية بسيطة من ناحية العتاد والبرمجيات | بنية أقرب إلى الحاسوب وأكثر تعقيدًا |
| 4 | معمارية المعالج | تختلف حسب الطراز؛ توجد لوحات 8-bit وأخرى 32-bit | تختلف حسب الطراز؛ توجد إصدارات 32-bit و64-bit، والأحدث يعتمد غالبًا على ARM 64-bit |
| 5 | سرعة المعالجة | منخفضة نسبيًا؛ Arduino Uno يعمل بتردد 16MHz | أعلى بكثير؛ تصل بعض الطرازات الحديثة إلى 2.4GHz |
| 6 | الذاكرة | محدودة؛ Arduino Uno يحتوي على 2KB SRAM | أكبر بكثير؛ من مئات الميجابايت إلى عدة جيجابايت حسب الطراز |
| 7 | نظام التشغيل | لا يحتاج إلى نظام تشغيل في الاستخدام المعتاد | يعمل عادةً بنظام تشغيل مثل Raspberry Pi OS المبني على Linux |
| 8 | البرمجة | C/C++ باستخدام Arduino IDE بشكل أساسي | Python وC/C++ وJava وJavaScript وغيرها |
| 9 | أدوات التطوير | Arduino IDE | مجموعة متنوعة من بيئات التطوير وأدوات البرمجة |
| 10 | الجهد المنطقي | يختلف حسب الطراز؛ بعض لوحات Arduino تعمل عند 5V وأخرى عند 3.3V | GPIO يعمل عند 3.3V |
| 11 | الإدخال والإخراج | منافذ رقمية وتماثلية حسب الطراز | GPIO رقمي بشكل أساسي، وقد يلزم محول ADC للإدخال التماثلي |
| 12 | واجهات الاتصال | UART وSPI وI²C حسب الطراز | UART وSPI وI²C وUSB وHDMI وEthernet وغيرها حسب الطراز |
| 13 | الحساسات | ممتاز للتعامل المباشر مع الحساسات | يدعم الحساسات عبر GPIO وواجهات الاتصال |
| 14 | التحكم في المحركات | مناسب جدًا مع استخدام دوائر قيادة مناسبة | ممكن، لكن غالبًا يحتاج إلى دوائر قيادة خارجية |
| 15 | التحكم في الوقت الحقيقي | ممتاز واستجابته أكثر قابلية للتوقع | أكثر تعقيدًا بسبب جدولة نظام التشغيل |
| 16 | قدرة منافذ I/O | مناسب للتحكم المباشر منخفض القدرة | قدرة GPIO محدودة نسبيًا، وغالبًا تحتاج الأحمال إلى دوائر قيادة |
| 17 | الاتصال بالشبكات | قد تحتاج بعض الطرازات إلى وحدات إضافية للاتصال | تتوفر Wi-Fi وBluetooth في العديد من الطرازات، وEthernet في العديد منها |
| 18 | التوسعة | Shields ولوحات توسعة | HATs ولوحات توسعة متعددة |
| 19 | استهلاك الطاقة | منخفض عمومًا | أعلى عمومًا ويختلف حسب الطراز والاستخدام |
| 20 | مشروعات البطاريات | مناسب جدًا للمشروعات منخفضة الاستهلاك | أقل ملاءمة للتشغيل الطويل بالبطارية |
| 21 | الكاميرات | إمكانات محدودة نسبيًا | مناسب جدًا لمشروعات الكاميرات ومعالجة الصور والفيديو |
| 22 | الذكاء الاصطناعي | قدرات محدودة وتعتمد على الطراز | أفضل للعديد من تطبيقات الذكاء الاصطناعي ومعالجة البيانات |
| 23 | خوادم الويب | محدودة بسبب الموارد المتاحة | مناسب جدًا للخوادم وتطبيقات الشبكات |
| 24 | سهولة التعلم | أسهل للمبتدئين في الإلكترونيات والتحكم في العتاد | يحتاج إلى معرفة أكبر بنظام التشغيل والبرمجيات |
| 25 | التكلفة | أقل عادةً، خصوصًا للمشروعات البسيطة | أعلى عادةً، مع الحاجة إلى ملحقات إضافية في كثير من الحالات |
| 26 | الاستخدامات الشائعة | الحساسات، الأتمتة، الروبوتات، التحكم في المحركات والمشروعات المدمجة | الخوادم، الوسائط، الروبوتات المتقدمة، الكاميرات، الذكاء الاصطناعي والحوسبة المتقدمة |
| 27 | الأفضل لـ | التحكم المباشر، الأتمتة البسيطة، الحساسات والأنظمة ذات الاستجابة الفورية | الحوسبة، الشبكات، الوسائط المتعددة، معالجة البيانات والبرمجيات المتقدمة |
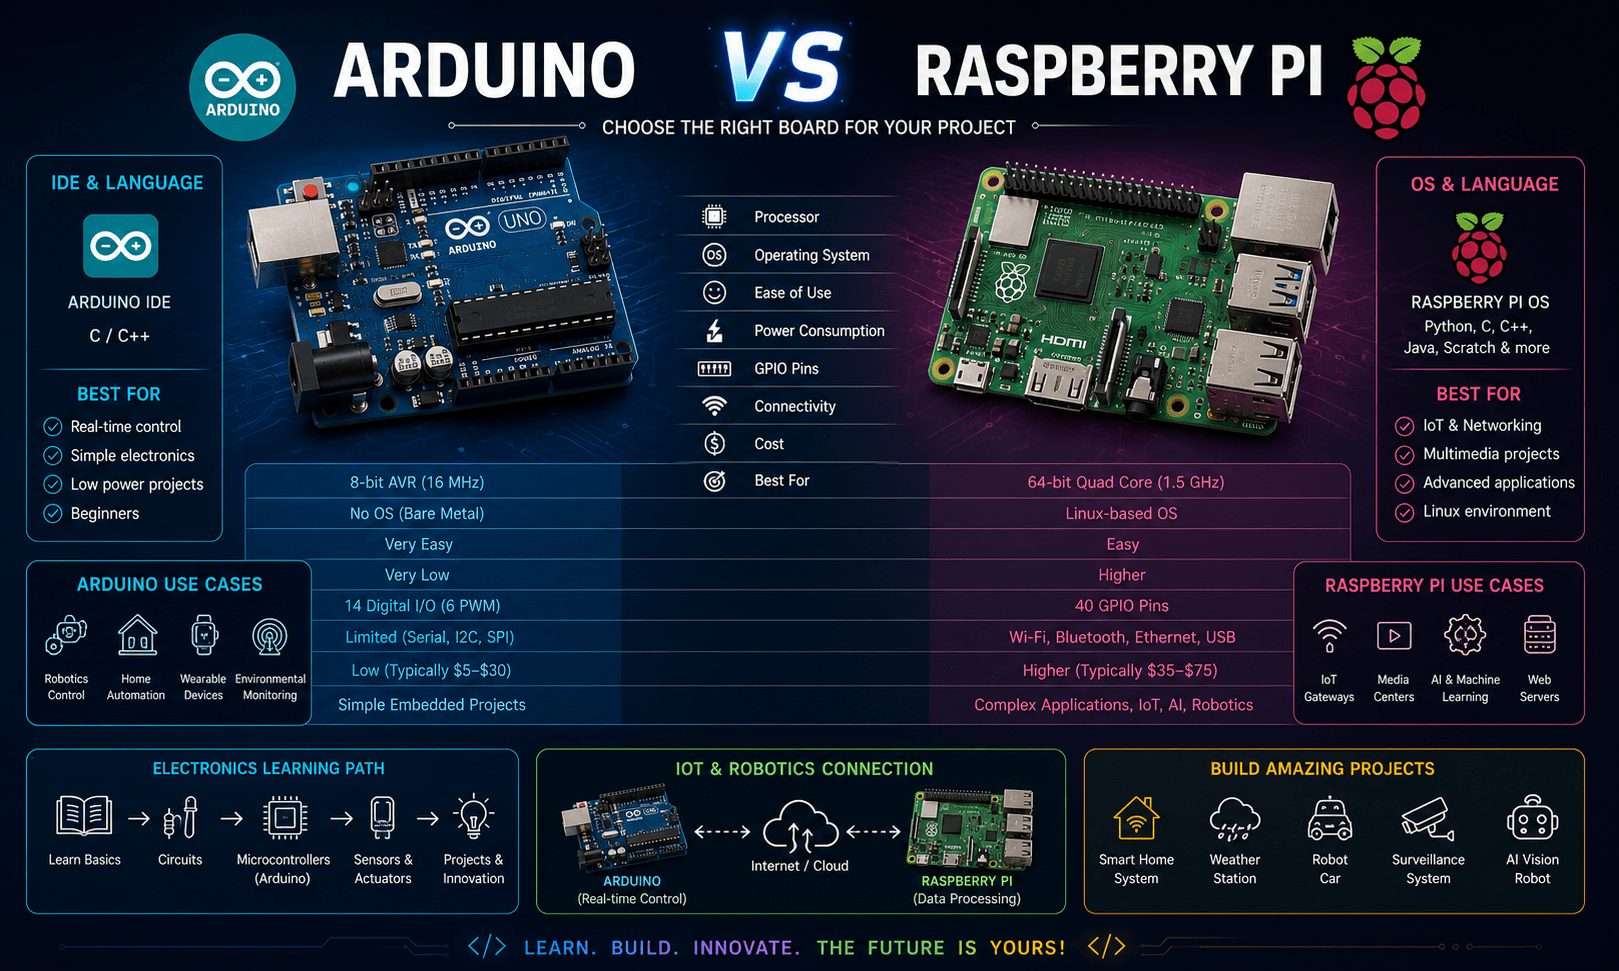
6- أهم الفروق بين Arduino وRaspberry Pi
الاختيار بين Arduino وRaspberry Pi لا يعتمد على القوة فقط، بل على طبيعة المشروع والمهام التي تريد تنفيذها. فلكل منصة طريقة مختلفة في التعامل مع العتاد والبرمجيات والطاقة وقابلية التوسع.
البنية العتادية
Arduino عبارة عن متحكم دقيق مصمم لتنفيذ برنامج محدد بصورة مستمرة ومنظمة. ولذلك يتميز بقلة الموارد، وعدم الحاجة إلى نظام تشغيل، والاستجابة السريعة للمهام التي يتحكم فيها.
أما Raspberry Pi فهو حاسوب أحادي اللوحة يعتمد على معالج وذاكرة أكبر ونظام تشغيل، ولذلك يستطيع تشغيل عدة برامج ومهام في الوقت نفسه.
لغات البرمجة
تعتمد برمجة Arduino بصورة أساسية على C/C++ من خلال Arduino IDE. ويعتمد البرنامج عادةً على دالتي setup() وloop()، مما يجعل التحكم في المكونات الإلكترونية مباشرًا وسهل الفهم.
أما Raspberry Pi فيوفر حرية أكبر في اختيار لغة البرمجة. وتعد Python من أكثر اللغات شيوعًا للمبتدئين، خاصة في مشروعات الأجهزة الإلكترونية وتحليل البيانات والذكاء الاصطناعي.
متطلبات الطاقة
يتميز Arduino بانخفاض استهلاك الطاقة، ولذلك يناسب الأجهزة المحمولة والحساسات التي تعمل لفترات طويلة باستخدام البطاريات.
في المقابل، يحتاج Raspberry Pi إلى طاقة أكبر بسبب المعالج ونظام التشغيل والمهام التي ينفذها. ولهذا السبب قد يكون أقل ملاءمة لبعض التطبيقات التي تعتمد على البطاريات لفترات طويلة.
قابلية توسع المشروع
يمكن توسيع مشروعات Arduino بإضافة عدة لوحات، بحيث تتولى كل لوحة مهمة محددة، مثل التحكم في الإضاءة أو قراءة درجة الحرارة أو تشغيل باب آلي.
أما Raspberry Pi فيمكن أن يعمل كمركز رئيسي لمجموعة كبيرة من الوظائف، مثل تشغيل الخادم ومعالجة البيانات وإدارة الأجهزة الذكية والاتصال بالإنترنت في الوقت نفسه.
7- متى تختار Arduino؟
يكون Arduino اختيارًا ممتازًا عندما يكون الهدف الأساسي هو التحكم المباشر في الأجهزة الإلكترونية، خصوصًا عندما تكون الاستجابة السريعة واستهلاك الطاقة المنخفض والبساطة أهم من قوة المعالجة.
أفضل مشروعات Arduino للمبتدئين
يقدم Arduino بداية سهلة في عالم الإلكترونيات العملية، حيث يمكنك رؤية نتيجة البرنامج مباشرة من خلال LED أو حساس أو محرك.
التحكم في LED والإضاءة
- ابدأ بمشروع Blink الشهير لتشغيل وإطفاء LED.
- بعد ذلك يمكنك التحكم في شدة الإضاءة باستخدام PWM.
- يمكنك أيضًا تصميم إشارات مرور بسيطة أو أنظمة إضاءة تتغير حسب قراءة الحساسات.
المشروعات المعتمدة على الحساسات
- إنشاء مقياس رقمي لدرجة الحرارة والرطوبة باستخدام حساس DHT.
- تشغيل ضوء تلقائي عند اكتشاف الحركة باستخدام PIR.
- إنشاء نظام إنذار يعتمد على حساس الموجات فوق الصوتية.
- تصميم نظام لمراقبة رطوبة التربة والتحكم في ري النباتات.
التحكم في المحركات والروبوتات
- بناء روبوت يتبع الخط.
- التحكم في محرك Servo لصنع ذراع روبوتية.
- تشغيل محركات DC لبناء عربة روبوتية صغيرة.
- استخدام دوائر قيادة المحركات لتوصيل المحركات والمرحلات بأمان.
الفنون التفاعلية والأجهزة القابلة للارتداء
- تصميم ملابس مزودة بإضاءة LED تستجيب للموسيقى.
- إنشاء مشروع فني يتفاعل مع اللمس أو الحركة.
- بناء مرآة ذكية تعرض الوقت وبيانات أخرى.
أتمتة المنزل
- إنشاء نظام للتحكم في الأجهزة الكهربائية.
- تصميم نظام أمان باستخدام جرس وحساس حركة.
- أتمتة الستائر أو النوافذ باستخدام المحركات.
8- متى تختار Raspberry Pi؟
يتميز Raspberry Pi عندما يحتاج المشروع إلى قدرة معالجة أعلى أو نظام تشغيل كامل أو اتصال بالشبكات أو تشغيل عدة برامج في الوقت نفسه.
أفضل مشروعات Raspberry Pi للمبتدئين
مراكز الوسائط والترفيه
- يمكن تحويل Raspberry Pi إلى مركز وسائط منزلي.
- يمكن استخدام برامج مثل Kodi أو Plex لتشغيل الأفلام والموسيقى ومحتوى الفيديو.
الخوادم المنزلية وNAS
- يمكن استخدام Raspberry Pi كخادم ملفات لمشاركة المستندات داخل الشبكة.
- يمكن استخدامه كخادم طباعة أو كوحدة تخزين شبكية NAS للنسخ الاحتياطي.
مركز المنزل الذكي
- يمكن تثبيت منصات مثل Home Assistant وNode-RED وOpenHAB.
- يمكن التحكم في الإضاءة والكاميرات وأجهزة المنزل الذكية من خلال واجهة واحدة.
تعلم البرمجة
- يوفر Raspberry Pi بيئة Linux كاملة للتعلم والتجربة.
- تعد Python من أفضل اللغات للبدء.
- يمكنك أيضًا تطوير الألعاب باستخدام Pygame أو إنشاء مواقع وتطبيقات ويب.
مشروعات الكاميرات والرؤية الحاسوبية
- إنشاء كاميرا للتصوير بفواصل زمنية.
- إنشاء كاميرا مراقبة منزلية.
- تجربة معالجة الصور والرؤية الحاسوبية والتعرف على الوجوه في المشروعات المتقدمة.
خوادم الويب ولوحات بيانات IoT
- يمكن لـ Raspberry Pi استضافة موقع إلكتروني أو لوحة تحكم تعرض بيانات الحساسات.
- يمكن استخدامه لمراقبة البيئة أو استهلاك الطاقة أو بيانات أجهزة IoT.
9- مميزات وعيوب Arduino
مميزات Arduino
- سهل الاستخدام: يتميز Arduino IDE بواجهة مناسبة للمبتدئين.
- مفتوح المصدر: تتوفر مكتبات وأمثلة ودروس تعليمية كثيرة بفضل المجتمع الكبير.
- إمكانية التوسعة: يمكن إضافة Shields لإضافة وظائف مثل الاتصال اللاسلكي والتحكم في المحركات.
- اقتصادي: توجد لوحات Arduino بأسعار مناسبة مقارنة بالعديد من لوحات التطوير الأخرى.
- متعدد المنصات: يمكن استخدام Arduino IDE على أنظمة تشغيل مختلفة.
عيوب Arduino
- قدرة معالجة محدودة: الذاكرة وسرعة المعالجة محدودة مقارنة بالحواسيب الصغيرة.
- تعدد المهام محدود: صُمم أساسًا لتنفيذ مهام مدمجة ومحددة.
- الاتصال محدود في بعض الطرازات: قد تحتاج إلى وحدات إضافية للحصول على Wi-Fi أو Ethernet.
10- مميزات وعيوب Raspberry Pi
مميزات Raspberry Pi
- حاسوب كامل: يعمل بنظام تشغيل ويدعم تعدد المهام.
- متعدد الاستخدامات: مناسب من مشروعات المنزل الذكي إلى الذكاء الاصطناعي.
- خيارات اتصال واسعة: USB وHDMI وWi-Fi وBluetooth وEthernet حسب الطراز.
- مجتمع كبير: تتوفر مصادر تعليمية ومشروعات وأدلة كثيرة.
- منافذ GPIO: تسمح بالتعامل مع المكونات الإلكترونية الخارجية.
عيوب Raspberry Pi
- أكثر تعقيدًا: يحتاج إلى فهم نظام التشغيل وبعض أساسيات إدارة النظام.
- استهلاك طاقة أعلى: قد يمثل ذلك تحديًا في المشروعات التي تعمل بالبطاريات.
- تكلفة إجمالية أعلى: قد تحتاج إلى بطاقة microSD ومصدر طاقة وشاشة ولوحة مفاتيح وملحقات أخرى.
- قد يكون مبالغًا فيه للمشروعات البسيطة: بعض المهام البسيطة يمكن تنفيذها باستخدام Arduino بسهولة أكبر.
11- أشهر استخدامات Arduino
- الروبوتات.
- أتمتة المنازل.
- النماذج الأولية الإلكترونية.
- مشروعات إنترنت الأشياء IoT.
- تسجيل البيانات.
- المشروعات التعليمية والهوايات.
- الأجهزة القابلة للارتداء.
12- أشهر استخدامات Raspberry Pi
- الروبوتات المتقدمة.
- أنظمة التحكم الصناعية.
- أتمتة المنازل.
- الخوادم وإدارة الشبكات.
- أنظمة المراقبة والأمان.
- مشروعات الصور والفيديو.
- إنترنت الأشياء IoT.
- التعليم والحوسبة.
- الذكاء الاصطناعي.
13- تكلفة ومكونات مشروع Arduino
من المهم عند التخطيط لأي مشروع إلكتروني أن تحسب تكلفة المشروع بالكامل، وليس سعر اللوحة فقط.
13. تكلفة مشروع Arduino والمكونات المطلوبة
عند البدء في تنفيذ مشروع باستخدام Arduino، من الأفضل للمبتدئين حساب التكلفة الإجمالية للمشروع وليس سعر لوحة Arduino وحدها. فالمشروع يحتاج عادةً إلى مجموعة من المكونات الإضافية مثل لوحة التجارب، وأسلاك التوصيل، والحساسات، والمقاومات، ومصابيح LED وغيرها.
يوضح الجدول التالي أهم المكونات التي قد تحتاج إليها عند إعداد مشروع Arduino للمرة الأولى، مع مجموعة من الخيارات المتوفرة لكل نوع من المكونات.
1- لوحة Arduino Uno
Arduino UNO R4 Minima board (Clone) Type-C
Arduino UNO R4 Wi-Fi board MADE IN CHINA
2- لوحة Arduino Nano
Arduino Nano ATmega328PU-PH مع مبرمج CH340G – Mini USB
Arduino Nano ATmega328PU-TH مع مبرمج CH340G – USB Type-C
Arduino Nano ATmega328PU-TH مع مبرمج CH340G – Micro USB
Arduino Nano ATmega328PB-U مع تعريف CH340C – 5V 16MHz Mini USB
Arduino Nano ATmega168P مع تعريف CH340C – 5V 16MHz Mini USB
Arduino Nano ATmega328P-U مع مبرمج FT232 – Mini USB
3- كابل USB
كابل USB بطول 30 سم للـ Arduino Uno
كابل USB إلى Mini USB بطول 30 سم للـ Arduino Nano
4- لوحة التجارب
Breadboard 1660 نقطة توصيل BB-2T4D مع قاعدة معدنية
Breadboard بسعة 830 نقطة مع خطوط طاقة منفصلة
ZY-204 Breadboard بسعة 1660 نقطة
ZY-201 Breadboard بدون لحام بسعة 830 نقطة مع قاعدة معدنية
5- أسلاك التوصيل
6- الحساسات
مجموعة متنوعة من حساسات الحرارة والضوء والحركة
7- المقاومات
8- مصابيح LED
9- صناديق وحافظات المشاريع
جميع أنواع صناديق وحافظات المشاريع
ملاحظة للمبتدئين:
لا تقتصر ميزانية مشروع Arduino على سعر اللوحة فقط، بل يجب احتساب تكلفة جميع المكونات اللازمة لتنفيذ المشروع وتجربته بصورة عملية.
تتميز مشروعات Arduino عادةً بانخفاض تكلفة البداية، لكنك ستحتاج إلى مجموعة من المكونات الأساسية لإكمال المشروع.
المكونات الأساسية
- لوحة Arduino: المتحكم الرئيسي للمشروع.
- كابل USB: لبرمجة اللوحة وتزويدها بالطاقة في كثير من الحالات.
- لوحة تجارب Breadboard: لبناء الدوائر دون لحام.
- أسلاك Jumper: لتوصيل المكونات.
- حساسات: مثل الحرارة والضوء والحركة.
- مكونات إلكترونية أساسية: مثل LED والمقاومات والأزرار والمقاومات المتغيرة.
- علب وحاويات للمشروعات: لحماية اللوحة والأسلاك والمكونات.
يمكنك العثور على مكونات Arduino المختلفة من خلال متجر Makers Electronics، بما في ذلك لوحات Arduino والكابلات وBreadboards والحساسات والمقاومات وLED وعلب المشروعات.
🧰 مجموعة البداية لمشروعات Arduino
🟢 WhatsApp: 01211981188
🛒 المتجر الإلكتروني: makerselectronics.com
📍 المتجر: 158 شارع راكويتس، الإبراهيمية، الإسكندرية، مصر
🎓 للطلاب والمهندسين: اسأل عن أسعار مشروعات التخرج والكميات.
14. تكلفة مشروع Raspberry Pi والمكونات المطلوبة
عند إعداد مشروع باستخدام Raspberry Pi، ينبغي للمبتدئ أن يضع في الحسبان تكلفة النظام بالكامل، وليس سعر لوحة Raspberry Pi وحدها.
فبخلاف اللوحة، ستحتاج في الغالب إلى مصدر طاقة مناسب، وبطاقة MicroSD لتثبيت نظام التشغيل، بالإضافة إلى لوحة مفاتيح وفأرة وشاشة عند الحاجة إلى استخدامه كحاسوب مكتبي.
فيما يلي أهم المكونات التي يمكن أن تحتاج إليها لبدء مشروع Raspberry Pi:
لوحة Raspberry Pi
Raspberry Pi 4 Model B بذاكرة RAM سعة 4GB – صناعة المملكة المتحدة
Raspberry Pi 4 Model B بذاكرة RAM سعة 8GB – صناعة المملكة المتحدة
Raspberry Pi 5 Model B بذاكرة RAM سعة 4GB – صناعة المملكة المتحدة
Raspberry Pi 5 Model B بذاكرة RAM سعة 8GB – صناعة المملكة المتحدة
مصدر طاقة 5V / 3A
XBS-0530 Adapter بجهد 5V وتيار 3A ومنفذ USB Type-C
بطاقة MicroSD بسعة 16–32GB
مجموعة متنوعة من بطاقات MicroSD المحملة بنظام Raspbian OS مع محول
لوحة المفاتيح والفأرة
مجموعة متنوعة من لوحات المفاتيح والفأرات
الشاشة أو جهاز العرض
مجموعة متنوعة من الشاشات وأجهزة العرض
صناديق وحافظات المشاريع
مجموعة متنوعة من صناديق وحافظات المشاريع
نصيحة للمبتدئين
احسب تكلفة Raspberry Pi مع جميع الملحقات والمكونات الأساسية التي يحتاج إليها المشروع، حتى تحصل على تقدير واقعي للميزانية المطلوبة قبل البدء في الشراء والتنفيذ.
المكونات الأساسية
- لوحة Raspberry Pi: الحاسوب الرئيسي للمشروع.
- مصدر طاقة 5V: مصدر طاقة مستقر ومناسب للطراز المستخدم.
- بطاقة microSD: لتثبيت نظام التشغيل وتخزين الملفات.
- لوحة مفاتيح وفأرة: مفيدة أثناء الإعداد الأولي.
- شاشة أو Monitor: مفيدة عند إعداد النظام لأول مرة.
- علبة أو حاوية: لحماية اللوحة والمكونات.
تتوفر لدى Makers Electronics مجموعة من لوحات Raspberry Pi ومصادر الطاقة وبطاقات microSD وغيرها من الملحقات اللازمة للمشروعات.
🖥️ مجموعة Raspberry Pi جاهزة للإقلاع
🟢 WhatsApp: 01211981188
🛒 المتجر الإلكتروني: makerselectronics.com
📍 المتجر: 158 شارع راكويتس، الإبراهيمية، الإسكندرية، مصر
🎓 للطلاب والمهندسين: اسأل عن أسعار مشروعات التخرج والكميات.
ملاحظة
- تعتمد التكلفة النهائية على المكونات التي تمتلكها بالفعل.
- إذا كانت لديك شاشة ولوحة مفاتيح وفأرة، يمكنك تقليل تكلفة التجهيز.
- يمكن أيضًا تشغيل Raspberry Pi بطريقة Headless والوصول إليه عن بُعد من جهاز آخر.
15- طريقة إعداد Arduino
إعداد Arduino من أسهل خطوات البدء في المشروعات الإلكترونية، ويمكن تنفيذ الخطوات التالية على أنظمة التشغيل المختلفة.
الخطوة 1: تثبيت Arduino IDE
- قم بتنزيل Arduino IDE من الموقع الرسمي لـ Arduino.
- يتوفر البرنامج لأنظمة Windows وmacOS وLinux.
- ثبّت البرنامج واتبع التعليمات الظاهرة على الشاشة.
الخطوة 2: توصيل Arduino
- استخدم كابل USB المناسب لتوصيل اللوحة بالحاسوب.
- يجب أن تحصل اللوحة على الطاقة ويضيء مؤشر LED الموجود عليها.
الخطوة 3: اختيار اللوحة والمنفذ
- افتح Arduino IDE.
- من قائمة Tools اختر طراز لوحة Arduino التي تستخدمها.
- اختر منفذ الاتصال الصحيح.
الخطوة 4: رفع أول برنامج
يمكنك استخدام المثال الشهير Blink من خلال المسار:
File → Examples → 01.Basics → Blink
- يعمل البرنامج على تشغيل وإطفاء LED الموجود على اللوحة.
- اضغط Upload.
- سيتم ترجمة البرنامج ثم رفعه إلى اللوحة.
- إذا بدأ LED في الوميض، فهذا يعني أن الإعداد تم بنجاح.
الخطوة 5: ابدأ ببناء مشروعك
بعد نجاح تجربة Blink، يمكنك تعديل البرنامج أو توصيل الحساسات والمكونات على Breadboard والبدء في تنفيذ مشروعاتك الخاصة.
16- طريقة إعداد Raspberry Pi
يتطلب إعداد Raspberry Pi تجهيز بطاقة microSD بنظام التشغيل ثم تشغيل الجهاز وإكمال الإعداد الأولي.
الخطوة 1: تجهيز بطاقة microSD
- قم بتنزيل Raspberry Pi Imager من الموقع الرسمي.
- أدخل بطاقة microSD في الحاسوب.
- افتح Raspberry Pi Imager واختر Raspberry Pi OS.
- حدد بطاقة microSD ثم اكتب النظام عليها.
الخطوة 2: ضبط الإعدادات الأساسية
- يمكنك إعداد الدولة واللغة والمنطقة الزمنية واسم الجهاز.
- يمكنك أيضًا إعداد SSH وبيانات Wi-Fi مسبقًا.
- يعد هذا الخيار مفيدًا عند تشغيل Raspberry Pi دون شاشة أو لوحة مفاتيح.
الخطوة 3: تركيب Raspberry Pi
- أدخل بطاقة microSD في Raspberry Pi.
- وصّل الشاشة ولوحة المفاتيح والفأرة إذا كنت تستخدم الواجهة الرسومية.
- وصّل مصدر الطاقة المناسب.
الخطوة 4: التشغيل الأول
- شغّل Raspberry Pi.
- قد يستغرق التشغيل الأول بعض الوقت.
- أكمل خطوات إعداد كلمة المرور والشبكة والإعدادات الأساسية.
الخطوة 5: تحديث النظام
بعد الإعداد الأولي، من الأفضل تحديث النظام والبرامج المثبتة.
sudo apt update
sudo apt full-upgrade -y
الخطوة 6: إعداد GPIO
يمكن استخدام مكتبات Python المناسبة للتحكم في منافذ GPIO، ومن بينها GPIO Zero التي تعد سهلة الاستخدام للمبتدئين.
sudo apt install python3-rpi.gpio python3-gpiozero -y
الخطوة 7: تنفيذ أول مشروع
بعد ذلك يمكنك البدء في التحكم بالمكونات الإلكترونية. ومن أشهر التجارب الأولى تشغيل LED باستخدام Python ومكتبة gpiozero.
17- أخطاء شائعة يجب تجنبها
البدء في الإلكترونيات والبرمجة تجربة ممتعة، لكن بعض الأخطاء قد تؤدي إلى إضاعة الوقت أو تلف المكونات. لذلك من الأفضل معرفة أكثر الأخطاء شيوعًا وتجنبها منذ البداية.
الخطأ 1: تجاهل الأساسيات
- تعلم أساسيات الجهد والتيار والمقاومة وقانون أوم.
- تعلم قراءة ألوان المقاومات.
- افهم الفرق بين التوصيل على التوالي والتوازي.
- لا تبدأ بالمحركات أو المرحلات قبل فهم أساسيات الدوائر.
الخطأ 2: توصيل الطاقة بطريقة خاطئة
- راجع التوصيلات قبل تشغيل الدائرة.
- انتبه إلى القطبية والجهد والتيار المطلوب.
- تذكر أن GPIO في Raspberry Pi يعمل عند 3.3V وليس مصممًا لاستقبال إشارات 5V مباشرة.
- توصيل إشارة 5V غير متوافقة إلى GPIO في Raspberry Pi قد يؤدي إلى تلف اللوحة.
الخطأ 3: عدم استخدام مقاومات تحديد التيار
- يجب استخدام مقاومة مناسبة مع LED لتقليل التيار وحماية المكون.
- تختلف قيمة المقاومة المناسبة حسب جهد التغذية وخصائص LED.
الخطأ 4: تجاهل الوثائق وDatasheets
- راجع دليل كل مكون قبل استخدامه.
- تحقق من جهد التشغيل وترتيب الأرجل وبروتوكولات الاتصال والحدود القصوى.
الخطأ 5: نسخ الأكواد دون فهمها
- لا تكتفِ بنسخ الكود من الإنترنت.
- حاول فهم وظيفة كل جزء من البرنامج.
- فهم الكود يساعدك على اكتشاف الأخطاء وتعديل المشروع حسب احتياجاتك.
الخطأ 6: سوء تنظيم الأسلاك
- نظم الأسلاك واستخدم الأطوال المناسبة.
- الدائرة المنظمة أسهل في الفحص والصيانة والتعديل.
الخطأ 7: عدم الاحتفاظ بنسخة احتياطية
- احتفظ بنسخ احتياطية من بيانات Raspberry Pi المهمة.
- احفظ برامج Arduino في مجلدات منظمة.
- يمكن استخدام Git لتتبع التغييرات في المشاريع البرمجية.
الخطأ 8: توقع النجاح من المحاولة الأولى
من الطبيعي أن تواجه أخطاء في البرمجة والتوصيل. عملية اكتشاف الأخطاء وإصلاحها جزء أساسي من التعلم.
اتبع طريقة منظمة عند البحث عن المشكلة:
- راجع التوصيلات.
- راجع الكود.
- ارجع إلى دليل المكونات.
- استفد من المصادر والمجتمعات التقنية الموثوقة.
- لا تجعل فشل المحاولة الأولى سببًا للتوقف.
18- الأسئلة الشائعة
السؤال الأول: هل يمكن استخدام Arduino وRaspberry Pi معًا في مشروع واحد؟
نعم. الجمع بين المنصتين يمكن أن يكون حلًا ممتازًا، لأن كل واحدة منهما تتولى الجانب الذي تجيده.
يمكن استخدام Arduino لقراءة الحساسات والتحكم في المحركات والمهام التي تحتاج إلى استجابة دقيقة، بينما يتولى Raspberry Pi معالجة البيانات والاتصال بالإنترنت وتشغيل البرامج أو عرض المعلومات.
يمكن للمنصتين التواصل عبر USB Serial أو I²C أو تقنيات الاتصال اللاسلكي مثل Wi-Fi وBluetooth.
السؤال الثاني: أيهما أفضل للمبتدئ الذي لا يمتلك خبرة في البرمجة؟
كلاهما مناسب للمبتدئين، لكن الاختيار يعتمد على نوع المجال الذي ترغب في تعلمه.
إذا كان اهتمامك الأساسي بالإلكترونيات والحساسات والمحركات والتحكم في الأجهزة، فإن Arduino يمثل بداية ممتازة.
أما إذا كنت مهتمًا أكثر بالبرمجة ونظام Linux وتطوير البرامج والويب، فقد يكون Raspberry Pi نقطة بداية مناسبة.
السؤال الثالث: هل يجب شراء لوحة Arduino أو Raspberry Pi أصلية؟
توفر اللوحات الأصلية توافقًا أفضل مع الوثائق الرسمية والبرامج، وقد تكون أسهل للمبتدئ عند استكشاف الأخطاء.
ومع ذلك، توجد لوحات متوافقة بأسعار أقل. عند شراء لوحة بديلة، يجب التأكد من المواصفات والتوافق قبل استخدامها.
السؤال الرابع: هل يستطيع Raspberry Pi استبدال Arduino في جميع المشروعات؟
يمكن لـ Raspberry Pi تنفيذ العديد من المهام التي ينفذها Arduino، لكنه ليس دائمًا الخيار العملي الأفضل.
يستهلك Raspberry Pi طاقة أكبر ويعتمد على نظام تشغيل، ولذلك قد لا يكون مناسبًا للمشروعات التي تحتاج إلى استجابة زمنية دقيقة جدًا أو تشغيل طويل باستخدام البطاريات.
لذلك استخدم Raspberry Pi عندما تحتاج إلى قوة معالجة أو تعدد مهام أو اتصال متقدم، واستخدم Arduino عندما يكون المطلوب تحكمًا مباشرًا وبسيطًا وموفرًا للطاقة.
السؤال الخامس: كم من الوقت أحتاج لتعلم Arduino أو Raspberry Pi؟
يختلف الوقت حسب خلفيتك ووقت التدريب ونوع المشروعات التي تعمل عليها.
يمكنك تعلم تنفيذ مشروعات Arduino بسيطة مثل تشغيل LED أو قراءة حساس خلال فترة قصيرة نسبيًا، بينما تحتاج المشروعات المتوسطة والمتقدمة إلى ممارسة مستمرة.
الأهم هو البدء بمشروع صغير ثم زيادة مستوى الصعوبة تدريجيًا.
السؤال السادس: ما لغة البرمجة التي أتعلمها أولًا؟
إذا اخترت Arduino، فستتعامل بشكل أساسي مع C/C++ من خلال Arduino IDE.
أما Raspberry Pi، فإن Python تعد من أفضل الخيارات للمبتدئين بسبب سهولة قراءة الكود واتساع استخدامها في البرمجة وتحليل البيانات والذكاء الاصطناعي.
السؤال السابع: هل يمكن تشغيل Arduino أو Raspberry Pi باستخدام البطاريات؟
نعم، لكن Arduino أكثر ملاءمة عادةً للمشروعات التي تعمل بالبطاريات لفترات طويلة بسبب انخفاض استهلاك الطاقة.
يمكن تشغيل Raspberry Pi باستخدام بطارية أو Power Bank، لكن استهلاكه الأعلى للطاقة يعني أن عمر البطارية سيكون أقصر غالبًا.
19- الخلاصة
لا توجد منصة واحدة يمكن اعتبارها الأفضل لجميع المشروعات. الاختيار الصحيح بين Arduino وRaspberry Pi يعتمد على طبيعة المهمة التي تريد تنفيذها.
إذا كان مشروعك يحتاج إلى تحكم مباشر ودقيق في الحساسات أو المحركات، واستهلاك منخفض للطاقة، وبنية بسيطة، فإن Arduino غالبًا سيكون الخيار الأنسب.
أما إذا كان مشروعك يحتاج إلى قدرة معالجة أعلى، أو نظام تشغيل، أو اتصال بالإنترنت، أو تشغيل عدة برامج، أو معالجة الصور والفيديو والبيانات، فإن Raspberry Pi سيكون أكثر ملاءمة.
اختر Arduino إذا كان مشروعك يحتاج إلى:
- تحكم دقيق وفوري في المحركات أو الحساسات.
- استهلاك منخفض للطاقة وعمر بطارية طويل.
- تعلم أساسيات الإلكترونيات والأنظمة المدمجة.
- تنفيذ مشروع إلكتروني بسيط بتكلفة منخفضة.
اختر Raspberry Pi إذا كان مشروعك يحتاج إلى:
- قدرة معالجة كبيرة لمعالجة الفيديو أو البيانات أو الذكاء الاصطناعي.
- اتصال بالإنترنت وتشغيل عدة برامج وخدمات.
- واجهة رسومية أو شاشة ولوحة مفاتيح وفأرة.
- بيئة تشغيل كاملة لتطوير البرامج.
- تخزين ومعالجة كميات أكبر من البيانات.
وفي كثير من المشروعات المتقدمة، لا تحتاج إلى الاختيار بين المنصتين أصلًا؛ إذ يمكن استخدامهما معًا للاستفادة من نقاط القوة في كل منهما. يمكن لـ Arduino تنفيذ التحكم الدقيق وقراءة الحساسات، بينما يتولى Raspberry Pi معالجة البيانات والاتصال بالشبكة وتشغيل التطبيقات.
ابدأ بالمنصة التي تتناسب مع أول مشروع ترغب في تنفيذه، ثم طوّر مهاراتك تدريجيًا وانتقل إلى المنصة الأخرى عندما تحتاج إلى إمكاناتها. فالتجربة والتعديل واكتشاف الأخطاء جزء أساسي من رحلة تعلم الإلكترونيات والبرمجة.
زيارة موقع Makers Electronics
📍 زيارة متجر Makers Electronics
158 شارع راكويتس، الإبراهيمية، الإسكندرية، مصر
🟢 WhatsApp: 01211981188
- عروض وتجارب مباشرة لمشروعات Arduino وRaspberry Pi.
- نصائح مجانية للمبتدئين.
- إمكانية تجربة واختبار المكونات عمليًا يوميًا.



Leave a comment
You must be logged in to post a comment.